• Home
  • Hi, Y'all
  • Recipes
  • Favorites
  • Say Hi
Menu

Savannah Makes

Street Address
City, State, Zip
Phone Number
bringing your grandmother's recipes into the 21st century

Your Custom Text Here

Savannah Makes

  • Home
  • Hi, Y'all
  • Recipes
  • Favorites
  • Say Hi

Grandpa's Breakfast Ice Cream

April 22, 2020 Savannah Near
Grandpa'sBreakfastIceCream.jpeg

Okay, okay, I have to say that my beloved grandfather “Papu” was not the inspiration for this recipe. He enjoys grapes and milk with his cereal at his 3:30 am wake up call—oh the sleep-deprived life of a cattle rancher and farmer. This recipe is more of a figment of my imagination: an incorrigible, white-haired man slipping spirits into his breakfast cereal before anyone can catch him. In my imagination this ice cream sounded delicious, and I am happy to report that in real life it tastes as good as I imagined. I think the tongue-in-cheek title adds to the flavor too—I deeply appreciate food that doesn’t take itself too seriously. In fact, that is exactly what this quarantine has brought out in me, a recovering perfectionist—a charge to try and not to take things so seriously. A reminder that life is finite and precious. The schedule, the plan, the day, inevitably, changes. I can either waste energy trying to course-correct, or go with the flow and put my energy into creating progress on what I can control: me doing my darnedest to see and keep up with therapy clients through telehealth and giving myself permission to play with food and flavors! Though I hope this quarantine will end soon, I must say that I have appreciated the pause and creativity that has come with the stillness—though I know that has definitely not been the case for everyone. I hope you are staying safe and well, and don’t forget to play with you food and laugh when you can. You never know what you will come up with, like putting cornflakes and bourbon together to make a delicious bowl of ice cream. 

Ingredients:

  • 3 cups cornflakes

  • 2 1/4 cups milk, yielding 2 cups of cereal milk

  • 2 1/2 cups heavy cream

  • 1/8 cup bourbon

  • 1 cup sugar

  • 1/2 teaspoon vanilla

  • 1/2 teaspoon kosher salt

Method:

  1. Freeze ice cream maker bowl at 0 degrees for 24 hours.

  2. Preheat oven to 350 degrees and place 3 cups of cornflakes onto a baking sheet and bake for 10-15 minutes.

  3. Pour 2 cups of toasted cornflakes into a bowl with 2 1/4 cups of milk. Cover and steep for 15 minutes. Strain milk out of cereal, pressing with a spatula. Due to the cornflakes absorbing the milk you will probably be left with 2 cups of cereal milk. If you get a little less than that—don’t worry—just top off with regular milk!

    P.S. Congratulations you just made cereal milk! It’s all the rage in NYC.

  4. In a large bowl, combine cereal milk, sugar, and salt. Stir together until sugar and salt are dissolved.

  5. Add in cream, vanilla extract, and bourbon. Stir until incorporated.

  6. Cover and chill for 2 hours, or if needing quicker, put in the freezer for 30 minutes.

  7. Pull out mix, and give it a final stir, taking care not to make it bubbles, as you do not want to add air.

  8. Pour into ice cream bowl and make according to your machine’s settings.

  9. While your ice cream starts churning, take remaining cup of cornflakes and place into the jar of a blender. Blend into a fine powder. This is your mix in!

  10. With 5 minutes left on the churn, add in cornflake powder!

  11. Once completed, put in a freezing container, and let harden for 3-4 hours or overnight.

  12. You can absolutely leave out the bourbon to make this kid-friendly! Or the mix in if you just want plain cereal milk!

Grandpa'sIceCream2.jpeg
In Treats Tags ice cream, bourbon, summer
Comment

Watermelon Crawl

April 17, 2020 Savannah Near
WC1.jpg

Truth be told I pretty much avoid alcohol Monday through Friday unless I am celebrating a special occasion—even then I am a one drink with dinner kind of girl. But yesterday I got a hankering for the watermelon juice that I typically make myself in the summer afternoons (think of an agua fresca!) where you basically just blend watermelon and ice together (so refreshing and hydrating). As I started blending the watermelon though, the proverbial creative juices really started flowing and all of the country songs involving alcohol-soaked watermelons at church picnics started playing in my head: I decided this juice needed a kick and a twist! My husband, seeing me pouring out a shot of vodka, walked by the kitchen laughing and said, “Quarantine has changed you!” I told him to hold onto his socks, and into the blender went the vodka. Next, I decided on lime juice, simple syrup, and mint and blended it together. It smelled amazing! Then I shook it over ice, strained it, served him a tester of the concoction. One sip in he decided that he was on board with the cocktail train that was leaving the station. This cocktail is refreshing with a citrus and mint kick and while it does have vodka in it, it is very light and not boozy! See also: perfect for sipping on a sunny afternoon. Happy Friday!

Tip: Serve with a watermelon wedge and eat your booze-infused watermelon once you have finished the drink!

Ingredients:

  • 1 1/2 cups watermelon juice

  • 2oz vodka or tequila

  • 1.5oz lime juice

  • .5oz of simple syrup

  • 2-3 mint leaves

Method:

  1. In the jar of a blender combine, watermelon juice, your spirit of choice, lime juice, simple syrup, and mint leaves.

  2. Blend until liquified.

  3. Pour juice into cocktail shaker and fill shaker 1/2 way full of ice. Shake it for 10 seconds.

  4. Fill a cocktail glass with ice and strain juice into glass. Serve with a watermelon wedge and a sprig of mint.

  5. Enjoy!
WC2.jpg
WC3.jpg
In Treats Tags summer, watermelon, cocktail, mint, lime, sweet
Comment

Happy Easter and Meyer Lemon Pie

April 11, 2020 Savannah Near
LemonPie1.jpeg

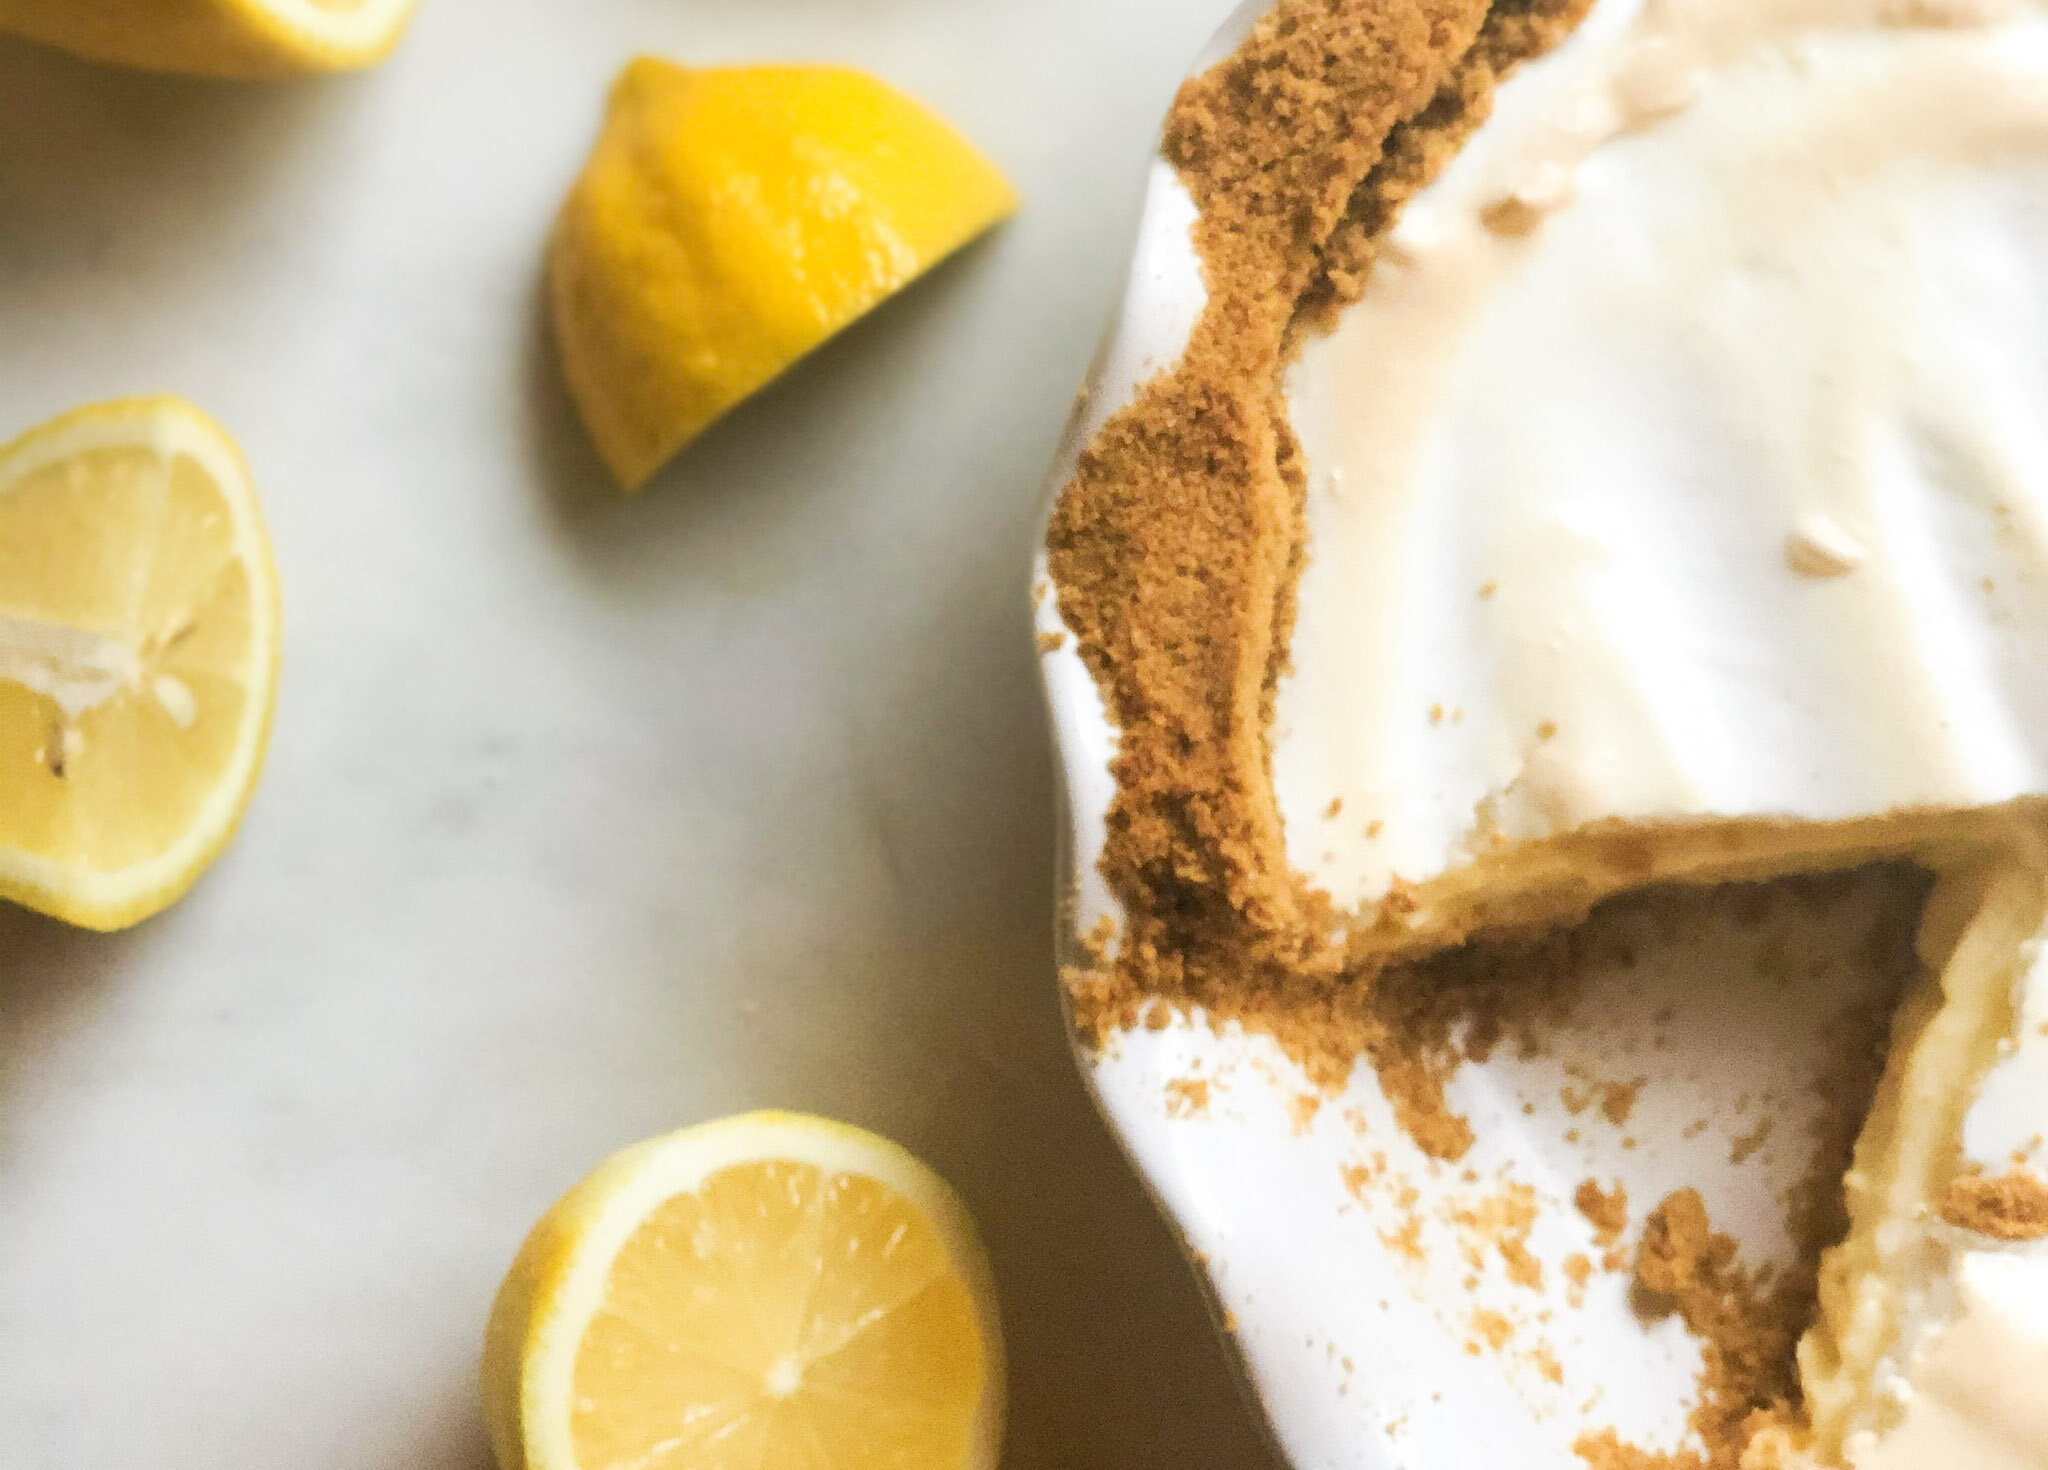
I love Easter. Everything about it just makes me so happy: The sunrise service at church, the bright florals, the adorable children in seersucker, the cascarones (confetti eggs), the warm weather, and the citrusy desserts. Clearly, none of that is happening this year with the exception of sunrise service that is being live streamed and the bright florals I see on my daily walks. I suppose I could sleep in one of my seersucker nightgowns to get that fix. Typically, my husband and I would attend the sunrise service and then go over to my parents’ house for lunch, who attend the 8:30 service, and eat ham, macaroni and cheese, and an endless string of desserts. Of all the desserts in the traditional line up, this meyer lemon pie is the star of the show. Though this Easter looks very different—my husband and I are making gourmet pizzas on the grill for dinner and not eating off the china or the crystal—this pie was a nonnegotiable for our Easter table. Pretty to look at, literal sunshine in food form, this pie will bring a smile to your face, and hopefully a “spring” in your step! Happy Easter!

Ingredients:

For pie shell:

  • 1 1/2 cups crushed graham crackers

  • 5 tablespoons melted butter

  • 2 tablespoons sugar

For pie filling:

  • 1 cup meyer lemon juice, if you don’t have meyer lemons simply blend together 3/4 cup of lemon juice and a 1/4 cup of mandarin orange juice, fresh squeezed. A meyer lemon is just a cross between a lemon and a mandarin orange!

  • 1 teaspoon lemon rind

  • 4 egg yolks

  • 2 cans sweetened condensed milk

For meringue:

  • 4 egg whites

  • 6 tablespoons sugar

  • 1 /4 teaspoon cream of tartar

Method:

  1. Preheat oven to 350 degrees.

  2. In a pie dish, combine graham cracker crumbs, sugar, and butter and mix until it feels like wet sand. With a smaller measuring cup, I used a 1/3 cup size, press evenly into a pie dish and bake for 6-8 minutes. Take out to let cool and keep oven on for browning the meringue.

  3. Combine condensed milk, lemon juice and rind, and egg yolks in a large mixing bowl stirring until homogeneous.

  4. Pour mixture into pie shell.

  5. In a large mixing bowl, combine egg whites and cream of tartar and beat until it begins to froth. Slowly pour in sugar and beat until stiff peaks form.

  6. Top pie with meringue, sealing the sides, and bake for 15-20 minutes or until meringue is lightly toasted.

  7. Allow to cool and then refrigerate, covered, until serving. Best served chilled.

MeyerLemonPie2.jpg
In Treats Tags lemon, easter, pie, dessert
Comment

No cook Banana Pudding

April 10, 2020 Savannah Near
BananaPudding.jpeg

The crust is a premade cookie. The filling is chopped fruit (premade too, I guess you could say) and no-cook, instant vanilla pudding. The topping is whipped cream. The typing up of this recipe is honestly more time-consuming than the actual making of it. I suppose I could have made my own pudding for this, but I am rationing my cartons of eggs for the double recipe of Meyer Lemon Pie that I am going to make tomorrow and that is a nonnegotiable for our Easter table (I will be sharing the recipe for that tomorrow!). Could I have made a fancy meringue too? Yes, but again I am making a pie tomorrow that warrants that amount of formality. Banana Pudding is a let your hair down dessert and I appreciate its unpretentious, approachable nature. While this pudding might be semi-homemade, don’t let the shortcuts fool you, it is truly delicious. If you have some bananas that need to be used, it is a great vehicle for that too! Also, because it does not involve a hot stove or oven, this would a great recipe for little ones to help with in the kitchen.

Ingredients:

  • 1 box of Nilla Wafers

  • 6-7 bananas

  • 1 box of instant vanilla pudding, 5 oz size

  • 1 tbsp powdered sugar

  • 2 cups of heavy cream

Method:

  1. Make vanilla pudding according to box’s instructions and set to the side.

  2. Beat powdered sugar and whipping cream until stiff peaks form and set to the side.

  3. Slice bananas to about 1/8in. thickness and set to the side.

  4. Now assemble:

    In a 9x13 dish, put down a layer of Nilla Wafers cookies to cover the bottom of dish. Place half of sliced bananas on top of the cookies, cover with half of the pudding mixture, smoothing it out. Place another layer of cookies on top of the pudding, place the rest of the bananas on top, and then top with the rest of the pudding mixture. Top with the whipped cream and crumble some the remaining cookies on top for show.

    Save a couple of cookies for a low moment and stash in a safe place!

  5. Place pudding into the fridge to chill for 3-4 hours.

  6. Or eat it before it chills. Honestly, there are no rules for quarantine-cooking.

BananaPudding_closeup.jpeg
In Treats Tags banana, pudding, southern, kid friendly
2 Comments

Cappuccino Pie: A love story

April 8, 2020 Savannah Near
CappuccinoPie1.jpg
CappuccinoPie2.jpg

I used my coffee chip ice cream recipe for the pie pictured above and even served the ice cream pie a la mode!

“…Amen”. Oh I’m sorry, I just had to say a quick prayer after eating another slice of this pie because it is so sinfully delicious. I have made it no secret that my favorite flavor combo is coffee and chocolate, a dessert that combines the two with ice cream: Sign me up! As if that was not enough reason to love this pie, the added bonus is that the crust is my favorite cookie, Oreo, and my favorite ice cream flavor, coffee, is the filling. If this pie were not already named after the frothy, caffeinated beverage, I would have probably started a petition to have it named after me. Since that role has already been filled, I will just stick to being this dessert’s #1 fan. If you are looking for a grown up version of the ice cream cake you had as a child, look no further, and has the simplest process to put it together.

I will always remember the first time I ever tried my first slice of cappuccino pie. My boyfriend—now husband—and I were seniors in high school and had just started dating. While driving back from dinner one night, we were stopped at an intersection, and he remarked that the restaurant we were stopped by had the most amazing cappuccino pie, and asked if I would like to try it. I think you could see my ears perk up from the next car over. He got the hint and on went the blinker! We pulled into the restaurant, and little did I know, the boy who would become my life’s staple introduced me to one of my dessert staples. I adore both of them—and could eat one of them with a spoon.  Like any good recipe does, this recipe has options. You want to make your own ice cream for the filling? Go for it. I linked my recipe for coffee chip ice cream here. If you want to buy a quart of your favorite coffee ice cream, that’s great too. This is a pie that is eager to please.

Ingredients

Crust:

  • 25 Oreo cookies, yielding 2 cups of crumb

  • 1/2 tsp. espresso powder

  • 1/2 tsp. kosher salt

  • 5 tbsp. melted butter

Filing:

  • 1 quart of coffee ice cream, softened

  • or if you want to make your own: click here! Just make sure you have a quart of it!

Topping:

  • 2 cups of heavy cream

  • 2 tbsp. of lemon juice (okay your eyebrows might be raising at this one, but hear me out. Traditionally speaking, when espresso is served in an Italian restaurant, it is served with a lemon rind that you are supposed to rub around the rim of the espresso cup and put into the drink, to cut the bitterness. I thought this addition would be a fun nod to that! It also helps cut through some of the milk fat and brightens the flavor!)

  • 1-2 tbsp. of powdered sugar, depending on how sweet you like your whipped cream

Method

For the crust:

  1. Preheat oven to 350.

  2. In a food processor, pulse Oreos, espresso powder, and salt until Oreos are a fine crumb. Pulse and stream butter in. Mix should look and feel like wet sand.

  3. Press into a pie dish with a measuring cup, I find the 1/3 of a cup works best, and work to make the crust even.

  4. Bake for 6-8 minutes.

  5. Take out and let cool.

For the filling:

  1. If you’re making your own ice cream, now is the time to bust out that ice cream maker! Your ice cream mixture can harden in your pie dish once it is done being mixed.

  2. If you’re going the premade route, put your ice cream on the counter to soften for 30 minutes or until spreadable.

  3. Fill pie dish with ice cream and place into freezer to set. About 30 minutes.

For the topping:

  1. Combine heavy cream, lemon, and sugar into a bowl and beat until stiff peaks form.

  2. Top pie with cream mixture.

  3. Place back into freezer to harden for 4 hours.

Pie can be stored in the freezer. To slice, run some hot water over a knife to make cutting easier! Or you can just stand in your kitchen, in your jammies, with a spoon just enjoying the whole thing yourself. No judgement.

In Treats Tags ice cream, cappuccino, pie, coffee
Comment

Baking Surfaces Review: Foil vs Silpat vs Parchment

March 21, 2020 Savannah Near
CookieCookingMethod.jpg

Have you ever looked at a baking surface and wondered how it was affecting the way your cookies or baked goods turned out? Whether smooth, ridged, or textured, in chemistry even the smallest variables can have an affect on the outcome. It seems as though same applies to cookies, which are really just little, delicious, chemistry experiments! I have been wanting to run this test for over a year, and finally, my quarantined self found the time—still trying to stay productive! So here are my findings in comparing the results of different baking surfaces. These cookies were made from the same recipe, were scooped with the cookie scooper to be the same size, and were baked at the same temperature, for the same amount of time.

  1. Foil- A much used option when it comes to covering things or making them in the oven. I feel that foil is often used in baking cookies. I found that the cookies baked morphed into less uniform circles. However, I did feel that the cookies baked very evenly, as foil works by reflecting the thermal energy used back to the food. The cookies baked on the foil-lined baking sheet also got crisper overall and toasted on the bottom, but did not burn. Also, I think by having more thermal energy directed towards the cookies, the butter and sugar had more of an opportunity to carmelize, and had a nutter/more distinct flavor once baked. If you like a chewier cookie, this is the baking surface for you! Rating: 8/10

  2. Silpat- If you’re not familiar with a Silpat, I feel that today you have made a very important, life-changing, discovery. A Silpat is a non-stick, food-safe, silicon mat. When it came to the shape of the cookies, all of the cookies baked on the Silpat achieved a beautiful, circular shape, and the whole pan was very uniform. The cookies baked very evenly, but the bottom of the cookie did not get as toasted at the cookies made on the parchment or the foil. Overall, the cookies had a softer, more tender texture. Although the picture of the cookies above does not depict this, the cookies made on the Silpat were overall smaller than those baked on the foil and parchment, I think this is due to the texture of the mat that makes it harder for the cookies to spread. If you like a softer cookie, this surface is for you, and you can buy them here! Rating: 8.5/10

  3. Parchment Paper- There is a picture of cookies on the box of my parchment paper. This had to be tested. Parchment paper is heat-resistant, moisture-resistant, and non-stick, all of the elements needed in order to be a baker’s partner in crime. However, I found that the cookies burned on the bottom and while still edible, it was not the toasted element the foil gave me. The paper was also the slickest surface option and while the dough was heating and spreading, it seems the bottoms of the cookies spread and baked first, and the rest of the cookie followed. As a result, the sides did not spread evenly and did not attain a circular shape. Overall the cookies this baking surface produced were overdone and unevenly spread and baked on the sides. However, my husband did want me to add that they were super crunchy. So if you want a crunchy cookie, this is your baking surface! Rating: 6.5/10

FOIL.jpeg SILPAT.jpeg PARCHMENT.jpeg
In Treats Tags cookie, test, baking
Comment

Shiny, Shatter-Top, Double Chocolate Brownies

March 12, 2020 Savannah Near
Brownies.jpeg

Brownies that are gooey on the inside yet have a shatter-top texture are no longer a figment of your food imagination. My friends, they are here and they are glorious, and just in time for swimsuit season! Ha! The best part is that they are a cinch to put together and even easier to eat! With everything going on in the world today, I feel the phrase “Keep Calm & Carry On” just took on greater meaning. But perhaps we should update it a bit to, “Keep Calm, Carry Hand Sanitizer, & Eat Chocolate”? Pretty sure that is going to be my new personal mission statement. So if you find yourself needing a new brownie recipe to try after putting up all of your stockpiled toilet paper, try this one! You will not regret it. Plus chocolate is known to cause a calming effect on the brain by increasing the neurotransmitter serotonin and it also causes an increase in your dopamine levels. Double chocolate and double neurotransmitter benefit? Talk about the definition of win-win!

Ingredients:

  • 10 oz of chocolate morsels, dark or semi-sweet

  • 2 sticks of butter, softened

  • 1 1/2 cups of sugar

  • 2 eggs

  • 1/2 cup of cocoa powder, Dutch-pressed if you have it

  • 1 cup all purpose flour

  • 1/2 tsp salt

  • 1/2 cup of brewed coffee, room temperature

Method:

  1. Preheat oven to 350 degrees.

  2. In a double boiler, melt chocolate morsels. Once melted set to the side, cool slightly.

  3. In a bowl, combine flour, salt, and cocoa powder. Set to the side.

  4. In a large bowl, cream sugar and butter together until fluffy.

  5. Add in eggs, one at a time, and blending together until incorporated.

  6. Add in a small amount of melted chocolate to temper the eggs, once incorporated, stir in the rest of the melted chocolate.

  7. Add in brewed coffee and stir to combine.

  8. Stir in dry ingredients into wet ingredients, and mix until well combined.

  9. Pour into a greased pan, I used a 9x13, and bake for 35-40 minutes, or until a toothpick comes out clean from the center.

  10. Enjoy!

In Treats Tags chocolate, brownie
Comment

Texas Sheet Cake

March 9, 2020 Savannah Near
TexasSheetCake2.jpeg

Texas Independence Day was one week ago today (Remember the Alamo/ Remember San Jacinto!). I love this great state of mine, but the sharing of the adoration had to wait due to work and terrible sickness that crept in towards the latter part of last week. But I am on the mend, (fever free no less!) and am so happy to be sharing this delicious Texas Sheet Cake with you! I’ll save you the extra copy and get straight to the sugar, as if this cake recipe is not sweet enough, you don’t have to wait to ice it! Speedy and efficient, just the way us Texans like it! Any day is a great day to celebrate Texas! I think Boone, Crockett, Bowie, and Houston would approve.

Ingredients:

Cake:

  • 1 cup of water

  • 4 tbsp. cocoa powder

  • 2 sticks of butter

  • 2 cups of flour

  • 2 cups of sugar

  • 1/2 cup of buttermilk (if you don’t have any don’t worry, just combine a cup of milk with a tbs. of vinegar or lemon juice. Let it sit for 10 minutes and you’re good to go!)

  • 2 eggs, beaten

  • 1/2 tsp salt

  • 1 tsp vanilla

  • 1 tsp baking soda

Icing:

  • 1 stick of butter

  • 1 cup of Coca Cola or Dr. Pepper

  • 1 cup of sugar

  • 1 tbs cocoa powder

  • 1 tsp of vanilla

  • Pinch of salt

Method:

  1. Pre-heat your oven at 350 degrees.

  2. In a large bowl, combine all of the dry cake ingredients: salt, flour, sugar, and baking soda.

  3. In a saucepan on medium-high heat, combine water, butter, and cocoa powder. Bring to a boil.

  4. Add vanilla to chocolate mixture and pour mixture into a bowl. Set to the side and cool slightly.

  5. Combine dry ingredients and into wet and add buttermilk and beaten eggs.

  6. Place into a greased sheet pan and bake for 30-35 minutes or until center is set and a toothpick comes out clean.

  7. While the cake is baking, start on the glaze.

  8. In a saucepan, melt a stick of butter on medium heat.

  9. Add in soft drink of your choice, vanilla, sugar, and cocoa powder. Bring to a boil.

  10. Reduce heat to a simmer. The graze will be ready when it coats the back of a spoon and stays put when you swipe your finger through it.

  11. Add salt to taste.

  12. Once cake is done, poke a few holes in the cake with a fork. and pour glaze over the top!

  13. Google Texas Independence Day videos, cut a slice, and enjoy y’all!

TexasSheetCake1.jpeg
In Treats Tags texas, sheet cake, chocolate, dessert
Comment

Hot Chocolate Ice Cream with Marshmallows

January 25, 2020 Savannah Near
HC_IC1.jpeg

Raise your hand if you were obsessed with Serendipity’s Frozen Hot Chocolate growing up (both of my hands are in the air!). I am sure the nutritionist I saw as a child just cringed! I will never forget the first time I tried that magical dessert during one hot New York summer day. It was love at first bite—as it enabled me to have one of my favorite Christmas time beverages in the summer heat. I loved it so much that I asked to bring the pre-made packets back to Dallas so I could make them as I pleased. While good, they were just not the same, I could never get the consistency right. Fast forward to the following summer, my quest for ice cold hot chocolate was still red hot. After swimming in the pool, I decided that some ice cream was in order (see that nutritional training paid off!). Perhaps, I thought, maybe if I combined a pre-made hot chocolate packet into ice cream, I might have something similar.

I wish I could go back in time and give my younger self a pat on the back because that 13 year old girl was on to something! Throughout high school and college, the frozen hot chocolate inspiration evolved into hot chocolate ice cream. I would simply take a hot chocolate packet and combine it with a simple vanilla ice cream recipe—voila. As I have gotten older though, I have really wanted to nail this recipe down and make it my own, as it one of my favorite childhood creations. I am so happy to share this recipe with you, as it is years in the making, and I hope you enjoy it as much as I have! Perhaps I should add to my resume: Savannah, virgo, gluten-full, and believer in year round hot chocolate consumption? I’m sorry, I couldn’t hear you say, “Yes!”, as my spoon was scraping the bottom of the bowl.

Ingredients:

  • 3 1/2 cups of whole milk

  • 2 cups of heavy cream

  • 2 tsp. vanilla

  • 1 cup of sugar

  • 1 tbsp. kosher salt

  • 1/2 cup of cocoa powder, unsweetened

  • 1/4 tsp. espresso powder—it is just going to enhance and intensify the cocoa flavor!

  • 1 cup of marshmallow bits, I used Kraft

Method:

  1. Pre-freeze ice cream maker bowl at 0 degrees for 24 hours.

  2. In a large bowl, combine milk, sugar, and salt. Stir together until sugar and salt are dissolved.

  3. Add in cream, vanilla extract, and espresso and cocoa powders. Stir until incorporated, it’ll take a second! You might have to whip out a whisk!

    Side bar: you could put all of the above ingredients together into a saucepan and heat over the stove on a medium-low setting until cocoa powder is mixed in—just like you would make stovetop hot chocolate. If you want to do this, just pick back up on step 4. I just wanted to simplify this process and opted to stir in my cocoa sans heat.

  4. Cover and chill for 2 hours, or if needing quicker, put in the freezer for 30 minutes.

  5. Pull out mix, and give it a final stir, taking care not to make it bubbles, as you do not want to add air.

  6. Pour into ice cream bowl and make according to your machine’s settings.

  7. Slowly add in marshmallows directly into ice cream mix with 5 minutes left to go.

  8. Put in a freezing container and let harden for 3-4 hours or overnight.

  9. Welcome to the hot chocolate ice cream fan club! I am the founder, manager, and janitor of the club!

In Treats Tags hot chocolate, marshmallow, ice cream, summer
2 Comments

"Fake It Til You Make It" Cinni-minis

December 30, 2019 Savannah Near
CinnamonRolls1.jpeg

Christmas is the perfect blend of so many things: food and family, peppermint and chocolate, silver and gold, holly and ivy. The same thought applies to this recipe, imagine a croissant and cinnamon roll got married and had a baby—a dough baby! You can go from no cinnamon rolls to a plate full in a Designing Women episode! Hence the name “Fake It Til You Make It”! No proofing of dough, blooming your yeast, or taking hours to make, like a traditional cinnamon roll from scratch—no ma'am! Could you use a canned cinnamon roll? Yes. But do they have the flaky, tender texture of a croissant? No! Take the filling of the cinnamon roll and combine that with crescent roll dough, and voila you have a pan full of the cutest and sweetest mini cinnamon rolls, or “cinni-minis”.

**To fill a cake pan, this recipe is doubled, cut in half to only make 12 rolls

Makes 24 rolls

Ingredients:

-2 cans of crescent roll dough

-8 tablespoons (1 stick) of softened butter, split in half

-2 tablespoons of sugar

-1 tablespoon of cinnamon

-2 tsp of nutmeg

Icing:

-4 tablespoons of butter, melted

-a scant 1/2 cup powdered sugar

-you can add a splash of water or milk if you need to thin it out at bit!

Method:

  1. Pre-heat your oven to 350 degrees and grease your preferred pan.

  2. Combine sugar and spices into a bowl and mix—set to the side.

  3. Take out the crescent roll dough and pinch the seams shut for each roll. Smooth out with a floured rolling pin or your hands.

  4. On each rolled out dough, spread out 4 tablespoons of butter. Take care not to melt butter completely, as it will push out when rolled.

  5. Sprinkle half of sugar/cinnamon/spice mixture on each.

  6. Starting at the top, roll down tightly, and bottom pinch seams together for each dough.

  7. Cut each dough rolls into 12 equal pieces, getting 24 rolls total.

  8. Place in baking pan, touching each other.

  9. Place in oven and bake for 20-25 minutes or until golden.

  10. While rolls have 5 minutes left baking, combine melted butter and powdered sugar. Whisk together until icing forms.

  11. Frost rolls immediately, once out of the oven.

  12. Enjoy!

Pre-frosting and still adorable!

Pre-frosting and still adorable!

In Treats Tags cinnamon rolls, christmas, cinnamon, butter, cinniminis
Comment

Peppermint Bark

December 18, 2019 Savannah Near
PeppermintBark3.jpeg

I feel that this recipe needs no introduction or explanation—it is, after all, the Christmas season, and a merry one it has been in our home. I’ve said before that my husband isn’t a big sweets guy, but he has literally put this on his Christmas gift list: Peppermint Bark. He could eat it by the pound and I enjoy a chocolate challenge. So naturally, this was something that was bound to come out of our kitchen. If you are looking to sharpen your tempering chocolate skills, this a great recipe to cut your teeth on. Why you ask? It is literally fail-proof, because even if you are not successful in tempering your chocolate, you will still have a delicious and highly edible product! Merry Christmas indeed.

Ingredients/Items:

-parchment paper cut for a quarter sheet pan

-10oz of dark chocolate chips

-10 oz of white chocolate chips

-1/2 cup of crushed peppermint candy

-peppermint oil

Method:

  • This recipe used the seed method to temper chocolate. Want to skip tempering all together? Melt your chocolates, add 2-3 drops of peppermint into each melted chocolate, and skip to step 6! Tempering just makes the chocolate snap when broken and shiny!

  1. Set up two double boilers, with the water temperature set to simmering.

  2. Pour 2/3 of your dark chocolate into one double boiler, stirring constantly until dark chocolate is melted and registers 118 degrees on a thermometer.

  3. Immediately take off the heat, pour in the remaining dark chocolate, and stir until melted.

  4. Place into ice bath, stirring continuously, until dark chocolate registers 78 degrees. Make sure no water comes into contact with chocolate!!

  5. Once dark chocolate registers 78 degrees, place back on double boiler until it reaches 87 degrees. Stirring until temperature is reached. Add in 2-3 drops of peppermint oil and stir in.

  6. On a parchment-lined and greased quarter sheet pan, pour dark chocolate onto pan and smooth out and into edges of pan. Place into freezer to harden while you prepare white chocolate, will need about 5-10 minutes to set up.

  7. In another double boiler, pour in 2/3 of your white chocolate, stirring until it reaches 115 degrees.

  8. Take off heat immediately, and stir in remaining 1/3 of white chocolate, until melted.

  9. Place white chocolate into ice bath, and stir until the thermometer registers 78 degrees. Make sure no water comes into contact with chocolate!!

  10. Place white chocolate back on double boiler, and stir until it reaches 87 degrees. Once reached, add in 2-3 drops of peppermint oil, stir in.

  11. Take dark chocolate out of freezer and pour white chocolate over the top. Smoothing out to match size of dark chocolate.

  12. Crush 5-6 candy canes or your preferred peppermint candy, until you get 1/2 cup of crushed candy. Sprinkle over the top of white chocolate.

  13. Freeze for 3-4 hours or overnight to set up. Break into pieces for serving.

In Treats Tags Christmas, peppermint, chocolate
1 Comment

Pumpkin Spiced Brownies

November 18, 2019 Savannah Near
PS_brownies.jpeg PS_Brownies3.jpeg PS_brownies2.jpeg

Fact: I am holding a brownie in one hand and attempting to type with the other hand as I write this. Could this one finger, one letter at a time, typing be sped up? Yes, but that would require me to put down my brownie and that is not something that I am willing to do. Another fact: my all-time favorite favor combination is coffee and chocolate, but in truth, pumpkin and chocolate is becoming a very close second. There is something about the warmth and savory nature of the pumpkin brings out and compliments the darker notes of the chocolate to give it a more savory quality as well. Either way, I took a big bowl of these to a gathering last night and came home with crumbs! Always a good sign!

Everyone has their own ideals of what makes a perfect brownie. Some prefer a glossy, crunchy top, others a fudgier consistency. And while you can’t make everyone happy, I am thrilled to report that everyone who has tried these brownies smiles after their first bite! A slightly crisp top, with a fudgey yet fluffy and light texture, with the slightest hint of savory spice—they might be the perfect bite.

For Brownies:

  • 10oz of dark chocolate

  • 2 sticks of butter, softened

  • 1 1/2 cups of sugar

  • 2 large eggs

  • 1/2 cup of pumpkin

  • 1 1/2 cups of all purpose flour

  • 1/2 tsp salt

  • 1/2 tsp cinnamon

  • 1 tbsp of pumpkin pie spice

  • 1/4 tsp of espresso powder

Method:

  1. Preheat your oven to 350 degrees.

  2. Using a double boiler, melt 10oz of dark chocolate. Set melted chocolate to the side.

  3. In a bowl add butter and sugar and mix until fluffy. Add eggs in one and time and combine, then add pumpkin and melted chocolate. Combine and set to the side.

  4. In other bowl, combine flour, salt, pumpkin pie spice, cinnamon, and espresso powder.

  5. Mix dry ingredients into wet and stir together and pour into a prepared, greased and parchment-lined pan. I used 9x13 and bake for 35-40 minutes.

  6. Dust with a little powdered sugar and cinnamon and enjoy!

PS_brownies4.jpeg
In Treats Tags brownie, kid friendly, pumpkin, pumpkin spice
Comment

Spooky Good Candy Bark

November 4, 2019 Savannah Near
candybark.jpg

I am not a big Halloween girl. Never have been, and probably won’t be until I have children of my own—I have big plans for baby poodles, maybe a scuba diver, and, let’s not forget, The Blues Brothers. There is something about Halloween that just grosses me out, maybe it’s the witches or the gory costumes. I have vivid memories of my mom’s ceramic witch bowl sitting on the kitchen table, and being unable to finish my breakfast as a child. My resistance to the kid-centric holiday was so bad one year my parents just threw in the towel and bribed me to trick-or-treat. I think they were worried that I was going to miss out on the childhood experience, and wanted me to learn to face my fears. As it turns out, an Alexander Hamilton in hand is a pretty good extrinsic motivator. All the while, I was researching how to make sure your Halloween spoils were not tampered prior to receiving them; I watched far too much news as a child. (I also took a rain jacket and umbrella everyday in elementary school!) It is no small wonder I work with anxious children, I can really identify with them.

Once my candy anxieties were quieted by ensuring the seals were not broken, the candy was the one part of Halloween I could get behind. I didn’t eat much of it, but mama loved her some Twix (still do!). I guess I should I call my parents and say thank you because this Halloween I decided to face another one of my fears: tempering chocolate. Ever since I began seeing my baking hero, Claire Saffitz, go through trial and error trying to temper chocolate on Gourmet Makes, the thought of trying it myself challenged and scared me. See also: the perfect combination for growth. Tempering chocolate basically means that you have to bring the chocolate to three different temperatures. The tempering causes an altering in the crystal formation of the chocolate, and when it dries it will be shiny and snap when broken. Don’t get any ideas about short cuts either, you cannot use a sous side, as the stirring is elemental in the tempering process. Also, if you want any chance of making a decent, homemade Peppermint Bark this coming holiday season, you too will have to temper your chocolate. This recipe used the Seed Method to temper.

So this Candy Bark accomplished three things: used up my left over Halloween candy, taught me to do something new, and served as a trial run to the main event: Peppermint Bark. Maybe I should rename this, Type A Bark?

Ingredients:

  • 1 cup of crushed Snickers

  • 1 cup of crushed Twix

  • 1 cup of M&M’s, reserving 1/4 cup for sprinkling on the top

  • 20 oz of dark chocolate

  • 20 oz of white chocolate

  • kosher salt for sprinkling at the end

Supplies (besides: pots/pans/and the like):

  • two cooking thermometers

  • make an ice bath in your kitchen sink, with no more that 2-3 inches of water

    Method:

  1. Set up two double boilers, with the water temperature set to simmering.

  2. Pour 2/3 of your dark chocolate into one double boiler, stirring constantly until chocolate is melted and registers 118 degrees on a thermometer.

  3. Immediately take off the heat, pour in the remaining dark chocolate, and stir until melted.

  4. Place into ice bath, stirring continuously, until dark chocolate registers 78 degrees. Make sure no water comes into contact with chocolate!!

  5. Once dark chocolate registers 78 degrees, place back on double boiler until it reaches 87 degrees. Stirring until temperature is reached. Leave on double boiler to maintain 87 degree temperature while you start tempering the white chocolate.

  6. In another double boiler, pour in 2/3 of your white chocolate, stirring until it reaches 115 degrees.

  7. Take off heat immediately, and stir in remaining 1/3 of white chocolate, until melted.

  8. Place white chocolate into ice bath, and stir until the thermometer registers 78 degrees. Make sure no water comes into contact with chocolate!!

  9. Place white chocolate back on double boiler, and stir until it reaches 87 degrees.

  10. On a small piece of parchment paper, take a small spoonful of each chocolate and place a drop of each on top of the paper.

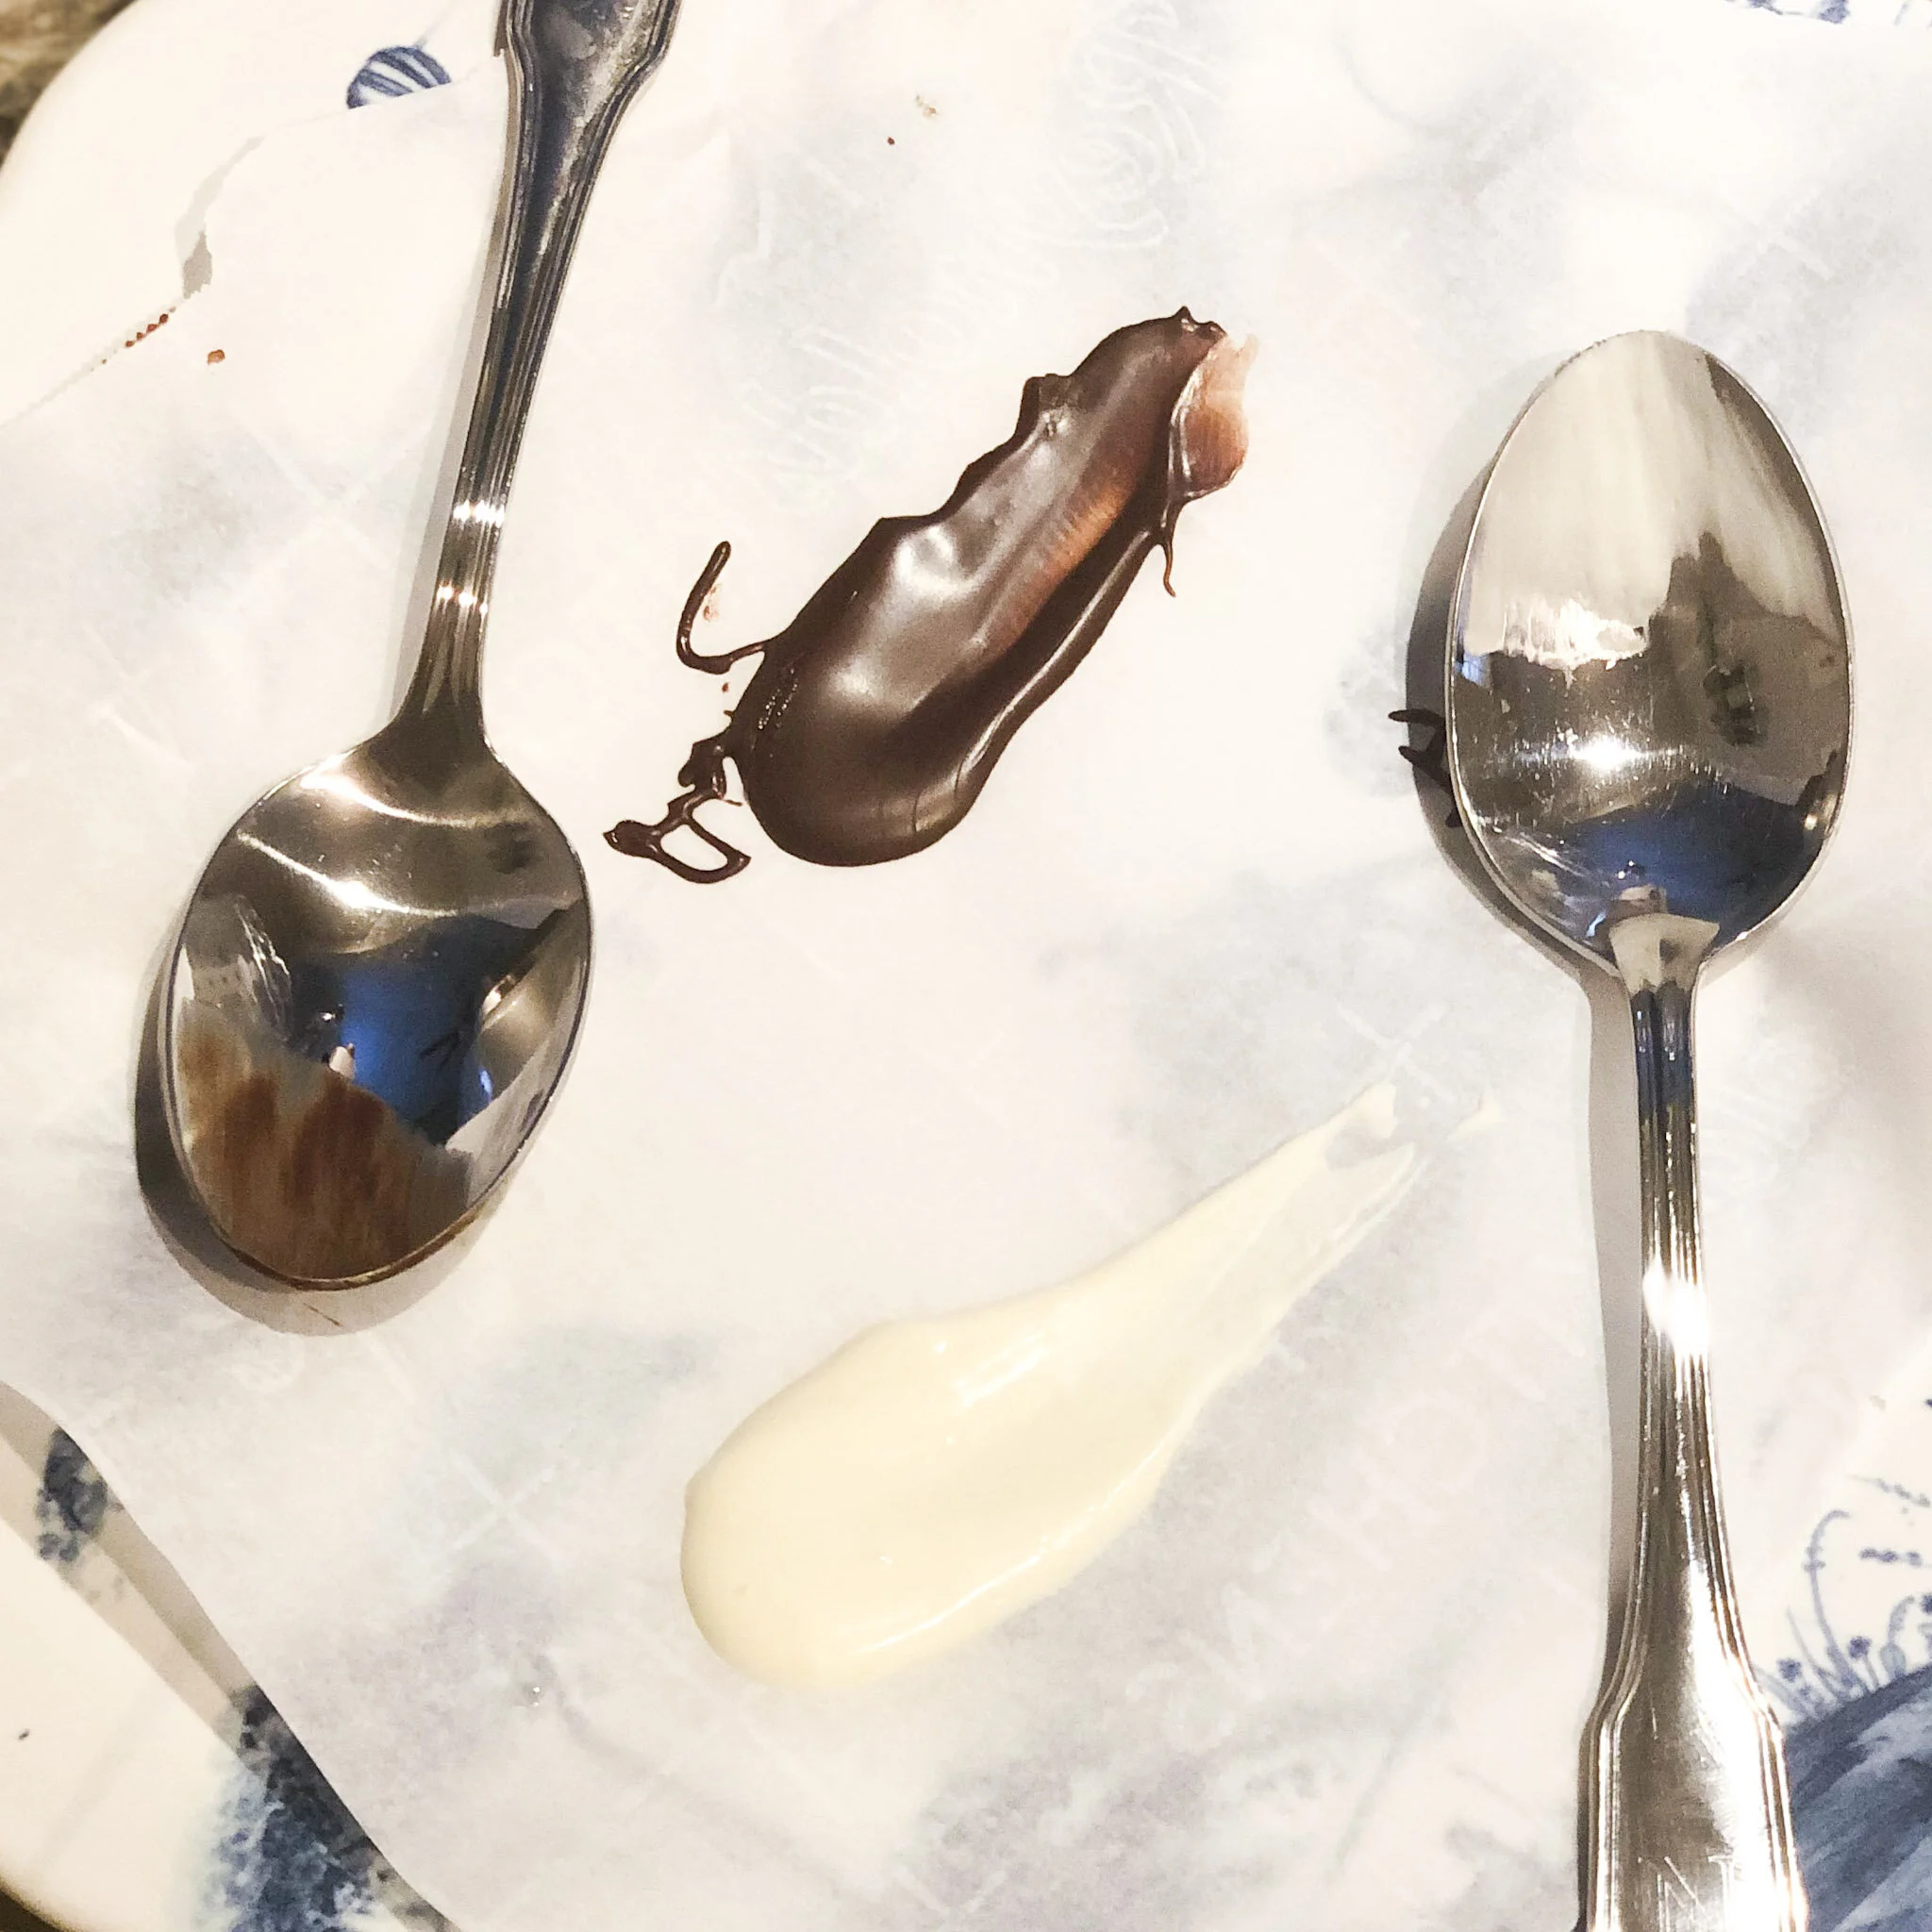
  11. Once the chocolate dries (should take 5-7 minutes), if it is tempered it will be shiny, and snap when broken. Picture below for reference!

  12. On a parchment lined baking sheet, coated with nonstick spray, pour both your dark and white chocolate, and with a knife or offset spatula, create whatever design you fancy. Picture for reference below! If you just want a chocolate bark, you can stop here and freeze for 3-4 hours or overnight to set up. Break into pieces.

  13. If you prefer to take it a step further, mix in the crushed Twix, Snickers, and M&Ms, until combined with chocolate.

  14. Top with remaining 1/4 cup of M&Ms and sprinkle with a pinch of kosher salt.

  15. Place into the freezer to harden for 3-4 hours or overnight.

  16. Break into pieces for serving.

Simple, tempered chocolate swirl!

Simple, tempered chocolate swirl!

Tempered dark and white chocolate. See that shine?!

Tempered dark and white chocolate. See that shine?!

In Treats Tags kid friendly, candy, tempering, chocolate, twix, snickers, m&ms
Comment

'Kila Cookies

October 29, 2019 Savannah Near
WWZX0403.jpg CCCookiesDisplay.jpg

When my husband and I went to Bali for our honeymoon, I discovered Amankila’s chocolate chip mini cookies that they delivered in the most adorable jar, twice a day! When jet lagged, I would wake up in the middle of the night and polish off the jar, and wake up in a pile of crumbs. They replenished during breakfast and turn down service, and yes, I asked my husband to hunt down the “Cookie Man” while we were on the beach too. Don’t worry, I have provided proof of my nightly cookie thief antics below for your entertainment.

I’m not sure if my husband had to beg, borrow, or steal, but upon check out, the manager had graciously typed it out for me, so I could bring it back to Texas! The original recipe was measured in grams, so I have been perfecting moving the recipe to volume measurements instead of weight, and adding my own touches here and there. You can make mini cookies or roll out large ones! Make it your own, I use a food processor and brown some of the butter to add a nutty flavor to put my own spin on things!

We lovingly refer to them as ‘Kila Cookies in our house. Warning this makes large batch, so you’ll have plenty to freeze to enjoy later!

Method:

In a food processor combine:

-4 cups of oats, 4 cups of flour, 2 tsp baking soda, 2 tsp baking powder, 2 tsp kosher salt and pulse to combine, until oats are powdery

In a sauce pan:

-brown 1 stick of butter and set to the side (the Balinese are not afraid of butter!!), set out 2 1/2 sticks to get to room temperature

In a large mixing bowl, combine:

-2 cups of white sugar, 1 1/2 cups of brown sugar, the browned and room temp. butter and cream together.

-add in 1 tsp of vanilla and 1 tsp honey.

-then add in 4 beaten eggs to the sugar/butter party (I use extra large)—one at a time

-then mix the dry into the wet

TIP: when mix wet into dry, you get pockets of flour and a crusty bowl. Dry into wet, provides a more supple dough (use a stand mixer if you fancy!).

Roll out as big or as small as you want! Bake at 325.

Mini cookies bake for about 10 minutes and the larger about about 15-20 minutes.

Who took the cookie from the cookie jar? I said Savannah took the cookie(s) from the cookie jar!

Who took the cookie from the cookie jar? I said Savannah took the cookie(s) from the cookie jar!

One more because that pool and that horizon….

One more because that pool and that horizon….

In Treats Tags cookies, chocolate chip, chocolate
Comment

Pumpkin-Spiced-Oatmeal-Chocolate-Chip Cookies

October 24, 2019 Savannah Near
PSCC_cookies.jpg

I warned y’all that I was on a fall kick. May I introduce you to my latest creation? Presenting Pumpkin Spiced Oatmeal Chocolate Chip Cookies! All the savory goodness of pumpkin spice and the flavors of fall, but with the perfect sweetness of a chocolate chip cookie. Also, for all you vegan bakers out there did you know that you can swap canned pumpkin for eggs or fat in a recipe? The ratio is 1/4 of a cup of pumpkin for every egg the recipe calls for, or to swap the fat (the butter or oil), simply use an equal amount of canned pumpkin.

Either way, these cookies are like a warm hug.

Ingredients:

-2 sticks (or 1 cup!) of butter (softened)

-1 cup brown sugar

-1 cup of sugar

-2 eggs

-1 T. vanilla

-2 1/2 cups of oats

-2 cups of flour

-1/2 t. salt

-1 t. baking powder

-1 t. baking soda

-1/3 cup of canned pure pumpkin

-1 T. pumpkin pie spice

-1/4 t. ground cinnamon

-12 oz chocolate (dealer’s choice of wafers, morsels, chips, or chopped chunks!) **This recipe used dark chocolate morsels

Method:

  1. Preheat oven to 350.

  2. In a stand mixer, cream together sugars and butter, add in eggs one at a time until well combined, and then add vanilla and pumpkin. Combine.

  3. In a food processor combine oats, flour, salt, baking soda and powder, pumpkin pie spice, and cinnamon, pulse until oats are powdery and well combined.

  4. Turn the stand mixer back on a gentle stir and slowly add in the dry ingredients. Once combined, add in the chocolate of your choice and mix in!

  5. Shape into golf ball size dough balls and place onto baking sheet.

  6. Bake for 15-20 minutes or until done to your liking. I found that the 15-17 minute mark ensures the gooey center and crunchy top—also known as the perfect cookie.

In Treats Tags cookie, sweet, pumpkin spice, pumpkin, fall, kid f
Comment

Spiced Pumpkin Bread with Dark Chocolate

October 10, 2019 Savannah Near
public.jpeg

Hello, Fall! If you’re reading this, I have probably just touched down in the Big Apple, and cannot help but reminded by Meg Ryan’s line in You’ve Got Mail, “Don’t you just love New York in the fall?” While Tom Hanks may not be asking for my address to send me a box of “newly sharpened pencils,” as he jokes in the film, I am finding my own way of enjoying the season. As my mom, sister and I are working through my grandmother’s recipes for the cookbook we are creating in her memory, we are coming across a treasure-trove of old favorites! One of them being, her Pumpkin Bread. Now I’ve never met a bread I didn’t like, but this one feels special. It’s not overly sweet, and the texture is simply divine. The taste actually lives up up the aroma while baking! I will admit, the base of this recipe is my grandmother’s, but I felt it needed a bit of a face lift. For starters, the original recipe called for a full cup of oil. That’s over 1800 calories, just in oil! So I swapped a few tablespoons of butter and some applesauce. The spice list in the original was pretty extensive, too. In order to simplify, I decided to use pumpkin pie spice seasoning, using a tablespoon, and a dash extra of cinnamon. My pumpkin pie seasoning also has ginger in it, which makes the bread a touch more spiced, than the cinnamon, cloves, allspice, and nutmeg the original recipe called for. I love falling for Autumn, and this bread can take me through the season’s flavors in a bite!

Ingredients:

3 cups of sugar

4 tbsp melted butter

3/4 cup of applesauce

1 15oz can of pumpkin 

1 tbsp pumpkin pie spice

1/4 tsp cinnamon

3 cups self rising flour

1 12 oz bag of dark chocolate chips

1 tsp salt

4 eggs

This recipe makes 2 loafs or one loaf and a dozen muffins! Or you can make all muffins too, if that’s your thing!

Method:

  1. Pre-heat oven to 350 degrees.

  2. In a large bowl combine, flour, pumpkin pie spice, cinnamon, and salt.

  3. In another large bowl beat together butter and sugar until fluffy. Crack and add in eggs in one at a time. Once combined, add in pumpkin and applesauce, and bring together.

  4. Add dry ingredients in, stirring into wet in 3-4 installments.

  5. Once combined, fold in dark chocolate chips.

  6. Place batter into greased baking dish. If making in loaf pans, bake for 65-75 minutes or until a toothpick inserted into the center comes out clean. If making in muffin tins, bake for 25-30 minutes or until muffins spring back when touched.

In Treats Tags bread, treats, dessert, kid friendly, breakfast, muffins, chocolate
1 Comment

Peach Ice Cream

August 31, 2019 Savannah Near
public.jpeg

Happy Labor Day weekend! The official bookend of summer is upon us and in case you find yourself by a peach stand during this long weekend, needing to get your last summer fix, make this! I find that there are two camps when it comes to peach ice cream. Camp one: wants basically vanilla with peach chucks in it. Camp two: wants it to taste/smell/look like a peach, just colder. Since I’m all about taking your favorite things from each recipe and blending together, this felt like a fun one to experiment with. Here’s what I found, making a peach simple syrup is KEY! It contributes sweetness, color and translates the essence of peach very well into the milk and cream mixture. Don’t worry, it’s not as complex as it sounds—I’m going to walk you through step by step so you too can know the wonders of peach ice cream!

Ingredients:

Peach Ice Cream

- 2 1/2 cups heavy cream

-2 cups whole milk

-2 1/2 tsp salt

-3/4 cup sugar

-2 cups fresh peaches, cubed (about 5 peaches)

-1/2 cup of peach simple syrup

-2 tsp vanilla extract

Peach Simple Syrup:

-skins of 5 yellow peaches

-1 1/3 cup water

-1 1/3 cup sugar

Method:

Peach Simple Syrup

  1. Peel the skin off 5 peaches. Place the inside of the peaches into a bowl (we will need for the ice cream) and place the skins into a saucepan.

  2. Fill saucepan with water until peaches are covered. Add same amount of sugar, as you did water. For this exercise, my measurement was 1 1/3 cup for both. Stir together until dissolved.

  3. Bring peach skins to a boil for 5 minutes. Reduce to a simmer and let cook for 45 minutes.

  4. Strain peach skins and place peach simple syrup in a container to cool completely.

Peach Ice Cream

  1. Place the freezer bowl of your ice cream maker in the freezer at 0 degrees for 24 hours

  2. In a large bowl combine, milk, sugar and salt. Stir until dissolved.

  3. Add in cream, vanilla, and simple syrup and mix to combine. Cover and let chill for 2 hours.

  4. Take freezer bowl out of freezer, and add cream mix, make according to your machines settings.

  5. Add in peach chunks with 5 minutes to go.

public.jpeg
In Treats Tags ice cream, peach, summer
Comment

“Mrs. Field’s” Oatmeal-Chocolate Chip Cookies

August 28, 2019 Savannah Near
Oatmeal_CCCookies2.jpeg

“Imma make you girls a hump day treat…” Okay, yes, my mom did not wear a hot pink Juicy Suit, like Mrs. George in Mean Girls, while she made after school snacks for me and my friends. She might have left the excessive Juicy Couture wearing to me and my sister, but she was all about the after school treats. In the spirit of back to school, think back to your after school snacks: was there a better surprise to await you than a hot cookie? Negative, ghost rider. These cookies were my childhood. We used to double the recipe and take them to our family reunions and when I dressed up as Debbie Fields for Biography Day in third grade, these were the cookies I had as my prop on my cookie tray. As such, as now refer to them as the “Mrs. Field’s Cookies.”

Side bar: I’ll have to dig up the picture of me on Biography Day, it’s GOLD. I look like an overweight, middle-aged colonial woman who lost her skirt to a pair of scissors.

Ingredients:

-1 cup of butter (softened)

-1 cup brown sugar

-1 cup of sugar

-2 eggs

-1 T. vanilla

-2 1/2 cups of oats

-2 cups of flour

-1/2 t. salt

-1 t. baking powder

-1 t. baking soda

-1/2 t. espresso powder

-12 oz chocolate (dealer’s choice of wafers, chips, or chopped chunks!)

Method:

  1. Preheat oven to 350.

  2. In a stand mixer, cream together sugars and butter, add in eggs one at a time until well combined, and then add vanilla.

  3. In a food processor combine oats, flour, salt, baking soda and powder, and espresso powder, pulse until oats are powdery.

  4. Turn the stand mixer back on a gentle stir and slowly add in the dry ingredients. Once combined, add in the chocolate of your choice and mix in!

  5. Shape into golf ball size dough balls and place onto baking sheet.

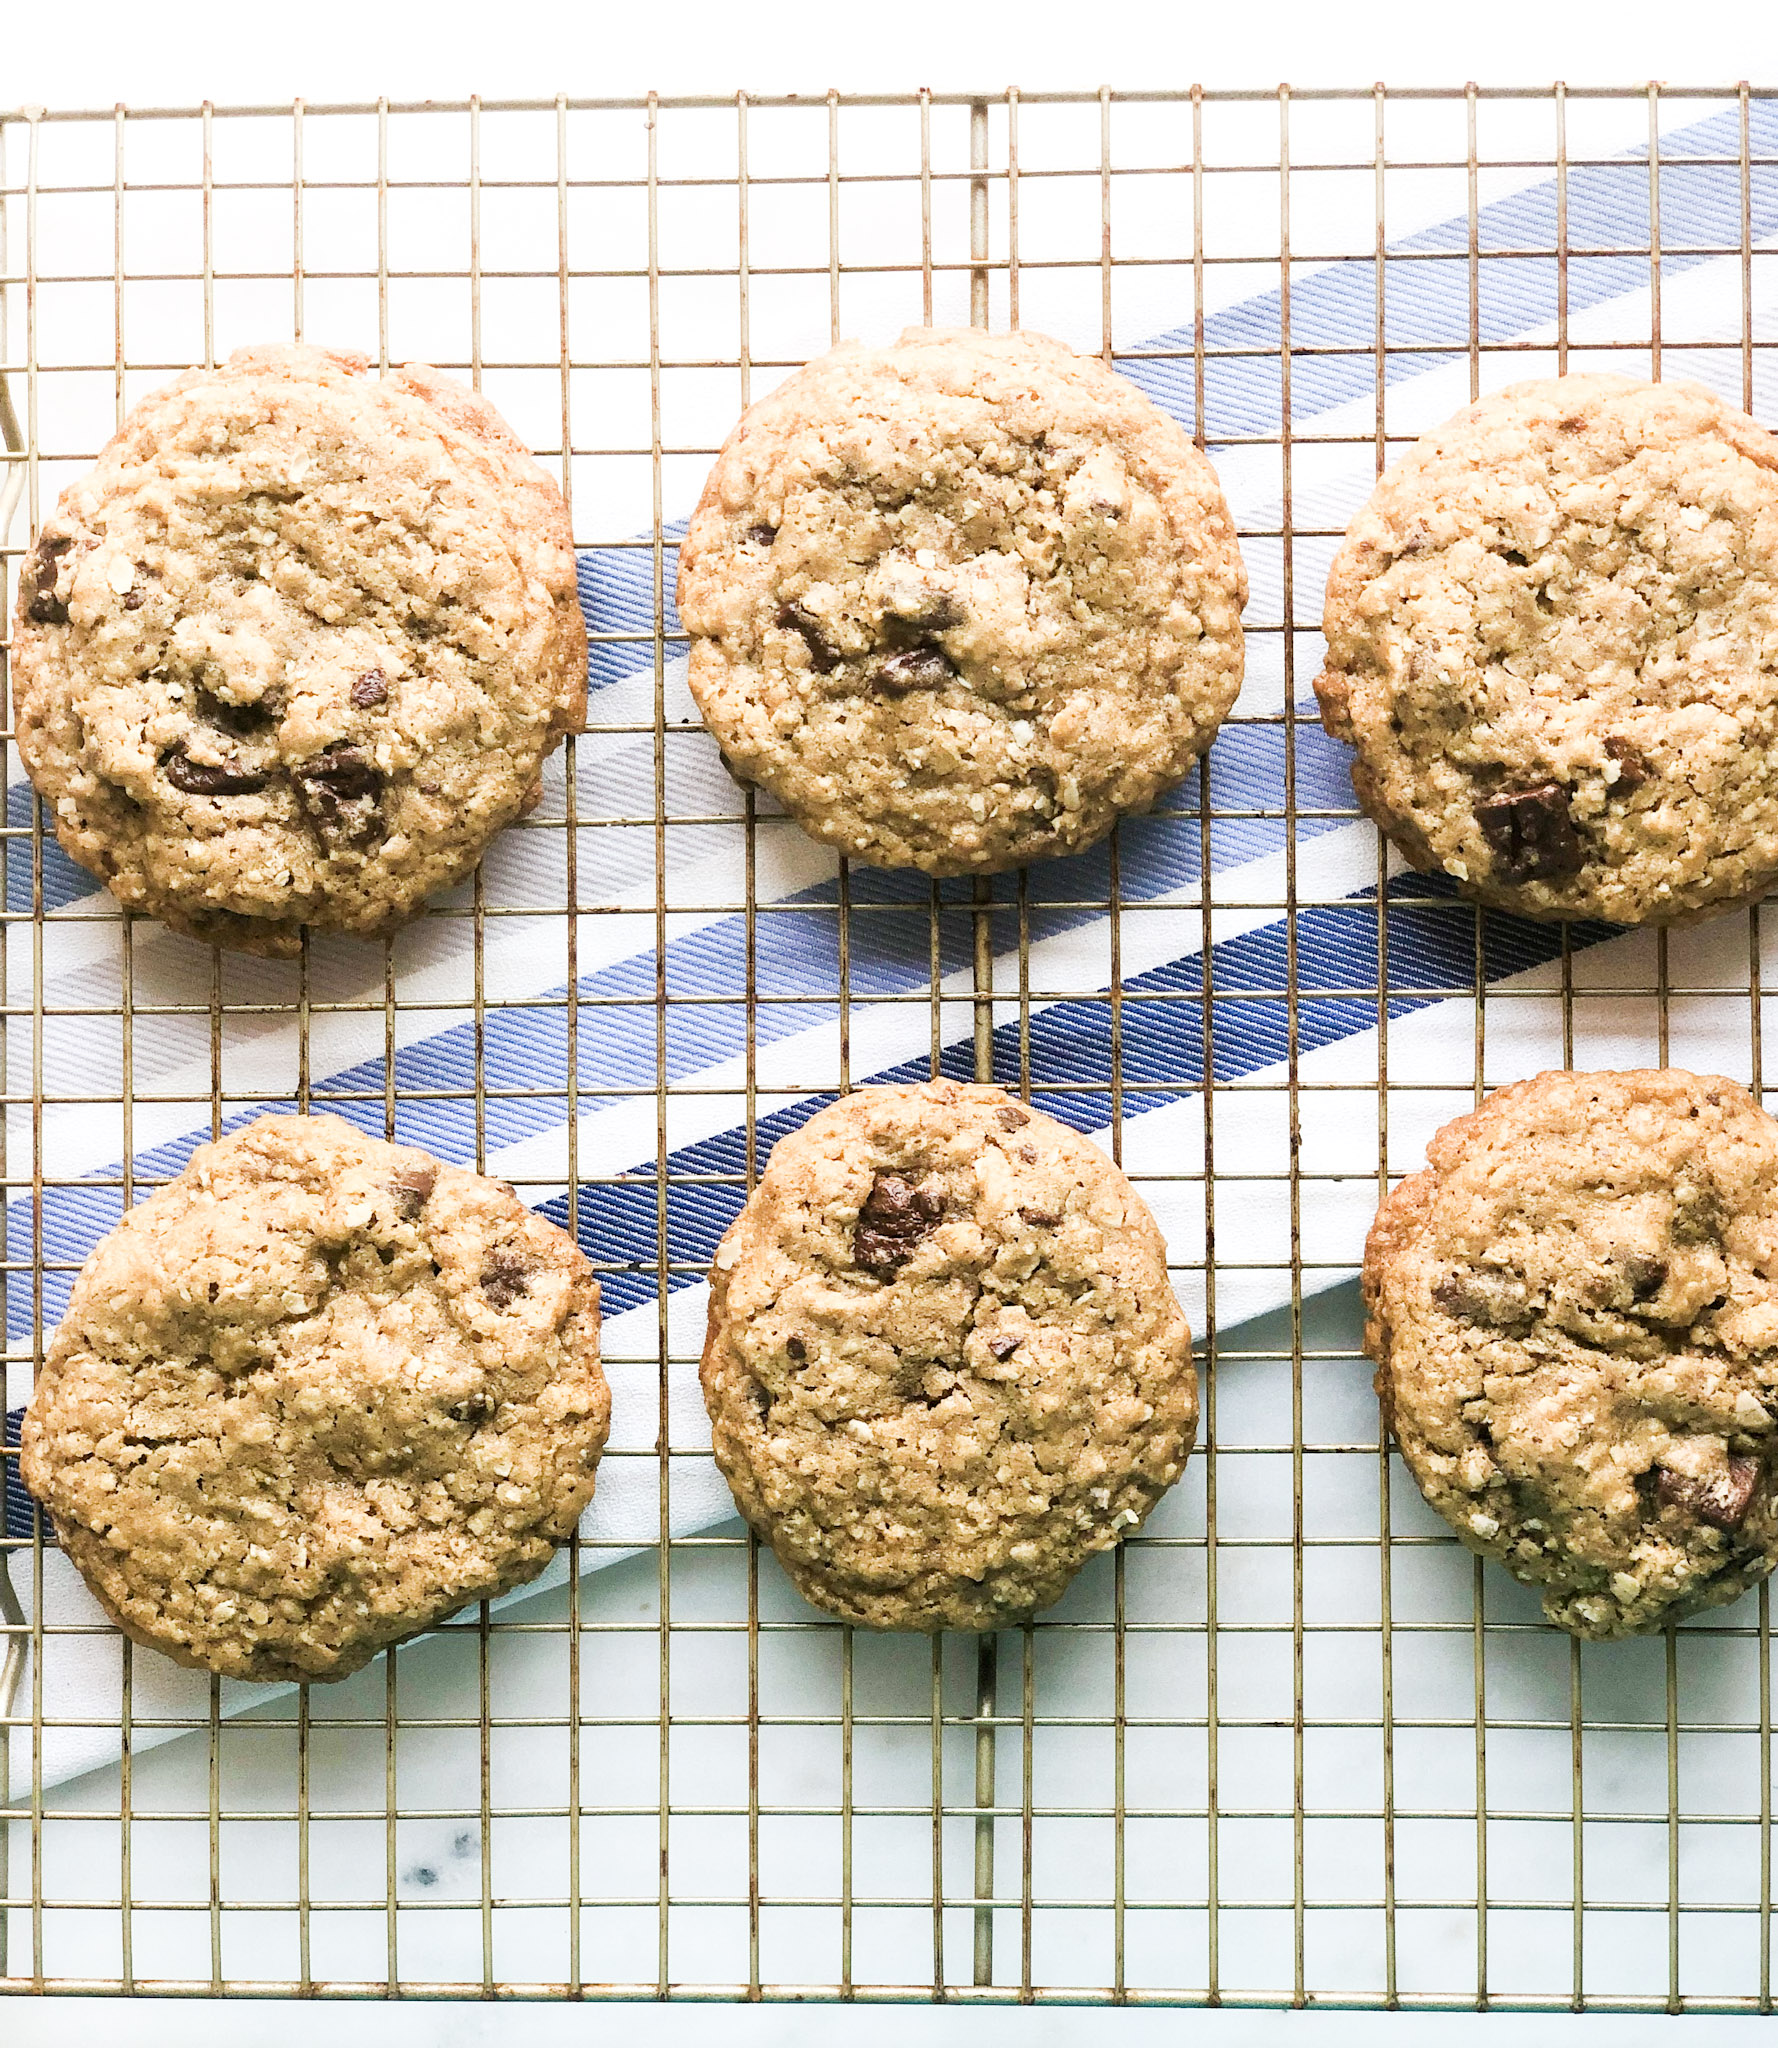
  6. Bake for 10-15 minutes or until done to your liking. I found that the 12-13 minute mark ensures the gooey center and crunchy top—also know as the perfect cookie.

  7. Let your inner cookie monster shine!

Oatmeal_CCCookies3.jpeg
In Treats Tags cookie, chocolate, oatmeal, treats
2 Comments

Peach Cobbler with Salted Vanilla Ice Cream

August 19, 2019 Savannah Near
A bowl of summertime!

A bowl of summertime!

There are many things I love about the summertime: more daylight hours, blueberry picking, the smell of sunscreen, and peach season to name a few. Peach cobbler has always felt like summertime in a bowl to me. Maybe it’s the bright color or the mix of the jelly-like texture of the peaches, with the pillowy-bread top, or the fact that it tastes like sunshine personified? I always knew it was the start of summer when my mom made a peach cobbler on Memorial Day Weekend, and then through out each holiday in the summer, made from peaches that we usually pick up from a peach orchard not far from our family’s farm in East Texas. The cool thing about cobblers is that is feels like everyone’s family has their own recipe and I love seeing how everyone puts their own spin on things—keeping the family traditions alive. I love the fact that this is the recipe my grandmother made, my mother makes, and my sister and I will continue to make. Each adding our own touches to make it our own. My mom doubles the recipes to make it thicker and cooks it longer, my sister makes her gluten free, and I macerate my peaches (which means nothing more than letting sugar break down fruit) and added the ice cream touch to make it a little extra special!

This is our family’s peach cobbler recipe and it reads a little like Miss Truvy’s “Cuppa-Cuppa-Cuppa” recipe from Steel Magnolias. I added the Salted Vanilla Ice Cream because the salt brings out the natural sweetness from the peaches, as well as cuts through the syrup-y sweet taste.

Peach Cobbler Recipe

Ingredients:

-1 cup of flour

-1 1/2 cups of sugar

-1/4 tsp of cinnamon

-1 cup of milk

-2 tsp baking powder

-1 stick of butter

-12 overly ripe peaches (you can leave them in the window sill to help them ripen!)

Method

  1. Peel peaches and cut into 1/2 in. size, sprinkle with half a cup of sugar and cinnamon. Set aside to macerate for 10-15 minutes.

  2. Mix together flour, sugar, milk, and baking powder to make a paste.

  3. Pour paste into a greased 9x13 baking dish.

  4. Cube one stick of butter of the paste.

  5. Pour peaches over the butter.

  6. Bake at 350 for 45-50 minutes or until it bubbles all around sides and in the center and browned.

Salted Vanilla Ice Cream

Pre-freeze ice cream maker bowl at 0 degrees for 24 hours.

Ingredients:

-2 cups of whole milk

-2 1/2 cups of heavy cream

-1 cup of sugar

-1 tbs. of kosher salt (I use Diamond)

-2 tsp. of vanilla extract

Method:

  1. In a large bowl, combine milk, sugar, salt. Stir (do not whisk) together until sugar and salt are dissolved.

  2. Add in cream, vanilla extract, and combine. Cover and chill for 2 hours.

  3. Pull out mix, and give it a final stir, taking care not to make it bubbles, as you do not want to add air.

  4. Pour into ice cream bowl and make according to your machine’s settings.

  5. Put in a freezing container and let harden for 3-4 hours or overnight.

  6. Or enjoy immediately over your freshly made peach cobbler and sprinkle with a little extra cinnamon!

PeachCobbler4.jpeg
PeachCobbler5.jpeg
In Treats Tags peach, cobbler, summer, family, butter, ice cream
Comment

Butterfinger Ice Cream with swirled peanut butter

August 12, 2019 Savannah Near
ButterfingerIceCream.jpeg

As the temperatures ramp up in Dallas, my obsession with perfecting ice cream recipes seems to be surging right along with them. I promise, come September 1st, you will see a green vegetable grace this site—maybe even two! But for now, the ideas keep coming, so I’m going to keep churning out (pun intended) the cream. Growing up Butterfinger was my favorite candy, a preferred treat of mine post soccer games. I loved the way the pieces broke off and it was still crunchy while being enrobed in chocolate. Delicious. I’ve tried Twix as a mix in for ice cream and the cookies just do not hold up to the ice cream and the crunch gets lost. All that is solved with the use of Butterfingers. It crumbles beautifully, breaks off into multiple sizes and shapes, the color is a fabulous burnt orange, and stays crunchy! Add in a little peanut butter and you’ve got yourself quite a treat—almost becoming mousse-like when churned. YUM!

Butterfinger Ice Cream with Swirled Peanut Butter:

Pre-freeze ice cream maker bowl at 0 degrees for 24 hours.

Ingredients:

-2 1/2 cups of heavy cream

-2 cups of whole milk

-1/2 cup of sugar

-2 1/2 tsp of kosher salt, remember the peanut butter will add salt too!

-2 tsp vanilla extract

-3/4 cup of smooth peanut butter (spray your measuring cup with nonstick spray prior to filling)

-1 cup of chopped/crushed Butterfingers (this took about 10 of the fun-sized bars)

Method:

  1. In a large bowl, combine milk, sugar, salt. Stir (do not whisk) together until sugar and salt are dissolved.

  2. Add in cream and vanilla and combine. Put in refrigerator to chill for 2 hours.

  3. Pull out mix, and give it a final stir, taking care not to make it bubbles, as you do not want to add air.

  4. Pour into ice cream bowl and make according to your machines settings.

  5. Add in Butterfinger pieces with 5 minutes to go. Then add in your peanut butter—slowly drizzle it in. The candy pieces will grab the peanut butter (they make the texture a little more irregular)—incorporating it easier.

  6. Put in a freezing container and let harden for 3-4 hours or overnight.

  7. As the little alien dude says in the new Butterfinger commercial, “Nobody lay a finger on my Butterfinger.”

  8. Make a sign to go on your ice cream with the same sentiment.

A little abstract ice cream art…

A little abstract ice cream art…

In Treats Tags ice cream, candy, butterfinger, cold, summer
← Newer Posts Older Posts →

Let’s be social. FOLLOW along at @savannahmakes

...lasagna with pesto and hot Italian sausage! 🇮🇹 Like Garfield, I too love lasagna. But unlike Garfield, I decided to throw mine a graduation party a let it get a little more sophisticated and grown-up! Recipe is now up on SavannahMakes.com and li Just a few bites of Texas sheet cake to celebrate my beloved state’s independence day! Happy Texas Independence Day, y’all! Recipe for the sheet cake is already on SavannahMakes.com! ⭐️ #rememberthealamo #remembersanjacinto #remembertoeat Sending you all the 💗❤️💜 from my kitchen to yours! #happyvalentinesday #biscuitlove The weather forecast for Dallas this week is: 🌧🌧🌧🌧 so I’m cozying up with plenty of soup. Starting with this one—beef vegetable! Hearty with plenty of colorful veggies, I’m pretty sure this soup accounted for 85% of my vegetable I hope your new year is off to a sweet start! Recipes are like relationships, when you don’t see one for awhile, you start to miss it. While I made lots of candy this Christmas, I didn’t make my cinni-minis at all! Making a batch of these Sending you the merriest wishes from me and my pink, peppermint clouds of divinity for a safe and happy Christmas! Merry, merry!! 💕 This recipe is now up on SavannahMakes.com and linked in my bio! 😘 #divinitycandy #christmascandy #peppermint ‘Tis the season for Christmas candy!  Give your sweet and salt tooth a gift, peanut 🥜 brittle! Sharing my family’s favorite recipe today on SavannahMakes.com and in the link in my profile! 🎄 #christmascandy #peanutbrittle Happy Friday to my fellow cookie monsters! Sending you a (virtual!) treat to start your weekend. My recipe for the ultimate chocolate chip cookie is up and it’s like a hug in your hand! 💕 Go to SavannahMakes.com or the link in my bio to bite i Sunday and baking goes together like biscuits and gravy!! My new (& improved) biscuit recipe is up with bonus recipe of sausage gravy!Beware: people (hungry husbands) will not be able to keep their hands off of them! Head over to SavannahMakes.co With @chiomegaxmas coming to a close this weekend, planning a very cozy and restful weekend for myself, with a big bowl of potato soup with allllll the fixings! Co-chairing a (virtual) Christmas market has been no joke and luckily, this soup is a cin Cookies, brownies, and ice cream pie (oh my!) Sending some virtual sweetness from me to you! ❤️💙 #election2020 Happy Halloween! No tricks here, just a treat! Remember that boxed cake experiment I did in the kitchen last week? Well this is the result—Gluten Free Spiced Bundt Cake with Cranberries and Orange Glaze!

I took a box of @simplemills vanilla, a I realized today and I hadn’t made these pumpkin spiced oatmeal chocolate chip cookies once this fall and they just went straight to the top of my weekend’s to do list! Because who doesn’t want a cookie that feels like a warm hug? 
Ending the week on a sweet note and giving our girl pumpkin pie a much deserved makeover in anticipation for all of her upcoming dinners. 💄 😜 Meet my Pumpkin Pie Chiffon Bars with a Biscoff cookie crust! If you like a crunchy pie crust and a cloud- Finally sat down and typed out the recipe for this ✨magical✨ marinara sauce my husband 🧔🏻 created! After the first bite, I immediately got up, found a pen and a piece of paper, and said he had to write down the recipe! This sauce is like a hug in a 🙌🏻Protein Power Balls with Almond Butter and Dark Chocolate🙌🏻 If you need a healthy snack that tastes like cookie dough, look no further! Recipe is below 👇🏻and on SavannahMakes.com 💙

 Ingredients:

1 1/4 cups oats

1 cup almond butter

1/2 cu
Instagram

All photography is my own, unless noted.