• Home
  • Hi, Y'all
  • Recipes
  • Favorites
  • Say Hi
Menu

Savannah Makes

Street Address
City, State, Zip
Phone Number
bringing your grandmother's recipes into the 21st century

Your Custom Text Here

Savannah Makes

  • Home
  • Hi, Y'all
  • Recipes
  • Favorites
  • Say Hi

'Tis the Season for Christmas Candy Part 3: Festive Fudge!

December 31, 2020 Savannah Near
Fudge3.jpg

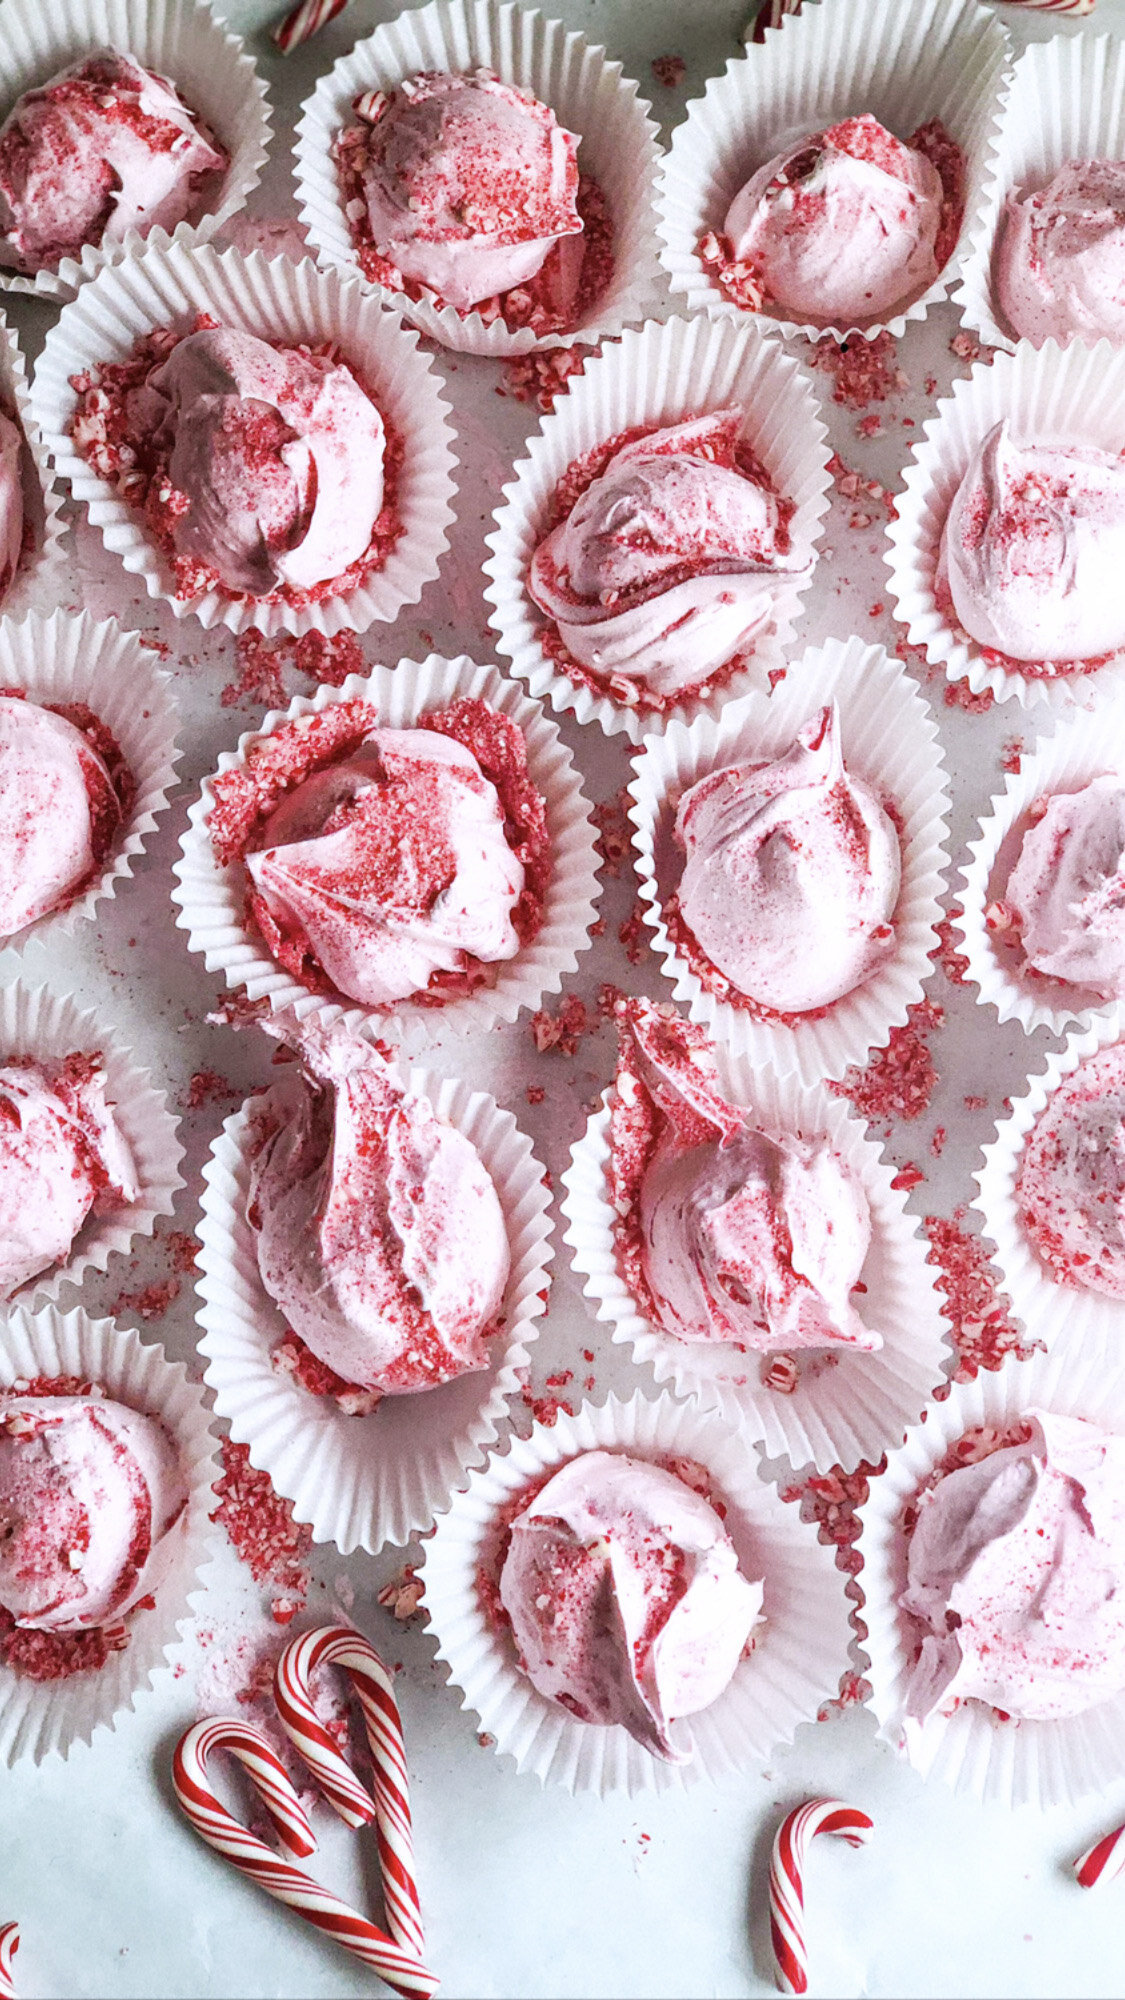
Let’s end the year on a sweet note! Though fudge may not be the most photogenic food, it sure does taste delicious! When I asked my mom for the fudge recipe that she used, she quickly replied with, “Well I use my mother’s recipe and she used the recipe on the back of the marshmallow creme jar…” While we probably wouldn’t consider this gourmet, I appreciate the unfussy, approachable nature of this recipe, which is probably why it has been used for years and years. So, in keeping with that spirit, I used part of the recipe for "Fantasy Fudge” that is found on the back of the marshmallow creme jar, just like my mom and my grandmother. While I decided to keep the method traditional, I wanted to elevate and play with the flavors a bit.

While Christmas day may be over, these treats are still being enjoyed as we countdown to 2021. So, I give you dark chocolate fudge and cookies and cream fudge (with plenty of Oreos!). Of all the Christmas candies I made, this is by far the easiest recipe! Though you do need a candy thermometer, it comes together pretty fast so it can get to cooling, and then most importantly, you can get to eating!

Wishing you a sweet New Year!

Cookies & Cream Fudge

Ingredients:

  • 3 cups white sugar

  • 3/4 cup butter (1 full stick +1/2 another stick)

  • 2/3 cup evaporated milk

  • 1, 12oz package white chocolate morsels

  • 1, 7oz. jar marshmallow creme

  • 1 teaspoon vanilla extract

  • 1/4 teaspoon kosher salt

  • 1 cup crushed Oreos (about 10 Oreos)

Equipment:

  • candy thermometer

  • lined and greased pan

Method:

(You can use an 8x8, 9x9, or a 9X13 pan for this!)

  1. Prep your desired pan with foil or parchment paper and non-stick spray, set to the side.

  2. In a medium saucepan over medium heat combine: sugar, butter, and evaporated milk stirring to dissolve sugar.

  3. Secure candy thermometer to the pot and set to soft-ball or 234 degrees. Stir until the temperature is reached.

  4. Immediately remove from heat and stir in white chocolate chips until melted and thoroughly combined. Fold in marshmallow creme, vanilla extract, and salt.

  5. Once smooth, pour in Oreos and mix.

  6. Pour fudge into the prepared pan and let cool before cutting into squares. Dust top with remaining Oreo crumbs, if you haven’t eaten them already,

Dark Chocolate Fudge

Ingredients:

  • 3 cups white sugar

  • 3/4 cup butter (1 full stick +1/2 another stick)

  • 2/3 cup evaporated milk

  • 1, 12oz package dark chocolate morsels

  • 1, 7oz. jar marshmallow creme

  • 1 teaspoon vanilla extract

  • 1/2 teaspoon kosher salt

Equipment:

  • candy thermometer

  • lined and greased pan

Method:

(You can use an 8x8, 9x9, or a 9X13 pan for this!)

  1. Prep your desired pan with foil or parchment paper and non-stick spray, set to the side.

  2. In a medium saucepan over medium heat combine: sugar, butter, and evaporated milk stirring to dissolve sugar.

  3. Secure candy thermometer to the pot and set to soft-ball or 234 degrees. Stir until the temperature is reached.

  4. Immediately remove from heat and stir in chocolate chips until melted and thoroughly combined. Fold in marshmallow creme, vanilla extract, and salt.

  5. Pour fudge into the prepared pan and let cool before cutting into squares. Can sprinkle the top with salt, if that is your jam!

In Treats Tags Christmas candy, candy, fudge, oreo, chocolate
Comment

'Tis the Season for Christmas Candy Part 2: Peppermint Divinity

December 24, 2020 Savannah Near
PeppermintDivinity1.jpeg
PeppermintDivinity2.jpeg

Sending you love and the merriest wishes for a safe and happy Christmas!

Divinity is one of my absolute favorite old-fashioned Christmas candies! If you have ever wondered what it would be like to bite into a cloud, these are for you! The women in my family have been making them for years from my great grandmother, Savannah; my great aunt, Maxine,who called it “California Candy” to my grandmother, Tina, and my mom! It seemed right to learn how to make them on my own and incorporate them into my and my husband’s Christmas line up. But I thought it needed a little twist and maybe a makeover. Peppermint flavoring? That sounded good and I love all of the Christian symbolism tied to candy canes. Dye it pink? SOLD. I love these little fluffy, pink, peppermint clouds. They look modern but make me nostalgic all at the same time.

When it comes to making these, let me save you some pain and anguish. Do you know that little supercomputer you’re holding in your hand and reading this recipe on? Okay, great. Now, come back to this recipe, but before you get to work on it, open the weather app on your phone and check the humidity. If the humidity is over 50-55% pick another day to make this, it will not set. Yes, there are culinary geniuses that have guidance on reducing the water content by a tablespoon for each increment of 10% of 50% that the humidity is over. However, I am not one of those geniuses and prefer to pick another day. I have curly hair, humidity and I have never gotten along. Why try to start fighting it now, when John Frieda’s frizz ease gave me no results in middle school? Save your candy making for another day!
Recipe:

  • 3.5 cups white sugar

  • 1 cup light corn syrup (I use Karo)

  • 1 cup water, room temperature

  • 3 large egg whites

  • 1 teaspoon vanilla extract

  • 1/4 teaspoon peppermint extract

  • 10-12 drops red food coloring (dealer’s choice here, I like light pink, if you want a lighter or darker color, drop until you get your desired color)

  • 1/4 cup finely crushed peppermint candy

Equipment needed:

  • stand mixer

  • candy thermometer

  • faith and patience

Method:

  1. Into the bowl of a stand mixer fixed with the whisk attachment, add three egg whites. Trust that we are going to going to come back to them and move to step 2.

  2. In a medium saucepan combine sugar, water, and corn syrup, affix the candy thermometer to the pot, and set to “hard ball” or 250 degrees. Bring the syrup mixture to a boil over high heat, stirring just until the sugar has dissolved. Cook until the syrup mixture reaches 250 degrees or the hard ball stage. Trust me, if your candy thermometer is as loud as mine, you will not miss it when it gets close to this stage. BEEP. BEEP. BEEP…

  3. While the syrup mixture is reaching its temperature, let’s turn back to those egg whites (we are building trust and making candy!). Turn your stand mixer to a medium speed and beat egg whites until stiff peaks form. If peaks are achieved prior to the syrup being ready, simply reduce the speed of the mixer to low until syrup is ready.

  4. Once the syrup reaches hard ball stage turn the mixer to a medium speed and in a slow, steady stream (trying not to hit the sides of the mixing bowl and whisk) pour the syrup mixture into the mixer. You might need oven mitts and a spotter to help you!

  5. Add in vanilla and peppermint extracts and increase the speed of the mixer to high.

  6. Beat until mixture loses its shine and can hold its shape; the texture will change from stringy to very fluffy, this step takes me about 20 minutes.

  7. Once the texture is reached, stop the mixer, add the food coloring and mix by hand or let the mixer do the work for you. Mix until just combined and the desired color is reached.

  8. Fill a small bowl with hot water and either using two spoons or a cookie scooper, dip out the mixture onto parchment paper, using the hot water as needed when things get too sticky between dips.

  9. Top scoops with crushed peppermint candy. Allow to set 1-2 hours or until no longer sticky.

  10. Enjoy!

PeppermintDivinity_3.jpeg
In Treats Tags christmas, peppermint, candy cane, divinity
Comment

'Tis the Season for Christmas Candy Part 1: Peanut Brittle

December 22, 2020 Savannah Near
PeanutBrittle.jpg

While I love Christmas more than your average girl, I think my candy thermometer might love it more. The poor thing just hangs out in a drawer, mostly ignored, just waiting patiently for Christmas, and it’s time to shine. I’m pretty sure my candy thermometer and Mariah Carey have this in common, no? For me, Christmas is a time to sharpen my candy-making skills and to reflect on those recipes that have been passed down through the generations. Sometimes, I make them as the recipe originally intended. Other times, I find that a little updating is necessary. This week I am sharing a little of both, as Mrs. Keller’s Peanut Brittle recipe is something that is never altered (that honestly would be considered a jailable offense in my family!). While my recipe for peppermint divinity was inspired by my Great Aunt Maxine’s recipe for divinity, or as she referred to it as, “California Candy”. I will also be sharing my brand new recipe for fudge (with Oreos!). To start us off, we are keeping it classic today with Mrs. Keller’s Peanut Brittle.

So, dust off those candy thermometers, folks! It is time to get those burners on and threads spinning!

This recipe has been a staple in my family’s Christmas candy line up for years. Mrs. Alice Keller and her husband, Tony, were very close friends of my maternal grandparents, Jack and Tina. Mrs. Keller was known for her peanut brittle and sent some along on a hunting trip that my dad was also on. One bite and my dad was in love. Mrs. Keller thoughtfully typed up the recipe (on a typewriter—yes—it is that old) and included a note that while it is called “never fail” peanut brittle that she has failed many times! According to my mom and Mrs. Keller, one of the secrets for it turning out properly is to make sure you use a sturdy, thick pot, to help with managing the heat, curbing the chance of it burning or the pot getting too hot. My mom also added that she always seems to burn herself on the batches that turn out the best. Can you say, made with love (and iced fingers!)? Mrs. Keller passed away earlier this year, but I am sure she would be glad to know that people are still enjoying her delicious peanut brittle! A photo of the original recipe is below; I love the stained, well-loved page. My mom shared a few of her tricks to help make sure it turns out too (like using a candy thermometer!).

Mrs. Keller’s “Never Fail” Peanut Brittle

Ingredients:

  • 3 cups white sugar

  • 1/2 cup water

  • 1 cup white Karo syrup

  • 4 cups of raw peanuts

  • 2 tablespoons butter

  • 2 teaspoons vanilla

  • 1 teaspoon salt

  • 2 teaspoons baking soda

Method:

  1. In a large thick pot and using a candy thermometer, boil sugar, water, and Karo on high heat until it spins a thread (your candy thermometer will have this stage marked to help with gauging temperature). About 6-8 minutes.

  2. Add peanuts and stir constantly until it has caramelized and turned a deep, brownish-gold.

  3. Remove from heat immediately, add butter and vanilla. Mix well until butter is melted.

  4. Then add salt and baking soda. Stir the mixture until it foams, then quickly pour onto a buttered pan (a half sheet pan).

  5. Let stand until cooled, break into pieces, and store in an air-tight container.

As Mrs. Keller wrote, “Good Luck!”
My mom also gave the tip of not to double this recipe! Rather make two separate batches, as if you double it, the bottom of the mixture cooks too fast than the top does in the pot.

Mrs.+Keller%27s+Peanut+Brittle.jpg

The note says, “Tina—here us the recipe for Jim. In spite of the name (never fail), I have on occasion undercooked or overcooked it. Practice, practice, and more practice! Also, tell him to use a heavy (thick) pot, works best for me. Alice”

In Treats Tags Christmas candy, Christmas, old recipe, Candy, peanuts, brittle
1 Comment

My Ultimate Chocolate Chip Cookie

December 18, 2020 Savannah Near
CC_cookies.jpeg

My husband is a self-proclaimed “cookie monster.” While I prefer a cake for my birthday (or more specifically the birthday cake from Milk Bar in New York, which I order and proceed to enjoy for breakfast, lunch, and dinner) he wants cookies. Last week he turned 30 and while celebrations have had to be more limited this year, I knew one thing for sure, I could not skimp on the cookies for my Cookie Monster. His favorite cookie? You guessed it, chocolate chip! While I woke him up with Ina Garten’s overnight Belgian waffles for his birthday breakfast, I made sure the cookie train started rolling for on-demand enjoyment throughout the day. If you too want to board the cookie train, grab some butter, and all aboard! These cookies are the perfect texture of soft but also crisp, and sweet, and salty! I guarantee you will not be able to eat just one; make them for yourself, or for the cookie monster in your life.

Ingredients:

  • 2 sticks of softened butter (1 cup)

    • I used European, salted butter. But I like a little salt with my chocolate, so if that does not fit your vision, use unsalted butter here instead.

  • 1 cup brown sugar

  • 1 cup of sugar

  • 2 eggs

  • 2 teaspoons vanilla extract

  • 3 cups of all-purpose flour

  • 1 teaspoon kosher salt

  • 1 teaspoon baking powder

  • 1 teaspoon baking soda

  • 12 oz or 2 cups chocolate (dealer’s choice of wafers, chips, or chopped chunks!)

  • Optional additions: 1/2 teaspoon espresso powder and 1/4 teaspoon almond extract

Method:

  1. Preheat oven to 350 degrees.

  2. In a stand mixer, cream together sugars and butter, on a medium speed. Add in eggs one at a time until well combined, and then add vanilla (and almond extract, if so desired!).

  3. In a large bowl combine, flour. salt, baking powder and soda, and, if you feel the need, espresso powder, mix together.

  4. Turn the stand mixer back on a gentle stir and slowly add in the dry ingredients. Once combined, add in the chocolate of your choice and mix in!

  5. Shape into golf ball size dough balls and place them onto a baking sheet. I line my baking sheet with a Silpat.

  6. Bake for 15-20 minutes or until done to your liking. I found that the 17-18 minute mark ensures the gooey center and crunchy top—also known as the perfect cookie.

CC cookies.jpeg
In Treats Tags cookies, chocolate chip, chocolate chip cookies, treats, baking, butter, sweets
Comment

Pumpkin Pie Chiffon Bars

October 16, 2020 Savannah Near
PumpkinBar_1.jpg
PumpkinBar2.jpg
PumpkinBars3.jpg
PumpkinBar_1.jpg PumpkinBar2.jpg PumpkinBars3.jpg

As the leaves begin to turn, I feel like my Instagram photo feed changes from "the last bbq of summer" to pie, pie, and more pie. I like pie, but just okay. Frankly, I think pie dough is a little boring (gasp!) and takes away from the overall dish because I find it so flavorless and dull--like a beige rug lining the bottom of the pie dish. I like pie, but I don't understand why the flavor and experimentation should end at the filling?! Not in my kitchen; I decided it was time for a pumpkin pie makeover, and it is pretty safe to assume that the first thing I changed was the crust!

I went with a Biscoff cookie, and I love the crunch that it brings to the otherwise soft texture. But I didn't stop there I also wanted the pie to be fluffy! So, I decided to add gelatin and whipped egg whites. This filling's texture is like a whipped pumpkin mousse (in a word: Y-U-M!). I also modernized the presentation and decided to do away with the pie dish and instead used a square-shaped pan, serving bars instead of slices. If you love having a traditional pie shape, you can still follow this recipe—just use your preferred pie dish. I completed the look with a little fresh whipped cream and garnished with some nutmeg and leftover Biscoff cookie crumbs. Are you ready to meet your new pumpkin dessert? It’ll have you falling for Fall and pumpkin all season long!

Ingredients:

For crust:

  • 25 Biscoff Cookies

  • 1/4 cup sugar

  • 1/4 tsp kosher salt

  • 6 tbsp melted butter

For Filling:

  • 1 envelope unflavored gelatin

  • 1 tablespoon pumpkin pie spice

  • 1/4 teaspoon of cinnamon

  • 3/4 cup sugar, divided into 1/2 and 1/4 measurements

  • 1/2 teaspoon kosher salt

  • 3 large eggs, separated into yolks and whites

  • 3/4 cup whole milk

  • 1 15oz. can pumpkin puree (pure pumpkin)

  • 1/2 teaspoon vanilla

For Topping:

  • 1 cup heavy cream

  • Optional: 1-2 tablespoons sugar

Method:

For Crust:

  1. Preheat oven to 350 degrees. Pulse Biscoff Cookies in a food processor until broken down into fine crumbs (you should have just over 1 1/4 cups). Add sugar and salt and pulse just to combine. Stream in butter while pulsing until mixture is the consistency of wet sand, and holds shape with pushed together.

  2. Transfer to into a greased and lined 9x9 pan. Using a measuring cup (I found 1/4 cup to be easiest), press crumbs firmly onto bottom until even. Bake crust until fragrant and edges just start to take on color, about 10 minutes. Set aside to let cool.

For Filling:

  1. In a small saucepan combine: gelatin, pumpkin pie spice, cinnamon, a 1/2 cup of sugar, salt and place on stove top with no heat (yet!). In a small bowl, whisk egg yolks, milk, and vanilla to combine, then whisk into saucepan mixture to combine and place over medium heat.

  2. Whisk mixture frequently, until mixture begins to thicken and coats the back of a spoon (but do not let it boil), about 5 minutes. Stir in pumpkin purée and remove from heat. Transfer to a large bowl and chill in the fridge until cool, about 10 minutes.

  3. Meanwhile, using an electric mixer on medium-high speed, beat egg whites in a large bowl until soft peaks form. While beating, gradually add about a 1/4 cup sugar and continue to beat until stiff peaks form, 5–7 minutes.

  4. Mix half of egg white mixture into chilled pumpkin mixture until smooth. Gently fold remaining egg white mixture into pumpkin mixture until just combined.

  5. Pour filling into crust and smooth top. Cover and chill for at least 2 hours or overnight.

For Topping & Serving:

  1. Beat or whisk cream in a large bowl until medium peaks form, add in 1-2 tablespoons of sugar, if so desired.

  2. Once peaks hold, turn out onto bars, and place back into fridge to chill until serving, if not serving immediately.

  3. And finally, cut, serve, and enjoy!

    **Can top with crushed Biscoff Cookies and nutmeg for serving.

In Treats Tags fall, dessert, pumpkin, thanksgiving, chiffon, pie
Comment

Candied Orange Slices

September 12, 2020 Savannah Near
CandiedOranges1.jpg

As the sun sets on summertime, I am welcoming fall with open arms, but before I bid summer a final adieu, I decided I needed to savor the last of the bright, citrus flavors. Have you ever candied fruit? If yes, you go, girl! If no, that was me too three weeks ago. I had these giant, juicy oranges that were going to waste. So, I decided it was time to add a new cooking skill in my toolbelt: candying. I won't lie; I was very intimidated at first. Candied fruit is something that I am used to seeing at Neiman's during Christmas in the most gorgeous tins. But with a little research and a little pep talk, I was well on my way, and before I knew it, my oranges were candied and, if I may, delicious! Here's to savoring the last of summer and welcoming fall! I cannot wait to candy some grapefruit slices around Christmas now!

Ingredients:

  • Fruit of your choice, sliced into 1/8 of an inch slices, with seeds taken out

    • I used 1 large orange here

  • 3 cups of water

  • 2 1/2 cups of sugar

  • 1 tablespoon of fresh juice of the fruit you are using

    • For this I used 1 tablespoon of fresh orange juice

  • Extra sugar for finishing

Method:

  1. Combine water and sugar over medium heat and stir until sugar is dissolved.

  2. Bring to a boil and then reduce to medium-low and add fruit juice.

  3. Place fruit in a single layer (it would probably be easiest to do this in a skillet) and cook until rind is translucent, about 45-60 minutes.

  4. Once translucent, take out one at a time—allowing the syrup to drip off.

  5. Place on a cooling rack, with a lined pan underneath it. You really don’t want to scrub syrup off your metal pan!

  6. Dust with granulated sugar, if so desired, and allow to dry for 3-4 hours or overnight.

  7. Stores in an airtight container in the fridge for 3-4 days and the syrup used to make the candied fruit can be saved and refrigerated for cocktail making!

In Sides, Treats Tags orange, candied, fruit
Comment

Grown-Up Dirt Cups with Chocolate Mousse

September 3, 2020 Savannah Near
Martini Glasses: Waterford Lismore / Cocktail Napkins: Lettermade

Martini Glasses: Waterford Lismore / Cocktail Napkins: Lettermade

There is something so comforting about enjoying a cherished dessert from childhood as an adult. I LOVED dirt cups growing up. How could I not? It involved all of my favorite things: chocolate, Oreos, and if I was feeling particularly dangerous, gummy worms! So I decided it was time to give this childhood classic a makeover, and instead of using chocolate pudding, making it with a very sophisticated mousse to elevate things a bit, and serving in some crystal martini glasses—they do not get used nearly enough! But still keeping the childhood favorite—Oreos—to keep things light-hearted and approachable. The results were the perfect balance between fluffy and crunchy, sweet and bittersweet, chocolate notes, and childhood and adulthood. Grab a spoon and bring this elevated classic into your grown-up day!

Tip: This mousse would also make an excellent replacement for icing between the layers of a chocolate cake!

Note: This recipe contains raw eggs and though heated on the stovetop for a brief period on low heat, if you are immunocompromised, pregnant, or have any other health issues, use pasteurized eggs so that you can safely enjoy this creamy mousse!

Ingredients:

  • 4 egg yolks

  • 1/3 cup sugar

  • 3 cups heavy cream, divided into 1 cup and 2 cups

  • 6 oz semi-sweet chocolate chips

  • 1 teaspoon vanilla

  • 1/2 teaspoon kosher salt

  • 2 teaspoons espresso powder

  • 8 Oreos (or chocolate wafers) crushed

  • Optional: Gummy worms! Or for the grown-up version: strawberry or raspberry!

Method:

  1. In a large bowl, beat egg yolks with a hand mixer until thick and lemon-colored. Gradually beat in sugar until well incorporated.

  2. In a small saucepan on medium-low heat, heat 1 cup of heavy cream until bubbles form around the sides of the pot, stirring occasionally. Do not boil! Once warmed, take off the heat.

  3. Stir 1/2 of the heated cream into the egg mixture to temper the eggs. Slowly stream in cream, stirring eggs constantly.

  4. Once 1/2 of the cream is added, pour the tempered eggs/cream mixture, into the saucepan with the rest of the cream and place over low heat.

  5. Cook for about 5 minutes, stirring constantly until thickened. Do not boil!

  6. Stir in chocolate chips until melted.

  7. Add in espresso powder, vanilla, and salt and stir until incorporated.

  8. Take off heat and pour the mousse into a bowl. Cover and refrigerate for 2 hours.

  9. Beat 2 cups of heavy cream with a hand mixer until stiff peaks form. Fold into the mousse.

  10. Crush Oreos or chocolate wafer cookies into the bottom of the serving dish, spoon in mousse, and place additional cookies over the top for an extra crunch! For some nostalgic flair, add some gummy worms (or fruit!).

  11. Serve immediately!

ChocolateMousse2.jpg
In Treats Tags chocolate, chocolate mousse, dirt cups, dessert
Comment

Guilty Pleasure à la mode: Cookies 'n Cream Ice Cream

August 5, 2020 Savannah Near
CnC_Icecream.jpg

My girlfriends and I have a running list of all of the outlandish things that have happened in 2020. The list includes everything from Covid to hurricanes to a sink hole in the East Village and a giant dust cloud from the Sahara—and that was just from the beginning of this summer. There are still so many hearts aching around our country and for many different reasons. Something I have noticed about myself during this summer is that I take time to appreciate the small things more: the sun shining when I wake up, my health, the endorphin rush after finishing a workout, and of course, a great bowl of ice cream with some trash tv. It is truly the simple things.

Last summer (2019 seems like such an innocent time now, doesn’t it?) one of my co-workers and I discovered a show on Lifetime called “Marrying Millions.” Though it is considered reality TV, you can tell pretty easily that the producers have a very specific plot line in mind and feed the couples lines, which is to say that the couples starring in it are doing their best to “act naturally,” which is to say that their acting classes haven’t paid off yet. Honestly, it’s so bad, it’s good and I am not even one for reality TV. Basically, they find couples with significant age and bank account differences, mic them up, and set them up on all of these little outings to bring out their differences and cause conflict. The therapist in me cringes but the observer in me laughs hysterically. While I was watching this show and hysterically laughing last summer, I was also eating ice cream during the episode. So, in an effort to bring some normalcy into 2020, I am going to eat ice cream and watch the season two premiere of “Marrying Millions” tonight. My two greatest guilty pleasures of 2019 are helping me round out the summer of 2020. Here is the ice cream I am going to be enjoying tonight, which features another one of my guilty pleasures: Oreos! One of the things I love about this ice cream is that instead of tasting like vanilla ice cream with some cookies mixed in, the ice cream base tastes similar to the cream between the Oreos—truly delicious!

Ingredients:

  • 2 1/2 cups whole milk

  • 2 cups heavy cream

  • 2 teaspoons kosher salt

  • 3/4 cup sugar

  • 2 teaspoon vanilla

  • 1 cup crushed Oreos

Method:

  1. Freeze ice cream maker bowl at 0 degrees for 24 hours.

  2. In a large bowl combine, milk, sugar, and salt. Stir together until sugar and salt are dissolved.

  3. Add in cream and vanilla extract. Stir until incorporated.

  4. Cover and chill for 2 hours, or if needing quicker, put in the freezer for 30 minutes.

  5. Pull out mix and give it a final stir.

  6. Pour into ice cream bowl and make according to your machine’s settings.

  7. While that’s churning, count out 12 Oreos and put 10 into a plastic bag and smash into crumbs with a rolling pin. This should yield about 1 cup. Snack on the saved two while waiting for ice cream to finish; when you finish the package of Oreos without sharing, hide the evidence.

  8. With 5 minutes left on the churn, add in crushed Oreos.

  9. Once completed, put in a freezing container, and let harden for 3-4 hours or overnight.

  10. Scoop yourself out some and enjoy some trash tv, honey!

In Treats Tags ice cream, oreos, cookies n creme, cookies n cream
Comment

Jazzed Up Blueberry Muffins

July 29, 2020 Savannah Near
BlueberryMuffins.jpg
Blueberrymuffins2.jpg

On Saturday morning after I got up and made coffee, I peeked in my fruit drawer and noticed pints on top of pints of blueberries that had somehow gone unused. Picking them up, I inspected them, took a bite, and decided that these perfectly ripe and juicy berries were to be wasted no more. I set off to make something with blueberries, what it was going to be, I had no clue. Flying by the seat of my pants, without a recipe, I got to brainstorming and decided that I really loved the flavor profile of my jazzed up banana bread.  I also knew that this recipe would lend itself well to a few tweaks and a pile of blueberries. Bonus points to my mom, as when taste tested my banana bread recipe, after telling me how much she liked it, she immediately said, “This would make a really great muffin.” Lightbulb! Blueberry muffins! So, I added some milk and blueberries to the recipe, played the recipe’s ratios, set the timer, and 30 minutes later I was greeted with the most fabulous smelling, heavenly, little blueberry pillows. Within an hour of making them, four of them were gone, and my husband said, with a full mouth of muffin, “You should share this recipe.” So, here is my recipe for my new favorite jazzed up blueberry muffins! They get their warmth from cinnamon, their lightness from the lemon zest and Greek yogurt, and their sweet smell and floral notes from plenty of vanilla extract. I think they are pretty wonderful and hope you will too!  

Ingredients:

  • 2 cups all-purpose flour

  • 2 1/2 teaspoons baking powder

  • 1/4 tsp baking soda

  • 1 tsp kosher salt

  • 1/2 tsp cinnamon

  • 1/4 cup butter, softened (1/2 stick)

  • 1/3 cup greek yogurt ( I used Fage 2%)

  • 2 teaspoons vanilla

  • 1 cup sugar

  • 2 eggs

  • 1 cup milk

  • 2 teaspoons lemon zest

  • 1 heaping cup blueberries

Method:

  1. Preheat your oven to 350.

  2. In a large bowl combine, flour, baking powder and soda, salt, and cinnamon. Stir and set to the side.

  3. In a stand mixer or in a bowl with a hand mixer, combine butter, sugar, and beat until fluffy. Beat in yogurt, then eggs, one at a time, until well incorporated. Add in vanilla, lemon zest and milk. I grated my lemon zest right over the bowl! I wanted my batter to catch all of the oil that is released when grating! Stir together.

  4. Slowly pour in dry ingredients into wet, mixing until just combined.

  5. Add in blueberries and bring together.

  6. Divide batter evenly in 12 lined and greased muffin tins.

  7. Bake for 30-35 minutes or until golden and tops of muffins spring back when touched.

In Treats Tags muffins, blueberry, breakfast, healthy
Comment

Snickerdoodle Rice Krispie Treats

July 22, 2020 Savannah Near
SnickerdoodleRiceKrispies.jpg
SnickerdoodleRiceKrispies2.jpg

I adore rice krispie treats and I adore snickerdoodle cookies so why not bring them together to create the ultimate treat: a snickerdoodle rice krispie treat?! Spoiler: they lived happily ever after! I am a big believer in small, meaningful changes in recipes that can revolutionize the flavor and the dish overall. Our small, but meaningful changes to this recipe were browning the butter and adding seasonings. So instead of your palate getting overwhelmed with just plain sweetness, like you would with a regular rice krispie treat, you get a layered effect that has other notes besides sweetness. You get the nutty notes from the browned butter that adds depth. You get the warmth of the cinnamon and the deeper, molasses flavor from the brown sugar. I think this is a perfect marriage of sugar and spice and hope you will enjoy it too!

Ingredients:

  • 8 cups Rice Krispies cereal

  • 1 12oz package of jet-puffed marshmallows

  • 1 stick of butter or you can swap with a half of a cup of coconut oil

  • 2 tablespoons brown sugar, packed

  • 1/4 teaspoon cinnamon, plus a pinch more for sprinkling on top

  • 1/4 teaspoon kosher salt

Method:

  1. If you’re using butter, we are going brown our butter in order to bring a nutty, deep flavor to this recipe. So place butter in a large pot, over medium-high heat. Stir butter as it continues to melt in the pot. Continue to stir as it gets foamy and once you see brown specs in the bottom of your pot, you’re done! Those brown specs are the toasted milk solids. Immediately move to step 2 so butter won’t burn. If you’re using coconut oil, simply melt over medium-high heat in a large pot.

  2. Reduce heat to medium and add in marshmallows and stir. Tip: spray your cooking utensil with a non-stick spray to help it not stick. Once marshmallows begin to break down add in salt, brown sugar, and cinnamon. Reduce heat to medium-low.

  3. Once melted and smooth, add in cereal and fold into marshmallow mix until completely coated.

  4. Immediately transfer onto a parchment-lined and greased baking sheet (I used quarter size). Press into the pan until uniform in depth and formed into a rectangle. Tip: You can also grease your hands to keep the rice krispie treats from sticking to your hand!

  5. Sprinkle top with a pinch of cinnamon and set to the side to cool. Once cooled, cut into preferred serving size with a knife and enjoy!

In Treats Tags rice krispie treats, rice krispies, snickerdoodle
Comment

Celebrating National Ice Cream Day

July 18, 2020 Savannah Near
IceCream_inhand.jpg

Did you know the 3rd Sunday in July is National Ice Cream Day? Yeah, me neither and I am not normally one for “Instagram” or “Hallmark” holidays, but this is one I can get behind! To celebrate tomorrow’s sweet day, I have rounded up some of my favorite ways that I have enjoyed this cold, sweet treat! From a pie to a grill to a cone, there is a no wrong way to enjoy ice cream! Happy National Ice Cream Day! I hope your day ends on a sweet note and hope you enjoy some of my favorite cold creations! In case you don’t feel like busting out your ice cream maker, I have also rounded up my favorite places to grab a scoop in Dallas:

  1. Wild About Harry’s If you’re a native Dallasite, this choice comes as no surprise. Harry Coley’s Dallas institution has been serving up delicious hot dogs and toppings to be sure, but the thing that really sets them apart is their custard. It is said that their custard recipe was born out of Harry’s mother’s recipe. All I know is I can taste all the love and care that went into the recipe when I get my two scoops of coffee custard with Oreos. Divine.

  2. Cool Haus While it didn’t start in Dallas, this West Coast transplant brings all of the flavor to their pints and ice cream sandwiches and creativity to their flavors! You can visit their ice cream truck at Klyde Warren Park or their store front at the Dallas Farmers Market. Don’t feel like venturing out to their store? They are sold in grocery stores too! I pick up a few sammies on my trips to Central Market to keep in the freezer and they have dairy-free options too! My favorite is their coffee ice cream sandwich!

  3. TCBY Whenever I want a no fuss, but delicious treat, this is the drive-thru (!) I head to! Especially after my tennis lessons in the one million-degree temperatures we have had lately. I have been visiting this location since I was a little ice cream enthusiast and my order has not changed much: a swirl with Oreos! Yum!

  4. Baldo’s Ice Cream & Coffee I had been wanting to try this relatively new spot and got to do so after our shelter in place got lifted and they offered socially distanced service. They focus on high quality ingredients and if you cannot choose between flavors, they offer ice cream flights! They also offer dairy-free options! Their cookies ‘n cream is delicious!

  5. Howdy Homemade I absolutely adore this ice cream store and the mission they stand for. Known for their Dr. Pepper Chocolate Chip and employing teens with special needs to develop job skills, their flavors and service are one of a kind! When I helped put on a summer day camp for children with Down syndrome during my time a Junior League member, we spent many afternoons in this store, and I became very well-acquainted with their flavors! My favorite is their salted caramel that is served with a smile!

My ice cream creations:

Featured
CnC_Icecream.jpg
Guilty Pleasure à la mode: Cookies 'n Cream Ice Cream
BananasFoster.jpg
BBQ Grill-Friendly Bananas Foster Dupe with Cinnamon Ice Cream
DirtyMintIC2.jpg
Dirty Mint Ice Cream
Smores1.jpg
S'Mores Ice Cream
ChocolateIceCream2.jpg
Chocolate Ice Cream
Grandpa'sBreakfastIceCream.jpeg
Grandpa's Breakfast Ice Cream
Cappuccino Pie: A love story
HC_IC1.jpeg
Hot Chocolate Ice Cream with Marshmallows
Peach Ice Cream
Peach Ice Cream
PeachCobbler_peaches.jpeg
Peach Cobbler with Salted Vanilla Ice Cream
ButterfingerIceCream.jpeg
Butterfinger Ice Cream with swirled peanut butter
Nutella_SV_IC1.jpg
Salted-Vanilla-Nutella Ice Cream
In Treats Tags national ice cream day
2 Comments

Fourth of July Trifle

July 4, 2020 Savannah Near
FourthTrifle2.jpg
FourthTrfile1.jpg
FourthTrfile3.jpg

Happy Fourth of July! I hope you are celebrating America’s 244th birthday with some good food and a little fun (at a safe social distance!). In case you need a last minute Fourth dessert that is equal parts festive and delicious, allow me to introduce you to my trifle! Here’s my little secret, I use an angel food cake because if you inverted the cake, it is the same shape (albeit a little wider) than my trifle dish. It is like American and freedom, some things are just made to go together. The dish is then filled with layers of delicious cake, gorgeous berries, and a whipped cream that brings the whole thing together. All in a matter of minutes. You could even put some candles in it and sing “Happy Birthday” to America. Happy Birthday, America! You look good, girl!

Ingredients:

  • One premade or store bought angel food cake

  • 3 cups blueberries

  • 1 tablespoon sugar

  • 1 teaspoon lemon juice

  • 1 teaspoon lemon zest

  • 1 tablespoon chopped mint

  • 3 cups sliced strawberries

  • 3 cups heavy cream

  • 2 tablespoons powdered sugar

  • 1 teaspoon vanilla

Note: You can make this very adults only by soaking each layer of cake with 3 oz of rum after adding it to the dish. You could even soak the fruit in it too!

Method:

  1. In a large bowl mix together blueberries, sugar, lemon juice and zest, and mint. Leave to sit for 10-15 minutes.

  2. In another large bowl, beat together cream, powdered sugar, and vanilla until soft peaks form. Set in the fridge to chill.

  3. Using a bread knife, cut off the top 1 inch of cake, where the cake is the most narrow. Slice the top piece that is now separate, into two separate pieces. Place pieces in the bottom of your preferred trifle dish and fill in the hole in the middle with a piece of cake. Press cake into the dish to make even. If you need a helpful how to, check out the pictures below to a step by step photo guide!

  4. Top cake with half of blueberry mixture, pressing up the sides of the bowl.

  5. Make a strawberry perimeter around the sides of the bowl. Fill in the middle with half strawberries—saving the longer slices for the next layer of strawberries.

  6. Top strawberries with half of the whipped cream.

  7. Cut another layer of cake and fill in the hole with extra cake. Press into the dish to help compact.

  8. Top with last half of blueberries and make another strawberry wall and fill in with the last of the strawberries.

  9. Top with remaining whipped cream and use the back of the spoon to create peaks.

  10. Refrigerate until serving and enjoy!

Trifle assembly in photos:

Trifle1.jpg Trifle2.jpg Trfile3.jpg Trifle4.jpg Trifle5.jpg Trifle6.jpg Trifle7.jpg Trifle8.jpg Trifle9.jpg Trifle10.jpg Trifle11.jpg
In Treats Tags trifle, berry, fourth of july, easy
Comment

BBQ Grill-Friendly Bananas Foster Dupe with Cinnamon Ice Cream

July 2, 2020 Savannah Near
BananasFoster.jpg

Yes, you read that right! This is a bananas foster dupe that yields a totally gorgeous and delicious result! This is for all you girls that love bananas foster but are terrified you might singe your eyebrows off trying to make it at home! (Side bar: Especially if you were the child who was trying to imitate your much cooler, older sister who got her eyebrows waxed, and in your 8 year old state of mind, decided it would be a great to go ahead and throw a nice strip of Scotch tape over your eyebrow to replicate the process. Leaving a bald spot on your brow that would take many years of brow therapy (brow waxing and shaping appointments) and tubes of a regrowth serum to come back from.) Saving time and saving your eyebrows, this recipe is everything you need!

For Ice Cream:

Ingredients:

  • 2 1/2 cups whole milk

  • 1 cup sugar

  • 1 teaspoon of vanilla

  • 1 teaspoon kosher salt

  • 2 cups heavy cream

  • 2 teaspoons ground cinnamon

  • 1/4 teaspoon ground nutmeg

  • Optional: 1/4 cup dark rum

Method:

  1. Freeze ice cream maker bowl at 0 degrees for 24 hours.

  2. In a large bowl combine, milk, sugar, and salt. Stir together until sugar and salt are dissolved.

  3. Add in cream, vanilla, cinnamon and nutmeg (and rum if you please). Stir until incorporated.

  4. Cover and chill for 2 hours, or if needing quicker, put in the freezer for 30 minutes.

  5. Pull out mix and give it a final stir. If the cinnamon looks clumpy in the mixture, don’t panic. Your mixer will take care of it!

  6. Pour into ice cream bowl and make according to your machine’s settings.

  7. Once completed, put in a freezing container, and let harden for 3-4 hours or overnight.

For Bananas Foster:

Ingredients:

  • 4 peeled bananas

  • 1 teaspoon cinnamon

  • 1 1/2 tablespoons sugar

  • 1 tablespoon brown sugar

  • a dash of nutmeg

  • 4 tablespoons of butter, cut into 8 pieces

  • 4 sheets of foil to wrap bananas in

Method:

  1. Preheat oven to 425 or if you’re using a grill, a medium-hot fire. (If you’re grilling meat prior to grilling this, wait about 5-10 minutes for the grill to cool down and bit and then you’re good to go. See also: girl, eat that delicious steak and then worry about your dessert!)

  2. Place bananas on their sides on each piece of foil.

  3. Divide seasonings evenly between each banana.

  4. Place two pieces of butter on each banana.

  5. Bring all of the foil seams to the top and fold down (like a little banana tent). You don’t want any butter spilling out into your grill or the bottom of your oven!

  6. Place on the grill for 15 minutes, or until banana is soft. If you’re using an oven, place bananas on a baking sheet and bake for 15-20 minutes, or until banana is soft.

  7. Serve immediately with cinnamon ice cream and enjoy!

In Treats Tags banana, bananas foster, dessert, rum, cinnamon, ice cream
Comment

Dirty Mint Ice Cream

June 24, 2020 Savannah Near
DirtyMintIC2.jpg

I absolutely adore mint in everything from my salads to my cocktails to my desserts—but most especially my ice cream. Recently, I have observed that the mint-chocolate flavor combination is becoming increasingly overlooked in favor of things that are more inventive and current, like mascarpone and fig or honey and lavender ice cream flavors. But what flavor is as refreshing as mint? It stands alone. What food is as celebrated as chocolate? None. It is time to revive this classic and celebrate her contributions to our spoons and stomachs. I’m a proud member of the ice cream party and am voting Mint-Chocolate 2020!

Ingredients:

  • 3 cups whole milk

  • 3 cups heavy cream

  • 2 teaspoons kosher salt

  • 3/4 cup sugar

  • 1/2 teaspoon mint extract

  • 3-5 drops green food coloring, personal color preference

  • 1 cup Oreos, crushed

  • 2 tablespoons chocolate hard shell (optional)

Method:

  1. Freeze ice cream maker bowl at 0 degrees for 24 hours.

  2. In a large bowl combine, milk, sugar, and salt. Stir together until sugar and salt are dissolved.

  3. Add in cream and mint extract and food coloring. Stir until incorporated.

  4. Cover and chill for 2 hours, or if needing quicker, put in the freezer for 30 minutes.

  5. Pull out mix and give it a final stir.

  6. Pour into ice cream bowl and make according to your machine’s settings.

  7. While that’s churning, count out 12 Oreos and put 10 into a plastic bag and smash into crumbs with a rolling pin. This should yield about 1 cup. Snack on the saved two while waiting for ice cream to finish; when you finish the package of Oreos without sharing, hide the evidence.

  8. With 5 minutes left on the churn, add in crushed Oreos and drizzle in chocolate hard shell.

  9. Once completed, put in a freezing container, and let harden for 3-4 hours or overnight.

  10. Welcome to the Ice Cream Party! We are glad to have you!

In Treats Tags ice cream, mint, chocolate, summer, trear, treat
Comment

Peach Cobbler 2.0

June 17, 2020 Savannah Near
IMG_9031.jpg

I love recipes. I love them for many reasons, from being able to pass down dishes served around the family dining table for generations to the fact that they can be as comforting and familiar as an old friend; however, I believe there is an element that can make recipes even more precious. They often can take on a life of their own. A simple tweak here and there can yield something new and exciting, maybe a different flavor profile, or an element of texture that elevates a dish that much more. That is what I have been learning in the kitchen as of late, the big tweaks are sometimes necessary, but the difference between a good and a great dish is often made by a smaller, more precise change. Think paring knife instead of chef’s knife. While I didn’t take a paring knife to my family’s peach cobbler recipe that I originally shared last summer: here, I did breakout the microplane and a teaspoon for some tweaks. Those little tweaks added up to big flavor development! The addition of citrus zest brightens the whole dish, while cinnamon provides that warmth on your tongue when it first hits your taste buds. Though this recipe has been elevated a bit, the batter feels reminiscent of Miss Truvy’s “cuppa, cuppa, cuppa” simple recipe in Steel Magnolias and I’ve always loved that, no tweaking there.

Ingredients:

  • 8-12 soft peaches, yielding about 2.5-3 cups of diced fruit and juice

  • 1/4 teaspoon cinnamon

  • 1/4 teaspoon lemon zest

  • 1 cup AP flour

  • 1.5 cups sugar

  • 1 cup milk

  • 2 teaspoons baking powder

  • 1 teaspoon vanilla

  • 1 stick (1/2 cup) of butter cut into 16 pats, 1/2 tablespoon pieces

Method:

  1. Preheat oven to 350 degrees.

  2. Peel and cut up peaches into 1/2 chucks and put into a large bowl. Tip: Make sure you squeeze the pits of the peaches to get all the juice and the fruit off the pit!

  3. Add 1/2 cup of sugar, cinnamon, and lemon zest to your peaches and let sit for 15 minutes. Hello, maceration!

  4. In another bowl combine, 1 cup of sugar, flour and milk and mix together.

  5. Add in vanilla and mix.

  6. Cut a stick of butter into 1/2 tablespoon pieces (you’ll get 16!)

  7. Grease a baking dish (I used 9 x 13) and pour batter into dish.

  8. Distribute the butter evenly over the top of the batter (like little butter life rafts!).

  9. Pour peach mixture over the top of the batter. Aim for the center of the pan as the sides of the batter are going to bake up and need to come up and over the peaches. (Say it with me, batter: “I think I can, I think I can, I think I can…”)

  10. Bake for 45-50 degrees or until golden brown and sides of pan and center bubble.

In Treats Tags cobbler, summer, peach
2 Comments

S'Mores Ice Cream

June 10, 2020 Savannah Near
Smores1.jpg

Well friends, we made it to June—Happy Summer! The temperatures in Texas have officially moved from warm to just plain H-O-T! With the rising temperatures, I am thinking of all the ways to cool down and my favorite way to do it is with my number one vice: ice cream! This recipe pays tribute to those nostalgic s’mores I used to enjoy at camp and at my family’s lake house growing up. I’m curious are you very methodical about your marshmallow roasting, trying to get just the right golden color, or do you simply just light yours on fire and let nature take its course? I am the latter—I love the crunch that comes with a burned marshmallow. I feel like you can get a small taste of children’s risk tolerance, watching them around a campfire, engaging in the roasting practice. I am no rebel though; a burned marshmallow is about as wild as I get! Spreading s’more love from my ice cream maker to yours—here’s to a sweet treat to beat the summer heat!

Ingredients:

  • 5 graham cracker sheets broken into pieces

  • 3 cups whole milk

  • 2 cups heavy cream

  • 1 cup sugar

  • 1 tbsp vanilla

  • 1 tsp kosher salt

  • 3/4 cup chopped chocolate bar

  • 3/4 cup graham cracker crumbs (I used a box of graham cracker pie crust) You could always pulse some graham crackers in the blender until you get a powder-like consistency

  • 3/4 cup of mallow bits (I used Kraft)

Method:

  1. Freeze ice cream maker bowl at 0 degrees for 24 hours.

  2. Preheat oven to 350 degrees and place broken graham crackers onto a baking sheet and bake for 10 minutes, or until you start smelling them.

  3. Pour toasted graham crackers into a bowl with 3 cups of milk. Cover and steep for 15 minutes. Strain milk out of crackers, pressing with a spatula. You should get back 3 cups of milk, but if you get a little less than that—don’t worry—just top off with regular milk!

  4. In a large bowl, combine graham cracker milk, sugar, and salt. Stir together until sugar and salt are dissolved.

  5. Add in cream and vanilla extract. Stir until incorporated.

  6. Cover and chill for 2 hours, or if needing quicker, put in the freezer for 30 minutes.

  7. Pull out mix, and give it a final stir, taking care not to make it bubbles, as you do not want to add air.

  8. Pour into ice cream bowl and make according to your machine’s settings.

  9. With 5 minutes left on the churn, add in chopped chocolate, graham cracker crumbs, and mallow bits.

  10. Once completed, put in a freezing container, and let harden for 3-4 hours or overnight.

  11. Enjoy your s’mores ice cream and remember to spread s’more love!

Smores2.jpg
In Treats Tags ice cream, summer, smore, smores, chocolate, marshmallow
Comment

Jazzed Up Banana Bread

May 27, 2020 Savannah Near
BananaBread2.jpeg

I feel as if banana bread needs no introduction, it is standard fare in most home kitchens. But this isn’t your grandmother’s banana bread. I am all for classics, but sometimes you need to throw on a pair of leopard heels and a studded bag to jazz things up a bit! That is exactly what we have here, a classic that has been given a little makeover! Don’t worry you’ll still recognize her; she’s just a little more fun than you remember—with plenty of sugar and spice—and a little twist (of lemon!).

Ingredients:

  • 2 cups all-purpose flour

  • 2 1/2 tsp baking powder

  • 1/4 tsp baking soda

  • 1 tsp kosher salt

  • 1/2 tsp cinnamon

  • 1/4 cup butter, softened (1/2 stick)

  • 1/3 cup greek yogurt ( I used Fage 2%)

  • 2 tsps vanilla

  • 1/2 cup sugar

  • 1/2 cup brown sugar

  • 2 eggs

  • 1 cup bananas, mashed

  • 1/2 tsp lemon zest

Method:

  1. Preheat your oven to 350.

  2. Mash 3-4 bananas, to achieve 1 cup, to your liking. I like mine a little more chunky! Set to the side.

  3. In a large bowl combine, flour, baking powder and soda, salt, and cinnamon. Stir and set to the side.

  4. In a stand mixer or in a bowl with a hand mixer, combine butter, sugars, and beat until fluffy, 3-4 minutes. Beat in yogurt, then eggs, one at a time, until well incorporated. Add in vanilla and lemon zest. I grated my lemon zest right over the bowl! I wanted my batter to catch all of the oil that is released when grating! Stir together.

  5. Slowly pour in dry ingredients into wet, mixing until just combined.

  6. Add in bananas and bring together.

  7. Pour into a greased and lined loaf pan. I simply cut a rectangular piece of parchment paper and let the sides hang over the pan so I can lift my bread out easily.

  8. Bake for 60-70 minutes or until a toothpick inserted into the center comes out clean.

BananaBread.jpg
In Treats Tags banana, banana bread, treats, jazzed
Comment

Gluten-Free Chocolate Chip Cookie Bark

May 13, 2020 Savannah Near
CookieBark2.jpeg
CookieBark34.jpeg

I love making cookie dough. I love setting out my butter the evening before to get soft. I love the mise en place of the dry ingredients. I love creaming the butter and sugar together until fluffy, and then the smell of the vanilla when it is added to the mix. I love making cookie dough. What I don’t love is making the cookie balls once the cookie dough has formed. You could say, the actual cookie part of the dough making process is not my jam. (Kind of like the folding part of the laundry process, also not my jam!) You have to create the dough balls to be the same shape and size so they bake evenly. Then your hands get messy, so then everything in your kitchen gets messy after you touch it—cough—OCD—cough. Most of time (well every other time before this) I soldier through the dough rolling with my trusty cookie scooper in hand and music playing in my ears. However, when I was making cookie dough last week, I thought to myself, “What would happen if I just scraped all of this dough onto the baking sheet, made the width uniform, and baked it?” I was already leaving out the flour (read: gluten) in an attempt to make gluten-free chocolate chip cookies, and gluten-free baked items already have a tendency to go for more of a crunchy texture. As I was rolling the cookie dough into the pan, I felt like I was making Peppermint Bark again, so I decided that if it turned out that’s what I would name it. Well, I am happy to say not only did it turn out, but it was delicious! And like Peppermint Bark you get to choose your serving size—whether it be a handful or a pan-full! There’s no bite in this bark—it is very nice to your taste buds!

Ingredients:

  • 1/2 cup of butter, 1 stick (softened)

  • 1/2 cup brown sugar

  • 1/2 cup of sugar

  • 1 egg

  • 1 tsp. vanilla

  • 1 1/2 cups of oats

  • 1 cup oat flour—which you can make simply by milling oats in your blender until powdery

  • 1/2 tsp salt

  • 1/2 tsp baking soda

  • 1/2 tsp espresso powder

  • 1 cup of chocolate pieces (dealer’s choice of wafers, chips, or chopped chunks!)

Method:

  1. Preheat oven to 350.

  2. In a stand mixer, cream together sugars and butter, add in egg and beat until well combined and fluffy, and then add vanilla.

  3. In a bowl combine oats, oat flour, salt, baking soda, and espresso powder, stir to combine.

  4. Turn the stand mixer back on a gentle stir and slowly add in the dry ingredients. Once dough has combined, add in the chocolate of your choice and mix in!

  5. In a greased and lined sheet pan, press dough into a flat rectangle—you can use your hands or put parchment paper on top of the dough and roll out with a rolling pin! Flaten until dough is about 1/4 inch thick (or just under the sides of the sheet pan!). I used a half sheet pan, if you need a size reference.

  6. Bake for 15-20 minutes—until golden brown and the center is set!

  7. Let cool and then break into your desired size pieces for serving! And yes, if you see the full sheet as your preferred serving size, I affirm that choice.

In Treats Tags bark, cookie bark, chocolate chip, gluten free
Comment

Chocolate Ice Cream

May 6, 2020 Savannah Near
ChocolateIceCream2.jpg

A sweet treat for a sweet day! Today is our 3rd wedding anniversary and actually the first time we have spent May 6th in Dallas since the day we got married! We love to take a trip over our anniversary! Tonight will look a little different, but still delicious! Ribeyes on the grill, twice baked potatoes, a glass (or two!) of red wine, the leftover brisket queso from yesterday’s Cinco de Mayo dinner, and finally, cookies and ice cream! I whipped this ice cream up in no time at all and it will be the perfect sweet treat to cap off tonight’s celebrations. I included some wedding photos below and it is very easy to see that our wedding revolved around food! I don’t think our guests went more than 30 minutes without eating! Starting off with our fabulous passed hors d'oeuvres (including mini crab cakes!), our three signature cocktails for our hour and a half cocktail hour (the Kentucky Derby ran in the middle of our cocktail hour so we had the country club set up a TV outside and served mint juleps during it too!). Leading to a seated dinner of salmon and beef tenderloin, my bride’s cake with vanilla and red velvet cake, my husband’s cookie bar with 2000 Oreos stacked with 15 dozen cookies and macaroons and spiked milk punch, a midnight snack of sliders and fries, and then donut holes in cinnamon and sugar to end the night on a sweet note! Clearly, our priorities have not changed—I would not have it any other way!

Ingredients:

  • 2 1/2 cups of whole milk

  • 2 cups of heavy cream

  • 1 tsp. vanilla

  • 1 cup of sugar

  • 1/2 tsp. kosher salt

  • 1/2 cup of cocoa powder, unsweetened

  • 1/2 tsp. espresso powder—it is just going to enhance and intensify the cocoa flavor!

  • Optional spike: 1/8 cup of preferred bourbon or whiskey—this will also intensify the chocolate flavor

Method:

  1. Pre-freeze ice cream maker bowl at 0 degrees for 24 hours.

  2. In a large bowl, combine milk, sugar, and salt. Stir together until sugar and salt are dissolved.

  3. Add in cream, vanilla extract, and espresso and cocoa powder. Add your spirit spike here too! Stir until incorporated, it’ll take a second! You might have to whip out a whisk!

  4. Cover and chill for 2 hours, or if needing quicker, put in the freezer for 30 minutes. This time is going to help the milk absorb all the cocoa powder you just threw at it!

  5. Pull out mix, and give it a final stir or whisk.

  6. Pour into ice cream bowl and make according to your machine’s settings.

  7. Put in a freezing container and let harden for 3-4 hours or overnight.

  8. Behold—your new favorite summer treat!

WRUBEL-EIDSON-WEDDING-_0594 (1).jpg WRUBEL-EIDSON-WEDDING-_0768.jpg WRUBEL-EIDSON-WEDDING-_1005.jpg WRUBEL-EIDSON-WEDDING-_0835.jpg WRUBEL-EIDSON-WEDDING-_0784.jpg WRUBEL-EIDSON-WEDDING-_0767.jpg WRUBEL-EIDSON-WEDDING-_0786.jpg WRUBEL-EIDSON-WEDDING-_0727.jpg WRUBEL-EIDSON-WEDDING-_0937.jpg WRUBEL-EIDSON-WEDDING-_0941.jpg WRUBEL-EIDSON-WEDDING-_1156 (1).jpg WRUBEL-EIDSON-WEDDING-_0849 (1).jpg WRUBEL-EIDSON-WEDDING-_0897 (1).jpg WRUBEL-EIDSON-WEDDING-_0899.jpg Highlights_WRUBEL-EIDSON-WEDDING-_1034.jpg Highlights_WRUBEL-EIDSON-WEDDING-_1035.jpg WRUBEL-EIDSON-WEDDING-_1037.jpg WRUBEL-EIDSON-WEDDING-_1334 (1).jpg WRUBEL-EIDSON-WEDDING-_1572 (1).jpg WRUBEL-EIDSON-WEDDING-_1384.jpg WRUBEL-EIDSON-WEDDING-_1359.jpg WRUBEL-EIDSON-WEDDING--1801 (1).jpg
In Treats Tags chocolate, ice cream, summer
Comment

Peanut Butter and Pumpkin Treats (For Your Four-Legged Friends!)

April 29, 2020 Savannah Near
// Dog Bone Cookie Cutters //

// Dog Bone Cookie Cutters //

I cannot tell you how many times during the course of this “quarantine” that I have joked with my husband that the dogs must have planned it. All of the humans stuck at home—I cannot think of something my dog dreams of more. Even though with my pre-COVID work schedule, our dog, Luke, was typically only left at home alone for a handful of hours a day. My husband is generally home by 6 or 7, and I don’t leave for work until later in the afternoon, so goes the life of a child and adolescent therapist. If we had to name who has enjoyed quarantine life the most in our home it would have to be Luke. He has no idea what is going on in the world, but mom and dad are home so that makes all well in his world. I feel like I have tried to tackle all kinds of things in the kitchen to make my time at home productive, from ice cream to making biscuits using different types of flours to cocktails to pork tenderloins, and roasting whole chickens. Though trying to the lose the novice feeling for many recipes that I have not tried before, I realized that I had left out making something special for my favorite furry friend. Sure he has gotten samples of many of things that are safe for him to eat, but nothing purely made for him. While we do not have human children, we consider Luke to be our firstborn. He loves anything on our plates, but especially loves the following: chicken and rice, Greek yogurt, eggs, sweet potatoes, peanut butter, frozen blueberries, dried pasta, and canned pumpkin. Luke is a fan of oats so I used them here instead of flour to give the treat more flavor. I also picked out a few things on his favorites list and mixed them together—he already follows me around to the point where I call him “Shadow'“ but now he will not stop harassing me for another round at the treat jar. I can’t say I blame him; mama has been known to put a few cookies away herself. Like mother, like son.

Ingredients:

  • 1 cup of canned pumpkin

  • 1/2 cup of peanut butter (tip: check your PB’s ingredients for the presence of xylitol, which is a sweetener—safe for humans but can be toxic for dogs!)

  • 2 1/2 cups of oat flour (you can make this by simply grinding or milling oats in your blender until they are powder)

    • Or you can sub in AP or whole wheat flour, just remember that you will need less of these flours about 2 cups

  • 2 eggs

Method:

  1. Preheat oven to 350 degrees.

  2. In a large mixing bowl combine pumpkin, peanut butter, and eggs. Beat until fluffy.

  3. Add in flour until it forms into a dough ball.

  4. Turn out onto parchment paper, that has been dusted with your choice of flour (sticky alert!)

  5. Knead until dough is smooth and supple and roll out with a floured rolling pin (or pressed out with your hand!).

  6. Use a floured cookie cutter and cut out your treats!

  7. Place on parchment or silpat-lined pan and bake for 25-30 minutes.

  8. Let cool and then reward your favorite quarantine and walking buddy!

DOgTreats3.jpeg Tastings.jpeg DogTreats67.jpeg DogTreats4.jpeg DogTreats5.jpeg DogTreats6.jpeg Dogtreats8.jpeg Luke.jpeg

A photo diary of Luke’s COVID adventures: many treats and tastings, walks, cuddles, trips to the fountain to cool off, naps on the couch, car rides, and watching Mom in the kitchen.

In Treats Tags dog treats, peanut butter, pumpkin
Comment
Older Posts →

Let’s be social. FOLLOW along at @savannahmakes

...lasagna with pesto and hot Italian sausage! 🇮🇹 Like Garfield, I too love lasagna. But unlike Garfield, I decided to throw mine a graduation party a let it get a little more sophisticated and grown-up! Recipe is now up on SavannahMakes.com and li Just a few bites of Texas sheet cake to celebrate my beloved state’s independence day! Happy Texas Independence Day, y’all! Recipe for the sheet cake is already on SavannahMakes.com! ⭐️ #rememberthealamo #remembersanjacinto #remembertoeat Sending you all the 💗❤️💜 from my kitchen to yours! #happyvalentinesday #biscuitlove The weather forecast for Dallas this week is: 🌧🌧🌧🌧 so I’m cozying up with plenty of soup. Starting with this one—beef vegetable! Hearty with plenty of colorful veggies, I’m pretty sure this soup accounted for 85% of my vegetable I hope your new year is off to a sweet start! Recipes are like relationships, when you don’t see one for awhile, you start to miss it. While I made lots of candy this Christmas, I didn’t make my cinni-minis at all! Making a batch of these Sending you the merriest wishes from me and my pink, peppermint clouds of divinity for a safe and happy Christmas! Merry, merry!! 💕 This recipe is now up on SavannahMakes.com and linked in my bio! 😘 #divinitycandy #christmascandy #peppermint ‘Tis the season for Christmas candy!  Give your sweet and salt tooth a gift, peanut 🥜 brittle! Sharing my family’s favorite recipe today on SavannahMakes.com and in the link in my profile! 🎄 #christmascandy #peanutbrittle Happy Friday to my fellow cookie monsters! Sending you a (virtual!) treat to start your weekend. My recipe for the ultimate chocolate chip cookie is up and it’s like a hug in your hand! 💕 Go to SavannahMakes.com or the link in my bio to bite i Sunday and baking goes together like biscuits and gravy!! My new (& improved) biscuit recipe is up with bonus recipe of sausage gravy!Beware: people (hungry husbands) will not be able to keep their hands off of them! Head over to SavannahMakes.co With @chiomegaxmas coming to a close this weekend, planning a very cozy and restful weekend for myself, with a big bowl of potato soup with allllll the fixings! Co-chairing a (virtual) Christmas market has been no joke and luckily, this soup is a cin Cookies, brownies, and ice cream pie (oh my!) Sending some virtual sweetness from me to you! ❤️💙 #election2020 Happy Halloween! No tricks here, just a treat! Remember that boxed cake experiment I did in the kitchen last week? Well this is the result—Gluten Free Spiced Bundt Cake with Cranberries and Orange Glaze!

I took a box of @simplemills vanilla, a I realized today and I hadn’t made these pumpkin spiced oatmeal chocolate chip cookies once this fall and they just went straight to the top of my weekend’s to do list! Because who doesn’t want a cookie that feels like a warm hug? 
Ending the week on a sweet note and giving our girl pumpkin pie a much deserved makeover in anticipation for all of her upcoming dinners. 💄 😜 Meet my Pumpkin Pie Chiffon Bars with a Biscoff cookie crust! If you like a crunchy pie crust and a cloud- Finally sat down and typed out the recipe for this ✨magical✨ marinara sauce my husband 🧔🏻 created! After the first bite, I immediately got up, found a pen and a piece of paper, and said he had to write down the recipe! This sauce is like a hug in a 🙌🏻Protein Power Balls with Almond Butter and Dark Chocolate🙌🏻 If you need a healthy snack that tastes like cookie dough, look no further! Recipe is below 👇🏻and on SavannahMakes.com 💙

 Ingredients:

1 1/4 cups oats

1 cup almond butter

1/2 cu
Instagram

All photography is my own, unless noted.