• Home
  • Hi, Y'all
  • Recipes
  • Favorites
  • Say Hi
Menu

Savannah Makes

Street Address
City, State, Zip
Phone Number
bringing your grandmother's recipes into the 21st century

Your Custom Text Here

Savannah Makes

  • Home
  • Hi, Y'all
  • Recipes
  • Favorites
  • Say Hi

Biscuits, they're what's for dinner (& dessert!)

September 3, 2019 Savannah Near
Biscuit_breakfastsammy.jpeg

Ah, September is here! It is month that is brimming with events and special occasions. This week I turn 29 and celebrate a co-worker’s (and favorite taste-tester’s!) pregnancy with a baby shower. The rest of the month is filled with celebrations for my sister’s birthday and pregnancy (I get to be an aunt come December!), both of my garden clubs’ obligations kick off, as well as a deep-dive into the charity luncheon I am a part of planning and in charge of selling tickets for! Also kicking off this fall, I also have the honor of serving as chairman for my sorority’s young alumnae group and my mom, sister, and I are the chairmen-elect for a large fundraiser that our sorority’s alumnae group puts on every year come fall. That is on top of having a full-time therapy case load for my real job. Plus, I also get to keep writing and creating content for my happy, tiny, corner of the internet: this website. Oh and I have a cute husband and a dog who occasionally get petted, too.

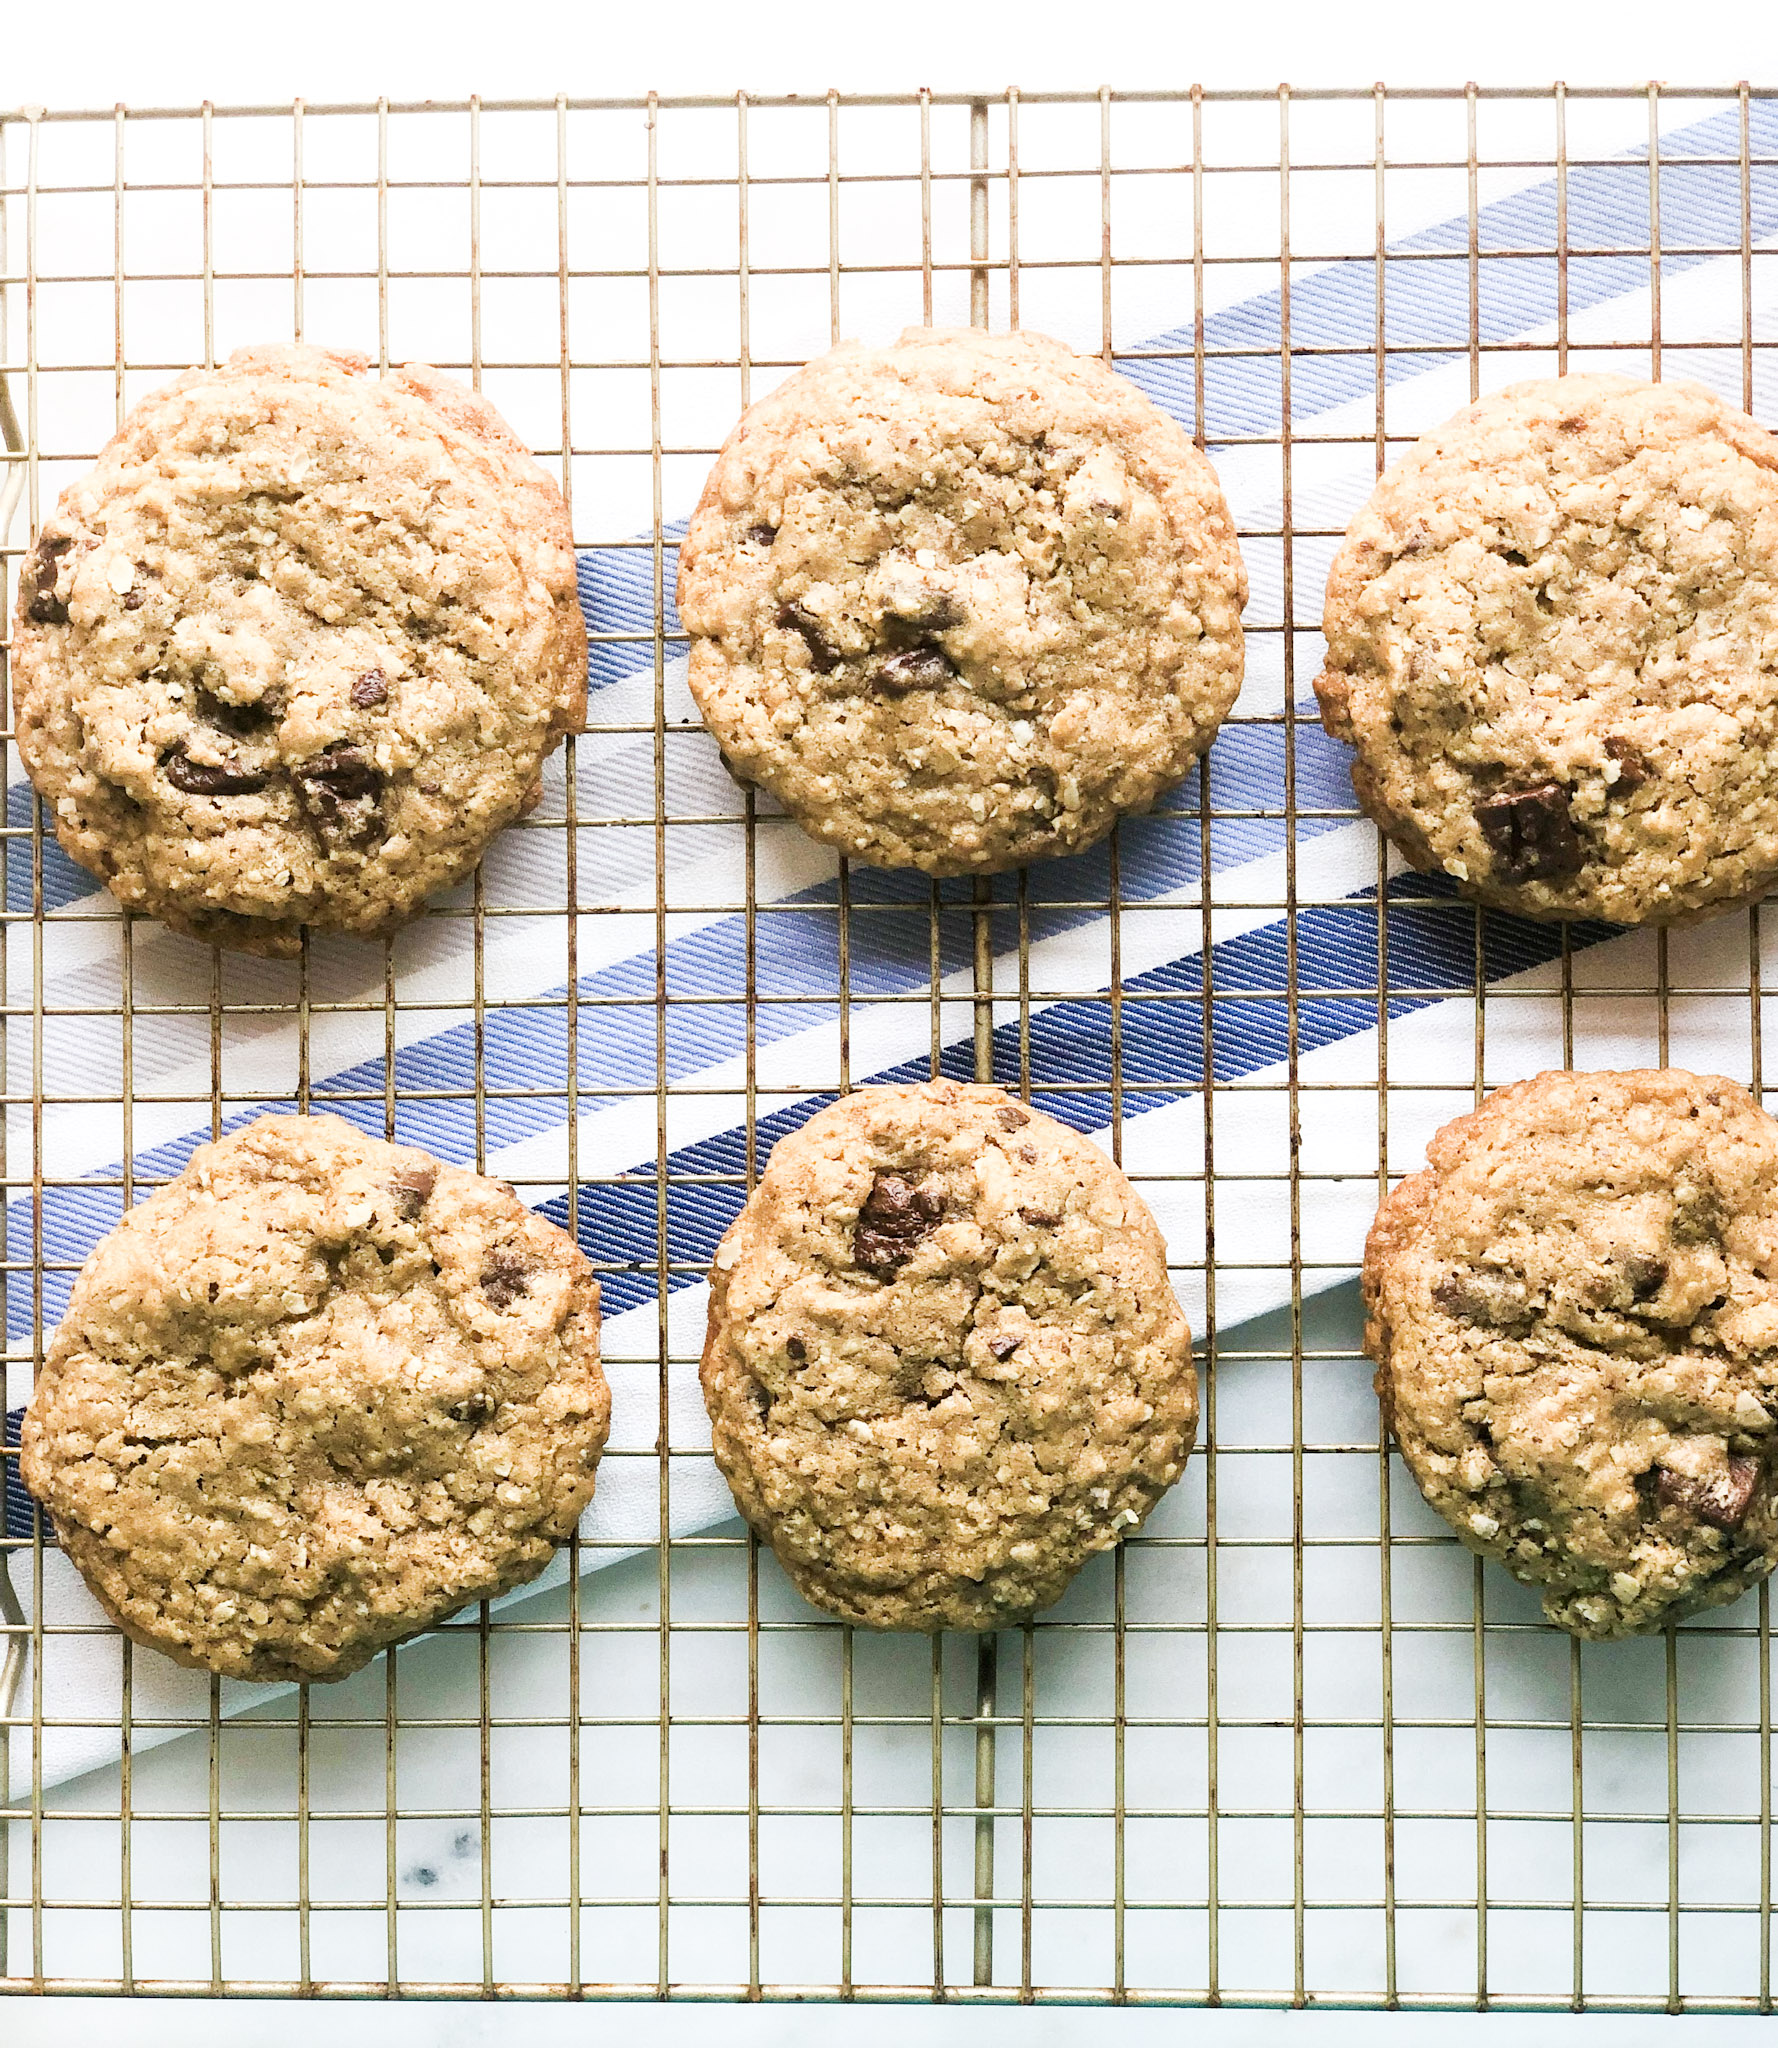
I LOVE fall! It is always busy and jam-packed and I would not have it any other way. Here’s a fun fact: just by saying “yes!” to going out of town for a friend’s wedding weekend in October, we had to say “no” to: two concerts, Billy Joel and Kasey Musgraves, in addition to missing the Red River Biscuit Showdown at the State Fair. Yes, I am sadly not competing this year. But while I may not be in biscuit two-a-days this fall like I was a year ago, I am officially naming September as Biscuit Month around here. In sharing my love of the biscuit, today I am sharing three ways to have an biscuit (besides with jam & butter!). I am also going to share my Cowboy Cheddar Biscuit and a gluten-free version in the coming weeks!

I share my obligations because sometimes you do not have time for a creative moment in the kitchen. As a therapist, I love walking people through the exercise of: when you say yes to something, you say no to something else. Sometimes, eating and cooking need to be an afterthought. It’s on those days that when I make something in the morning, like a biscuit, I might need it to support the rest of the meals heading out of the kitchen that day. Lucky for me, biscuits are a utility player and a delicious one at that! I give you le biscuit, three ways!

Biscuit_lunch.jpeg Biscuit_breakfastsammy.jpeg Biscuit_SBshortcake.jpeg

Biscuit 1: The Lunch Bunch—lunch is my hardest meal to plan. Sometimes I really just want it to be second breakfast and will have yogurt with fruit, other times that I want something heavy, like a burger, I would try to make the calorie splurge mid-day so I had a chance to burn some of it off. But if you have a plate of biscuits, you have a sandwich! Simply top with the meat of your choosing (a baked ham or roasted turkey work great) and add a little mustard. Heat in the microwave for 30 seconds—lunch is done!

Biscuit 2: Yes, the Biscuit Breakfast Sandwich—but is anyone else a fan of breakfast for dinner? How quickly does it come together when all you have to do is poach or fry an egg and make some bacon, maybe add a little avocado? Dinner done.

Biscuit 3: Strawberry Shortcake with Balsamic: Because these biscuits were made more savory than sweet, all you have to do is add some sugar to your strawberries (macerate) to add a bit of sweetness. Whip up (pun intended) some whipped cream and top with a little balsamic and dessert is done!

One pan of biscuits truly can get you through a whole day of meals!

In Dinner Tags biscuits
Comment

Peach Ice Cream

August 31, 2019 Savannah Near
public.jpeg

Happy Labor Day weekend! The official bookend of summer is upon us and in case you find yourself by a peach stand during this long weekend, needing to get your last summer fix, make this! I find that there are two camps when it comes to peach ice cream. Camp one: wants basically vanilla with peach chucks in it. Camp two: wants it to taste/smell/look like a peach, just colder. Since I’m all about taking your favorite things from each recipe and blending together, this felt like a fun one to experiment with. Here’s what I found, making a peach simple syrup is KEY! It contributes sweetness, color and translates the essence of peach very well into the milk and cream mixture. Don’t worry, it’s not as complex as it sounds—I’m going to walk you through step by step so you too can know the wonders of peach ice cream!

Ingredients:

Peach Ice Cream

- 2 1/2 cups heavy cream

-2 cups whole milk

-2 1/2 tsp salt

-3/4 cup sugar

-2 cups fresh peaches, cubed (about 5 peaches)

-1/2 cup of peach simple syrup

-2 tsp vanilla extract

Peach Simple Syrup:

-skins of 5 yellow peaches

-1 1/3 cup water

-1 1/3 cup sugar

Method:

Peach Simple Syrup

  1. Peel the skin off 5 peaches. Place the inside of the peaches into a bowl (we will need for the ice cream) and place the skins into a saucepan.

  2. Fill saucepan with water until peaches are covered. Add same amount of sugar, as you did water. For this exercise, my measurement was 1 1/3 cup for both. Stir together until dissolved.

  3. Bring peach skins to a boil for 5 minutes. Reduce to a simmer and let cook for 45 minutes.

  4. Strain peach skins and place peach simple syrup in a container to cool completely.

Peach Ice Cream

  1. Place the freezer bowl of your ice cream maker in the freezer at 0 degrees for 24 hours

  2. In a large bowl combine, milk, sugar and salt. Stir until dissolved.

  3. Add in cream, vanilla, and simple syrup and mix to combine. Cover and let chill for 2 hours.

  4. Take freezer bowl out of freezer, and add cream mix, make according to your machines settings.

  5. Add in peach chunks with 5 minutes to go.

public.jpeg
In Treats Tags ice cream, peach, summer
Comment

“Mrs. Field’s” Oatmeal-Chocolate Chip Cookies

August 28, 2019 Savannah Near
Oatmeal_CCCookies2.jpeg

“Imma make you girls a hump day treat…” Okay, yes, my mom did not wear a hot pink Juicy Suit, like Mrs. George in Mean Girls, while she made after school snacks for me and my friends. She might have left the excessive Juicy Couture wearing to me and my sister, but she was all about the after school treats. In the spirit of back to school, think back to your after school snacks: was there a better surprise to await you than a hot cookie? Negative, ghost rider. These cookies were my childhood. We used to double the recipe and take them to our family reunions and when I dressed up as Debbie Fields for Biography Day in third grade, these were the cookies I had as my prop on my cookie tray. As such, as now refer to them as the “Mrs. Field’s Cookies.”

Side bar: I’ll have to dig up the picture of me on Biography Day, it’s GOLD. I look like an overweight, middle-aged colonial woman who lost her skirt to a pair of scissors.

Ingredients:

-1 cup of butter (softened)

-1 cup brown sugar

-1 cup of sugar

-2 eggs

-1 T. vanilla

-2 1/2 cups of oats

-2 cups of flour

-1/2 t. salt

-1 t. baking powder

-1 t. baking soda

-1/2 t. espresso powder

-12 oz chocolate (dealer’s choice of wafers, chips, or chopped chunks!)

Method:

  1. Preheat oven to 350.

  2. In a stand mixer, cream together sugars and butter, add in eggs one at a time until well combined, and then add vanilla.

  3. In a food processor combine oats, flour, salt, baking soda and powder, and espresso powder, pulse until oats are powdery.

  4. Turn the stand mixer back on a gentle stir and slowly add in the dry ingredients. Once combined, add in the chocolate of your choice and mix in!

  5. Shape into golf ball size dough balls and place onto baking sheet.

  6. Bake for 10-15 minutes or until done to your liking. I found that the 12-13 minute mark ensures the gooey center and crunchy top—also know as the perfect cookie.

  7. Let your inner cookie monster shine!

Oatmeal_CCCookies3.jpeg
In Treats Tags cookie, chocolate, oatmeal, treats
2 Comments

Peach Cobbler with Salted Vanilla Ice Cream

August 19, 2019 Savannah Near
A bowl of summertime!

A bowl of summertime!

There are many things I love about the summertime: more daylight hours, blueberry picking, the smell of sunscreen, and peach season to name a few. Peach cobbler has always felt like summertime in a bowl to me. Maybe it’s the bright color or the mix of the jelly-like texture of the peaches, with the pillowy-bread top, or the fact that it tastes like sunshine personified? I always knew it was the start of summer when my mom made a peach cobbler on Memorial Day Weekend, and then through out each holiday in the summer, made from peaches that we usually pick up from a peach orchard not far from our family’s farm in East Texas. The cool thing about cobblers is that is feels like everyone’s family has their own recipe and I love seeing how everyone puts their own spin on things—keeping the family traditions alive. I love the fact that this is the recipe my grandmother made, my mother makes, and my sister and I will continue to make. Each adding our own touches to make it our own. My mom doubles the recipes to make it thicker and cooks it longer, my sister makes her gluten free, and I macerate my peaches (which means nothing more than letting sugar break down fruit) and added the ice cream touch to make it a little extra special!

This is our family’s peach cobbler recipe and it reads a little like Miss Truvy’s “Cuppa-Cuppa-Cuppa” recipe from Steel Magnolias. I added the Salted Vanilla Ice Cream because the salt brings out the natural sweetness from the peaches, as well as cuts through the syrup-y sweet taste.

Peach Cobbler Recipe

Ingredients:

-1 cup of flour

-1 1/2 cups of sugar

-1/4 tsp of cinnamon

-1 cup of milk

-2 tsp baking powder

-1 stick of butter

-12 overly ripe peaches (you can leave them in the window sill to help them ripen!)

Method

  1. Peel peaches and cut into 1/2 in. size, sprinkle with half a cup of sugar and cinnamon. Set aside to macerate for 10-15 minutes.

  2. Mix together flour, sugar, milk, and baking powder to make a paste.

  3. Pour paste into a greased 9x13 baking dish.

  4. Cube one stick of butter of the paste.

  5. Pour peaches over the butter.

  6. Bake at 350 for 45-50 minutes or until it bubbles all around sides and in the center and browned.

Salted Vanilla Ice Cream

Pre-freeze ice cream maker bowl at 0 degrees for 24 hours.

Ingredients:

-2 cups of whole milk

-2 1/2 cups of heavy cream

-1 cup of sugar

-1 tbs. of kosher salt (I use Diamond)

-2 tsp. of vanilla extract

Method:

  1. In a large bowl, combine milk, sugar, salt. Stir (do not whisk) together until sugar and salt are dissolved.

  2. Add in cream, vanilla extract, and combine. Cover and chill for 2 hours.

  3. Pull out mix, and give it a final stir, taking care not to make it bubbles, as you do not want to add air.

  4. Pour into ice cream bowl and make according to your machine’s settings.

  5. Put in a freezing container and let harden for 3-4 hours or overnight.

  6. Or enjoy immediately over your freshly made peach cobbler and sprinkle with a little extra cinnamon!

PeachCobbler4.jpeg
PeachCobbler5.jpeg
In Treats Tags peach, cobbler, summer, family, butter, ice cream
Comment

Butterfinger Ice Cream with swirled peanut butter

August 12, 2019 Savannah Near
ButterfingerIceCream.jpeg

As the temperatures ramp up in Dallas, my obsession with perfecting ice cream recipes seems to be surging right along with them. I promise, come September 1st, you will see a green vegetable grace this site—maybe even two! But for now, the ideas keep coming, so I’m going to keep churning out (pun intended) the cream. Growing up Butterfinger was my favorite candy, a preferred treat of mine post soccer games. I loved the way the pieces broke off and it was still crunchy while being enrobed in chocolate. Delicious. I’ve tried Twix as a mix in for ice cream and the cookies just do not hold up to the ice cream and the crunch gets lost. All that is solved with the use of Butterfingers. It crumbles beautifully, breaks off into multiple sizes and shapes, the color is a fabulous burnt orange, and stays crunchy! Add in a little peanut butter and you’ve got yourself quite a treat—almost becoming mousse-like when churned. YUM!

Butterfinger Ice Cream with Swirled Peanut Butter:

Pre-freeze ice cream maker bowl at 0 degrees for 24 hours.

Ingredients:

-2 1/2 cups of heavy cream

-2 cups of whole milk

-1/2 cup of sugar

-2 1/2 tsp of kosher salt, remember the peanut butter will add salt too!

-2 tsp vanilla extract

-3/4 cup of smooth peanut butter (spray your measuring cup with nonstick spray prior to filling)

-1 cup of chopped/crushed Butterfingers (this took about 10 of the fun-sized bars)

Method:

  1. In a large bowl, combine milk, sugar, salt. Stir (do not whisk) together until sugar and salt are dissolved.

  2. Add in cream and vanilla and combine. Put in refrigerator to chill for 2 hours.

  3. Pull out mix, and give it a final stir, taking care not to make it bubbles, as you do not want to add air.

  4. Pour into ice cream bowl and make according to your machines settings.

  5. Add in Butterfinger pieces with 5 minutes to go. Then add in your peanut butter—slowly drizzle it in. The candy pieces will grab the peanut butter (they make the texture a little more irregular)—incorporating it easier.

  6. Put in a freezing container and let harden for 3-4 hours or overnight.

  7. As the little alien dude says in the new Butterfinger commercial, “Nobody lay a finger on my Butterfinger.”

  8. Make a sign to go on your ice cream with the same sentiment.

A little abstract ice cream art…

A little abstract ice cream art…

In Treats Tags ice cream, candy, butterfinger, cold, summer

Salted-Vanilla-Nutella Ice Cream

August 9, 2019 Savannah Near
Nutella_SV_IC1.jpg

We made it to the weekend! Grab arm in arm with the person next to you and sprint across the finish line to that celebratory, Friday-feeling. With summer winding down, I have been pulling out all the stops on the ice cream recipes. After seeing Coffee Chip put so many smiles on the faces of my family, friends, and co-workers, I started playing around with my favorite condiment: Nutella. It was only a matter of time before I turned it into an ice cream. Those who have taste-tested (Hi, Rachel & Kristina!) have loved it so far and I hope you will too!

Salted-Vanilla-Nutella Ice Cream

Pre-freeze ice cream maker bowl at 0 degrees for 24 hours.

Ingredients:

-2 1/2 cups of whole milk

-2 cups of heavy cream

-1 cup of sugar

-1 tbsp. of kosher salt (I use Diamond)

-2 tsp. of vanilla extract

-1/2 cup of Nutella

Method:

  1. In a large bowl, combine milk, sugar, salt. Stir (do not whisk) together until sugar and salt are dissolved.

  2. Add in cream, vanilla extract, and combine. Cover and chill for 2 hours.

  3. Pull out mix, and give it a final stir, taking care not to make it bubbles, as you do not want to add air.

  4. Pour into ice cream bowl and make according to your machine’s settings.

  5. Slowly drizzle in Nutella directly into ice cream mix with 5 minutes left to go. The Nutella will be resembling the texture of stracciatella. Tip** spray your measuring cup with non-stick spray so it will slide out easier!

  6. Put in a freezing container and let harden for 3-4 hours or overnight.

  7. Tell yourself that you will not eat the whole thing in one sitting.

  8. Forgive yourself for breaking that promise.

Nutella_SV_IC2.jpg
In Treats Tags nutella, ice cream, vanilla
Comment

GF Blueberry-Banana-Oat Muffins

August 5, 2019 Savannah Near
GF_blueberrymuffins7.jpg
GF_BlueberryMuffins.jpg
GF_BLueberryMuffins6.jpg
GF_BlueberryMuffins2.jpg
GF_BlueberryMuffins3.jpg
GF_blueberrymuffins7.jpg GF_BlueberryMuffins.jpg GF_BLueberryMuffins6.jpg GF_BlueberryMuffins2.jpg GF_BlueberryMuffins3.jpg

Perhaps I should start calling these the law firm muffins? While I love the fictional law firms of Cooper-Banks-Mackenzie and Crane, Poole and Schmidt (shout out to you if you got the Father of the Bride 2 and Boston Legal references, respectively), these are my Gluten-Free-Blueberry-Banana-Oat Muffins, LLP. Yes, their title is a mouthful, but so is their flavor and heavenly texture. As the saying goes—if the shoes fits?

I digress.

While I am not 100% gluten-free, recently, I have parked it over to my weekend food consumption list. When I did my MRT testing earlier this summer, wheat came back as a yellow food for me. Meaning it could cause a reaction, so I took it out of my diet for 30 days, and I did notice a difference when I added it back in—sadly, noticed a difference I should say. Your girl still loves her some banana bread though, and I was not about to park banana bread on my weekend only food list. So I went back to my food science/nutrition knowledge from college, determined to give one of my favorite baked goods a makeover. As Galinda says to Elphie in Wicked, “We’re gonna make you pop-u-lar!” For this exercise, me being Galinda and the banana bread being Elphie. If you don’t know what song I’m referring you, please bless your day with this gem.

I’ve been testing out these muffins and recipe on both the gluten-free and gluten-full people in my life. Happily I can report that both populations have asked for second and in some cases a third.

The prosecution rests, your Honor. These muffins are in fact delicious. Recipe is below and can be amended to suit your dietary needs. Want to use coconut oil and sugar instead? Please do! Cut the milk, butter, and egg and make them vegan? Why not! Want to go full freight and use AP flour and white sugar, honey, you have my blessing!

Ingredients:

-2 cups of oat flour (remember you can make your own in a blender!)

-2 1/2 tsp of baking powder

-1/4 tsp. ground cinnamon

-1 tsp salt (I use Diamond Kosher)

-3/4 cup of oats

-3 over-ripe bananas, mashed to your liking

-3/4 cup of brown sugar (or get coco-nutty and make it with coconut sugar)

-1 stick of room temp. butter

-1 large egg

-1/4 cup of milk with 1 tbs. of oil (oat flour and oats are thirsty girls—the oil helps keep everything hydrated)

-1 cup of blueberries, dusted in a flour

Method:

1. Preheat oven to 350 degrees. Grease a muffin pan or put in muffin liners

2. In a medium bowl, whisk together oat flour, oats, baking powder, salt, and cinnamon.

3. In a separate bowl, cream together sugar, and butter. Add in milk, the egg, and then bananas last. Stir dry ingredients into wet ingredients then add in blueberries (Tip** dust your blueberries in a few teaspoons of oat flour before adding them in. This keeps them from sinking to the bottom.

4. Divide batter evenly between prepared cups, a full Tovolo scoop or about 1/3 cup to each. Bake until tops spring back when lightly touched, about 20-25 minutes. Cool in pans 5 minutes, then remove to wire rack to cool completely.

In Breakfast, Treats Tags muffins, gluten free, blueberries, healthy, oat flour
Comment

Southern Buttermilk Biscuits Part Two

August 2, 2019 Savannah Near
BiscuitsHowTo.jpg

Now that we have the story out of the way, let’s get down to business of biscuit making. Biscuits are the perfect test for any person who loves being covered in flour. Like a toddler, they cannot be rushed and like a teen, they can have a mind of their own. My friends, I give you my version of the perfect Buttermilk Biscuit:

Ingredients:

 - 4 cups White Lily Self-Rising Flour

- 1 teaspoon salt (I use Diamond Kosher)

-1 teaspoon of sugar

-1 teaspoon baking powder

-1/2 teaspoon baking soda (yes you’re using self rising but these give a little extra lift!)

-1/2 cup of butter flavored Crisco (1/2 a stick)

  • Plus additional 1/8 of a cup for greasing baking surface

-1 1/2 cups of buttermilk (Don’t have buttermilk, don’t be sour ;) … you can make it as fast as you can say “I’m out of buttermilk”… measure out as much milk as you need and then add in one tablespoon of vinegar or lemon juice per cup. Let sit for 10 minutes and you are good to go!)

-3 tablespoons European Butter melted, for brushing at the end

Yields:

 12 Biscuits

Method

Preheat oven to 425 degrees.

  1. In a large mixing bowl, combine flour, sugar, baking powder and soda, and salt. Once mixed together, take Crisco and break into smaller pieces and add to flour mixture.

  2. Using a pastry blender or your hands, cut Crisco into dough. Breaking up into pea size pieces and a crumbling texture.

  3.  Make a well in the center for the flour mixture and pour in buttermilk. I always add in my cup measurement first and then add in my last 1/4 as I need it. If mixture seems dry and does not pull away from sides of bowl, add a touch more of buttermilk, a tablespoon at a time.

  4. Use a spatula to wipe down sides of bowl while working to combine. Once brought together, turn out onto a floured surface.

  5. Knead gently, about 5-7 times, until dough has a smooth consistency.

  6. Then begin the folding portion: flour your rolling pin, and then begin rolling our your dough into a rectangle about 6 in. wide and 9 in. long and about half an inch thick, take bottom side of dough, and fold the dough in half. The bottom edge and the top meet. Turn the dough, to the right once, then roll out again (to about half an inch), and then fold in half and turn back to the left. Complete this folding process 5 times—you are building layers into your biscuits.

  7. Cut out 7-8 biscuits with 2¾ inch biscuit cutter (second to largest in set). Combine and roll scraps and cut out remaining biscuits. **Do not twist the cutter when you push down, this will pinch the seams shut that you just worked so hard to create. Keep the motion up and down, and flour your cutter between each.

  8. Place on a baking sheet or cast iron skillet, pre-greased with Crisco or butter, with sides touching. **Remember, biscuits are friendly and LOVE neighbors!

  9. Bake for 15-20 minutes or until golden brown. Brush tops with melted butter immediately out of the oven.

Click through the pictures below for a step by step of how to make a biscuit

BiscuitsHowTo.jpg BiscuitsHowTo2.jpg BiscuitsHowTo3.jpg BiscuitsHowTo4.jpg BiscuitDough.jpg RollingBiscuitDough.jpg BiscuitHowTo1.jpg Biscuitlayers2.jpg BiscuitsCooked.jpg
In Breakfast Tags breakfast, biscuits, southern, butter, crisco
Comment

Southern Buttermilk Biscuits Part One

July 31, 2019 Savannah Near
Biscuits.jpg Biscuits2.jpg Biscuits1.jpg

I really feel like these do not need an introduction, but perhaps my fascination with these little dough pucks does. When I set out to write this post I realized how, as good Southern recipe goes, this begins with a story. So I broke this post into two parts. The first is the story, the second will be the recipe and the method.

When in graduate school and still living with my parents (shout out to that back home baller life), my father kept remarking how making the perfect biscuit eluded him. Given his more than proficient cooking skills, especially for Southern staples he grew up on, I decided to try my hand at making a batch one day on a whim. I wondered how hard it could truly be. Truth be told, I was probably avoiding writing a paper for my psychopathology class. After doing some quick recipe research, preheating my oven, and about 30 minutes after remarking that he always underworked his dough, I presented him with a pan of freshly made biscuits. Between me, my mom and dad, all 12 biscuits were devoured in the span of 2 hours. My dad and I continued to pursue the perfect biscuit: recipe and technique. Both of us have a bit of competitive edge; therefore, it was only a matter of time before this became a ride on the trash talk express, and that, my friends, is where this story takes a departure into interesting.

LADIES AND GENTLEMEN, LET’S GET READY TO RUMBLEEEEEEEEE…

In this corner: standing at 5 foot, 4 inches tall, the butter-enthusiast herself, Savannah “like the city” Eidson (this was pre-marriage, I’ll use my maiden name)…

In this corner: standing at 6 foot, 4 inches tall, the Crisco crusher himself, purveyor of the 5 P’s, former offensive guard for America’s team, Jim “better get two of those” Eidson…

So now that you have a sense of the height difference between me and my dad, you can probably guess that there is a slight difference between our hand sizes and when I say slight I mean significant. Base of my palm to the tip of my third finger is just under six inches. I cannot throw a regulation size football properly. Read: my hands are tiny. My father’s hand measurement is closer to 8 inches. His hands are GIANT, which was wonderful for the many pass-protection drills, but not so much for biscuit making. Why you ask? Because there is a significant difference between the amount of force my dad and I create when we work a dough. But we have the opposite problem, he is worried that his large hands are going to overwork the dough and he underworks it. I’m worried my delicate digits are going to underwork the dough, so I overwork it (#psychology).

In addition to our size differences, we were also on different teams of fat. My dad believed Crisco was the finer choice, as it is what he grew up with in Alabama, and thought it resulted in a crisper biscuit top.

I was team butter all the way. I thought it made a more flavorful, hydrated dough, as it imparted more steam into the dough when baked.

Like all good rivalries, we decided to have a biscuit-off around Thanksgiving and it was a draw (can you say fixed?). I was feeling a bit unsatisfied with the results and then stumbled upon the best news ever. The great State Fair of Texas held a biscuit-off every year called the “Red River Biscuit Showdown” that is held during the Red River Shootout football game. This was my chance. I would tell my dad that we were taking this to the field (errr…actually the Fair) but you catch my drift. It would be a showdown of sorts, and instead of it being between OU and Texas, it would be between me and my dad. Or so I thought.

It turns out that participants for the biscuit competition are drawn randomly, which you have to first apply for, and only 14 are chosen. As it is a live cooking demonstration, they can only accommodate based on the number of ovens they have. Dreams. Dashed. We decided it was unlikely that both of us would be chosen. So I applied for the competition, we called a truce between the fats, and I happened to be selected (can you say beginner’s luck?). My dad and I spent July (when you are notified of your selection) through October perfecting my biscuits. My former opponent was now my biggest ally and taste taster. Things I figured out during my biscuit practice drills:

  1. Biscuits cannot be rushed. If you are nervous or anxious, two things happen: your body temperature rises and your muscles tense. Anytime I’ve made biscuits in a pinch for time, they have always turned out tough and have not browned properly.

  2. You need to keep things cold. In addition to keeping your psyche on ice, your utensils, bowls, and any other biscuit paraphernalia need to be chilled too.

  3. Crisco is more forgiving than butter. Crisco is shelf stable, meaning it does not need to be refrigerated, and in a competition that is very helpful.

  4. If you want to use butter, freeze the sticks whole first. Shout out to Southern Living for this tip. You can get a grater and literally grate frozen butter over your flour to cut it in. Genius.

  5. Flour makes a difference. Yes, your standard all-purpose flour is great for a Saturday morning biscuit at home. But want to take it to the next level? Use a self rising flour. Before the competition, I ordered 20 pounds of White Lily Self Rising Flour. Why so specific? Because White Lily is made from a softer type of wheat that results in a more tender flour, ergo a more tender biscuit.

  6. If you are going to use butter, make it European—oui oui. It has a higher milk fat content, and will make the inside more fluffy. You’re already eating a biscuit, this is not the time to try and make them a diet food.

  7. Oven temperature is crucial. At the Fair, my oven panel went out because the circuit was shorted (thank you to ESPN College Game Day) and I had to be moved to another oven. My oven never quite got hot enough and my biscuits did not brown properly.

  8. Unlike the saying “good fences make good neighbors” biscuits LOVE neighbors. The closer, the better. It helps them rise up.

  9. If you use self rising flour, or any baking soda on its own, you must use an acid to cause a reaction. Most of time this is buttermilk.

  10. Use your cooking utensils instead of your hands as much as possible. Cut in your fat with a pastry cutter, mix your milk in with a wooden spoon or spatula.

P.S. If you made it to the very end of this post. BRAVO! Thank you for sharing my love and pursuit of the perfect biscuit. 

Got my game face on at the Red River Biscuit Showdown at the State Fair of Texas! As you can see there are stands in the back and family members and fellow biscuit enthusiasts can sit and enjoy the competition. I had over 20 people show up in suppor…

Got my game face on at the Red River Biscuit Showdown at the State Fair of Texas! As you can see there are stands in the back and family members and fellow biscuit enthusiasts can sit and enjoy the competition. I had over 20 people show up in support, but all of them are standing on the barriers. Hence all the empty seats!

A few of the 20! Shout out to the Crain family for stopping by to cheer me on!

A few of the 20! Shout out to the Crain family for stopping by to cheer me on!

In Breakfast Tags breakfast, biscuits, bread
Comment

Green Goddess Dip

July 29, 2019 Savannah Near
Screen Shot 2019-07-23 at 3.52.46 PM.png

The weeknight version of chips and dip!

This yogurt dip is completely versatile, going from your veggie tray to your salmon and could not be more simple to throw together.

In a food processor combine:

-1 cup of Greek yogurt (unsweetened)

-1/2 an avocado

-1 handful of cilantro

Blend until combined. To thin it out and make a more dippable (or spreadable) consistency, add in a drizzle of olive oil, I did 4 tablespoons, add salt to taste, and then blend together again. I use the Breville Control Grip to make this and it literally could not be easier. See it here.

I like for the consistency to be similar to thick queso. Then I can turn on tejano music (Selena Forever!) and play out my fantasy that I’m actually eating chips and queso. And while this dip may not turn me into a goddess, it certainly makes me feel like one.

In Gluten Free, Sides Tags healthy, greek yogurt, avocado, carrot
1 Comment

Blueberry and Orange Zest Scones

July 29, 2019 Savannah Near
BB_Scones.jpg

Intimidated by homemade scones? Don’t be! They are nothing more than a biscuit that made it out the door with lipstick and heels on! Read: a fancy biscuit.

The great thing about these is that you can add whatever flavors you like. Chopped chocolate: you bet, cherries: why not, and cheese and chives: it’s a no-brainer. I used Cara Cara oranges here—which is the Navel’s more sassy/tart sister, and their juice is a little more pink in color, and fresh blueberries.

You can also make them as big or as small as you want! Baby blueberry scones would be perfect for a baby shower, and easier to fit on a cocktail plate.

This recipe allows the use of a stand mixer. If Queen Ina says you can use a stand mixer to make scones, who am I to argue with her? Don’t forget that unlike a biscuit, scones are vain and they want to shine! So the egg wash before baking is essential!

Method:

1. Preheat oven to 400 degrees

2. Take 1 Cara Cara orange and zest 2 teaspoons worth. Then, juice 4 tablespoons worth of liquid from the orange. For me, this took both halves.

3. Measure out 1 cup of blueberries and place them in a colander.

Tip: Take a spoonful of flour and toss with blueberries; this will keep them from falling to the bottom of the mixing bowl and the baking container, too!

4. In a stand mixer with the paddle attachment, put in 4 cups of all-purpose flour, 2 tablespoons sugar, 2 tablespoons of baking powder and 2 teaspoons of salt (this seems like a small amount but you're using salted butter) and mix together on the lowest speed.

5. Once combined, take 3 sticks of cold, salted butter and cut into 1/2 in. pieces. With the mixer still on the stir setting, add the butter to the flour mixture.

6. Let butter break down evenly into flour mixture, into pea sized pieces and the flour should look crumbly.

7. In a 2 cup measuring cup, pour in 1 cup of heavy cream (I never said these were low fat) and add in 4 beaten eggs (extra large), and the orange zest and juice.

8. Add blueberries into flour and then add egg/cream mixture, with the mixer still on the stir speed. Mix to barely combine, mixture should pull away from the sides and wrap around the paddle. There will still be flour in the bottom of the bowl but the egg mixture will be absorbed fully.

9. Take dough and turn it out to a lightly floured surface and knead a few times (don’t forget to flour your hands!) and knead enough to where the dough is no longer sticky.

10. Flour a rolling pin and roll out dough to 1 inch thick.

11. Take a 2 inch biscuit cutter, dip it in flour, and punch out 6 scones.

12. Combine scraps, re-knead and roll out to 1 inch.

13. Punch out 6 scones.

14. Repeat process and punch out as many as can fit on scraps.

15. Place on 2 parchment-lined baking sheets.

16. Combine one egg and a splash of water and brush tops of scones with egg wash. Sprinkle tops with sugar.

17. Bake for 20-25 minutes.

18. Enjoy!

Scones.jpg
In Treats Tags blueberry, orange, scones
Comment

Coffee Chip Ice Cream

July 29, 2019 Savannah Near
CoffeeChipIC2.jpg

If you follow me on Instagram, you might have seen a story post of mine a few weeks back where I could not actually stop myself from eating ice cream. This recipe was what yielded the ice cream in question, and yes, I heard that dreaded sound of the spoon scraping the bottom of the tub.

My favorite flavor combination would have to be coffee and chocolate. Nothing else comes close for me. I am curious what is yours? Leave in the comments below! After spending the July 4th week perfecting my peach ice cream, I finally decided I had a delicious and reliable enough base recipe to start making other flavors.

This ice cream is creamy, but not too soft. Sweet, but with plenty of bold flavor to cut through. And the cream eats cleanly—don’t you just hate it when ice cream coats your mouth? I truly believe this is the best ice cream I have ever had or made. My friends, I give you Coffee Chip Ice Cream.

Coffee Chip Ice Cream Recipe:

Pre-freeze ice cream maker bowl at 0 degrees for 24 hours.

Ingredients:

-2 1/2 cups of whole milk

-2 cups of heavy cream

-1 cup of sugar

-2-3 teaspoons of kosher salt, total personal preference here and I’ve used 2.5 teaspoons before

-2 tablespoons of espresso powder

-1 cup of chopped semisweet chocolate chunks

Method:

  1. In a large bowl, combine milk, sugar, salt. Stir (do not whisk) together until sugar and salt are dissolved.

  2. Add in cream, combine, and espresso powder, a tablespoon at a time, and make sure to stir out clumps. Put in refrigerator to chill for 2 hours.

  3. Pull out mix, and give it a final stir, taking care not to make it bubbles, as you do not want to add air.

  4. Pour into ice cream bowl and make according to your machines settings.

  5. Add in chocolate chunks with 5 minutes to go.

  6. Put in a freezing container and let harden for 3-4 hours or overnight.

  7. Do not eat all of the ice cream in one sitting.

  8. Do as I say, not as I do.

CoffeeChipIC.jpg
In Treats Tags ice cream, coffee, chocolate
Comment

Mexican Hot Chocolate Brownies

July 29, 2019 Savannah Near
MXHCBrownies.jpg

The temperature might be too hot for Mexican Hot Chocolate, (Dallas in July—send help!) but it’s always the right time of year for Mexican Hot Chocolate Brownies. If these brownies were a wine their tasting notes would include: sweet, slightly smokey, with hint of spice, cinnamon-forward, and finishes with coffee.

Consider this your warning, these babies can be addictive!

Ingredients:

For Brownies:

-10oz of melting chocolate wafers

-2 sticks of butter

-1 1/2 c of sugar

-4 large eggs

-1 tsp vanilla

-1 1/2 c of AP flour

- 1 1/2 tsp espresso powder

-1/4 tsp chipotle chili powder

-1/4 tsp cayenne

-1/2 tsp salt

- 1/2 tsp cinnamon

Icing:

-2 cup of semisweet chocolate chips

-10 oz cinnamon chips

-1 stick of butter

-1/4 tsp cayenne

-1 tsp espresso powder

Method:

Preheat your oven to 350 degrees.

In a saucepan, combine your chocolate wafers and 2 sticks of butter on medium heat until melted. Careful not to burn! Set to the side to cool.

In a bowl combine, sugar, eggs and vanilla.

Add egg mixture to cooled chocolate mixture and stir.

In another bowl, combine flour, espresso powder, chipotle powder, cayenne, salt and cinnamon and stir together.

Mix dry ingredients into wet and stir together and pour into a parchment lined pan. I used 9x13 and bake for 25-30 minutes.

Now for the world’s easiest icing:

In a microwave safe bowl, combine semisweet chocolate chips, cinnamon chips and butter. Microwave in 30 second increments until melted together and add your spices!!

This would also be FABULOUS served over ice cream but I digress...

Pour the icing over the brownies while they are still warm and finish with a little smokey, flaky, sea salt!!

Enjoy!

Vanilla Smooth-shake

July 29, 2019 Savannah Near
Screen Shot 2019-07-23 at 3.02.00 PM.png

My milkshake brings all the boys to the yard… okay, maybe not my milkshakes.

My biscuits, perhaps?

I think we can all agree that while try our hardest to enjoy this culinary diverse world we live in, in moderation, it is very easy to overindulge. When you love sweets as much as I do, it can be hard to say no. What’s a girl to do?

Make a smoothie that tastes like a milkshake. The prosecution rests, your Honor and I dub thee a “smooth-shake.”

Before we get to the smooth-shake, if you have a sensitive stomach, like me, protein powders can be very hard on your digestive system. I have tried many over the years and figured out whey and soy protein powders are just not for me. Luckily, I stumbled upon Orgain Protein Powder while at Costco and it has been a happy union ever since.

Ingredients:

-1.5 cups of unsweetened, vanilla almond milk

-1 scoop of vanilla protein powder (I used Orgain here)

-1 banana (or naner if you are like me)

-1/4 tsp of cinnamon (documented to have blood sugar stabilizing properties)

-1.5 to 2 cups of ice, depending on how thick you like your smoothies

Method:

Starting with your almond milk and finishing with your ice (because it will jam the blades if you add it before everything else) throw all of listed ingredients into the blender. I use my blender’s smoothie setting. Let her rip and finish with a sprinkle of cinnamon to make it feel special. I give you a smooth-shake!

Tags smoothie, protein shake, healthy
Comment

Gluten Free Blueberry Cobbler

July 29, 2019 Savannah Near
BlueberryCobbler1.jpeg BlueberryCobbler4.jpeg BLueberrycobbler6.jpeg Blueberrycobbler5.jpeg BLueberryCobbler3.jpeg

Two truths and a lie: I once cast over 500 votes for Kelly Clarkson in finale of season one of American Idol (Kelly, feel free to send a royalty check at any time) using both land lines at my parents house, my mom’s cell phone, and the cell phone I got in 5th grade for “emergencies,” I was once featured on episode of a hunting show filmed on my family’s ranch, and I am gluten free.

What’s that you say? Gluten free is the lie? You are correct! For those curious about the truths: the show is called Brush Country Monsters, the episode is “West Texas Whitetails.” I was also on the opening credits for season one of the show… I digress.

I am not gluten free; however, many people in my life are. Namely, my sister. As someone who views the making and giving food as one of the love languages (sorry, Gary Chapman), the thought of someone having to watch everyone else enjoy a treat that they can’t makes me sad. I wanted to change that and the Good Lord gave us oat flour—His mercies are indeed new every morning.

My friends, I give you Gluten Free Blueberry Cobbler...

Ingredients:

-1 cup of sugar

-1/2 tsp kosher salt

-2 to 3 cups of blueberries, depending on your berry-enthusiasm scale (mine is on the higher end)

-1 cup of oat flour

-1 tbsp of baking powder (these are generally gluten free, but always double check the starches in the ingredients)

-1 tbsp of the juice of an orange

-1 tsp orange zest

-1 cup of milk

-1 tbsp of vegetable oil (or your preference of neutral flavored oil)

-1 stick of butter

Method:

Preheat your oven to 350 degrees. In a mixing bowl combine: sugar, salt, oat flour and baking powder and mix together. Add in the milk, oil, orange juice and zest and stir. Why the extra oil? Well, oat flour is a drier flour and it will be receiving moisture from the butter we add in later, but this oil is going to help the batter stay tender while baking.

In a baking dish (mine was 9x13), butter or coat the dish with a nonstick cooking spray. Add in your batter mixture to the baking dish. Then cut a stick of butter into 1/2 tsp size pieces, there are 8 tbs in each stick of butter, so you will have 16 pats of butter. Distribute the butter pats evenly on top of the batter. Then pour your blueberries on top of the batter and butter. Bake for 45-50 minutes or until cooked and golden brown.

Goes perfectly with ice cream and that’s no lie.

BlueberryCobbler4.jpg
In Gluten Free, Treats Tags blueberry, cobbler, summer, dessert, gluten free, oat flour
Comment

Watermelon Caprese Salad

July 29, 2019 Savannah Near
WCSalad.jpg

I think we can all agree that when the temperatures rise (especially in Texas) that you rarely will crave a hot meal in the thick of summer. Unless that hot food is queso, which I crave 24/7. If I am seeing clients late, I rarely want to make a big expression with my dinner. Often times I am eating dinner at about 8:30 on my late client nights, and just want a quick dinner before bed. Enter Watermelon Caprese Salad. It’s quick, easy, delicious, and like the earth, watermelon is mostly made up of water (try 90%!) so it will help keep you hydrated in the heat of summer. Filling from the cheese and fiber from the watermelon, in addition to being hydrating and pretty to look at, this salad would graduate valedictorian. Serve as a quick, meatless dinner, salad option, or a side dish. Could also be styled on a skewer!

Ingredients:

-4 cups of cubed watermelon

-8 oz. of mozzarella

- large handful of basil, hand torn yielding about 1/2 c of basil

-2 to 3 second drizzle of olive oil (don’t count in Mississippi’s)…which gets you around 1.5 tablespoons

-a drizzle of balsamic reduction

-pinch of flaky sea salt and pepper (if it suits you)

Method:

Cube up a watermelon into bite size pieces (about 1 in. cubes). Then break the mozzarella into bite size pieces. Hand tear the basil (this is essential because the heat of your hand releases the oils in the basil, thus making it more fragrant/delish). Toss together and sprinkle with some flaky sea salt. Finish with a balsamic reduction, you can make your own on the stove or buy it at your grocer, and your preferred olive oil.

Buckle up, my friend. Your taste buds are going for a wild ride.

P.S. I’ve used peaches before too, and while good, the watermelon soaks all of these flavors up like a sponge.

In Dinner, Sides, Healthy Tags salad, caprese, watermelon, summer
Comment

Rainbow Rice Krispie Treats

July 29, 2019 Savannah Near
A colorful treat next to a wall of Blue Willow and Tobacco Leaf—this is literally the stuff of my dreams.

A colorful treat next to a wall of Blue Willow and Tobacco Leaf—this is literally the stuff of my dreams.

They say if you follow a rainbow and you’ll find a pot of gold. And while Lucky Charms are magic and delicious (has anyone at General Mills ever thought about just selling the marshmallows from Lucky Charms separately? Call me, General Mills.) I personally believe the pot would be filled with these Rainbow Rice Krispy Treats. Why you ask? Because they combine your two favorite Saturday morning cartoon cereals into one with melted marshmallows and butter. So basically this is the stuff of your kindergartener-self dreams, or at least mine, except my hands won’t be covered in dried and peeling Elmers Glue while I eat them. Or maybe they will be, after all, I do work with kiddos all day…

Here is the recipe and it could not be simpler. Have little hands wanting to help in your kitchen? Let them measure out the ingredients and press the mixture into the pan. Have a gluten allergy? Good news! Fruity Pebbles are GF and you can buy Rice Krispies that are GF—easy peasy swaps!

Ingredients:

-5 cups of Fruity Pebbles

-3 cups of Rice Krispies

-4 tbsp of butter

-8 cups of Jet-Puffed marshmallows

-non stick cooking spray

Method:

Combine the Rice Krispies and Fruity Pebbles into a large bowl and stir to make sure there is an even distribution. Set aside. In a large pot, over low heat, melt the butter. Once melted add in your marshmallows, and stir until melted. Tip: To keep the marshmallows from sticking to your mixing utensil, spray with a nonstick cooking spray before stirring. Pour the cereal mixture into the pot, coating the cereals with the melted marshmallows. Pour out the mixture on to a parchment-lined baking sheet, that has been coated in a non-stick spray, and use the pan a guide to make the shape, and press the mixture to be the same depth as the pan. Let set for 10-15 minutes (or as long as you can stand) and then cut into squares with a knife. Fair warning: you will not be able to eat just one. Makes about 20-26 squares, depending the size you choose.

RRKTInPan.jpg
RRKT4.jpg
In Gluten Free, Treats Tags dessert, sweets, rice krispies, kid friendly
Comment
← Newer Posts

Let’s be social. FOLLOW along at @savannahmakes

...lasagna with pesto and hot Italian sausage! 🇮🇹 Like Garfield, I too love lasagna. But unlike Garfield, I decided to throw mine a graduation party a let it get a little more sophisticated and grown-up! Recipe is now up on SavannahMakes.com and li Just a few bites of Texas sheet cake to celebrate my beloved state’s independence day! Happy Texas Independence Day, y’all! Recipe for the sheet cake is already on SavannahMakes.com! ⭐️ #rememberthealamo #remembersanjacinto #remembertoeat Sending you all the 💗❤️💜 from my kitchen to yours! #happyvalentinesday #biscuitlove The weather forecast for Dallas this week is: 🌧🌧🌧🌧 so I’m cozying up with plenty of soup. Starting with this one—beef vegetable! Hearty with plenty of colorful veggies, I’m pretty sure this soup accounted for 85% of my vegetable I hope your new year is off to a sweet start! Recipes are like relationships, when you don’t see one for awhile, you start to miss it. While I made lots of candy this Christmas, I didn’t make my cinni-minis at all! Making a batch of these Sending you the merriest wishes from me and my pink, peppermint clouds of divinity for a safe and happy Christmas! Merry, merry!! 💕 This recipe is now up on SavannahMakes.com and linked in my bio! 😘 #divinitycandy #christmascandy #peppermint ‘Tis the season for Christmas candy!  Give your sweet and salt tooth a gift, peanut 🥜 brittle! Sharing my family’s favorite recipe today on SavannahMakes.com and in the link in my profile! 🎄 #christmascandy #peanutbrittle Happy Friday to my fellow cookie monsters! Sending you a (virtual!) treat to start your weekend. My recipe for the ultimate chocolate chip cookie is up and it’s like a hug in your hand! 💕 Go to SavannahMakes.com or the link in my bio to bite i Sunday and baking goes together like biscuits and gravy!! My new (& improved) biscuit recipe is up with bonus recipe of sausage gravy!Beware: people (hungry husbands) will not be able to keep their hands off of them! Head over to SavannahMakes.co With @chiomegaxmas coming to a close this weekend, planning a very cozy and restful weekend for myself, with a big bowl of potato soup with allllll the fixings! Co-chairing a (virtual) Christmas market has been no joke and luckily, this soup is a cin Cookies, brownies, and ice cream pie (oh my!) Sending some virtual sweetness from me to you! ❤️💙 #election2020 Happy Halloween! No tricks here, just a treat! Remember that boxed cake experiment I did in the kitchen last week? Well this is the result—Gluten Free Spiced Bundt Cake with Cranberries and Orange Glaze!

I took a box of @simplemills vanilla, a I realized today and I hadn’t made these pumpkin spiced oatmeal chocolate chip cookies once this fall and they just went straight to the top of my weekend’s to do list! Because who doesn’t want a cookie that feels like a warm hug? 
Ending the week on a sweet note and giving our girl pumpkin pie a much deserved makeover in anticipation for all of her upcoming dinners. 💄 😜 Meet my Pumpkin Pie Chiffon Bars with a Biscoff cookie crust! If you like a crunchy pie crust and a cloud- Finally sat down and typed out the recipe for this ✨magical✨ marinara sauce my husband 🧔🏻 created! After the first bite, I immediately got up, found a pen and a piece of paper, and said he had to write down the recipe! This sauce is like a hug in a 🙌🏻Protein Power Balls with Almond Butter and Dark Chocolate🙌🏻 If you need a healthy snack that tastes like cookie dough, look no further! Recipe is below 👇🏻and on SavannahMakes.com 💙

 Ingredients:

1 1/4 cups oats

1 cup almond butter

1/2 cu
Instagram

All photography is my own, unless noted.