• Home
  • Hi, Y'all
  • Recipes
  • Favorites
  • Say Hi
Menu

Savannah Makes

Street Address
City, State, Zip
Phone Number
bringing your grandmother's recipes into the 21st century

Your Custom Text Here

Savannah Makes

  • Home
  • Hi, Y'all
  • Recipes
  • Favorites
  • Say Hi

Lasagna with Pesto and Hot Italian Sausage

March 5, 2021 Savannah Near
lasagna1.jpeg

Like Garfield, I, too, love lasagna. But unlike Garfield, I decided to throw mine a graduation party a let it get a little more sophisticated and grown-up! My creative juices have been missing in the kitchen the last few weeks, hence the decline of posts on here recently. I am not sure if it was the thought of Garfield or lasagna but I got a jolt of excitement when I started working on refining this recipe a couple of months ago.

Here’s how things started: I would add chopped basil, lemon zest, and olive oil to my ricotta for my filling—as I thought about this further I realized I was basically adding pesto. And poof! A thought occurred: make pesto and add it to my ricotta—hello, creativity—how are you?! This got me really excited and the next thing I knew I was making lasagna once a week to perfect my refined and sophisticated lasagna. She’s familiar and new all at the same time! The pesto brings balanced and earthy notes, the lemon adds brightness and freshness, the Hot Italian brings a little heat, the cheese adds plenty of savory, salty flavor, and then the tomato’s acid hits the back of your palate and is like HELLO!! Did I mention I was excited about this recipe?

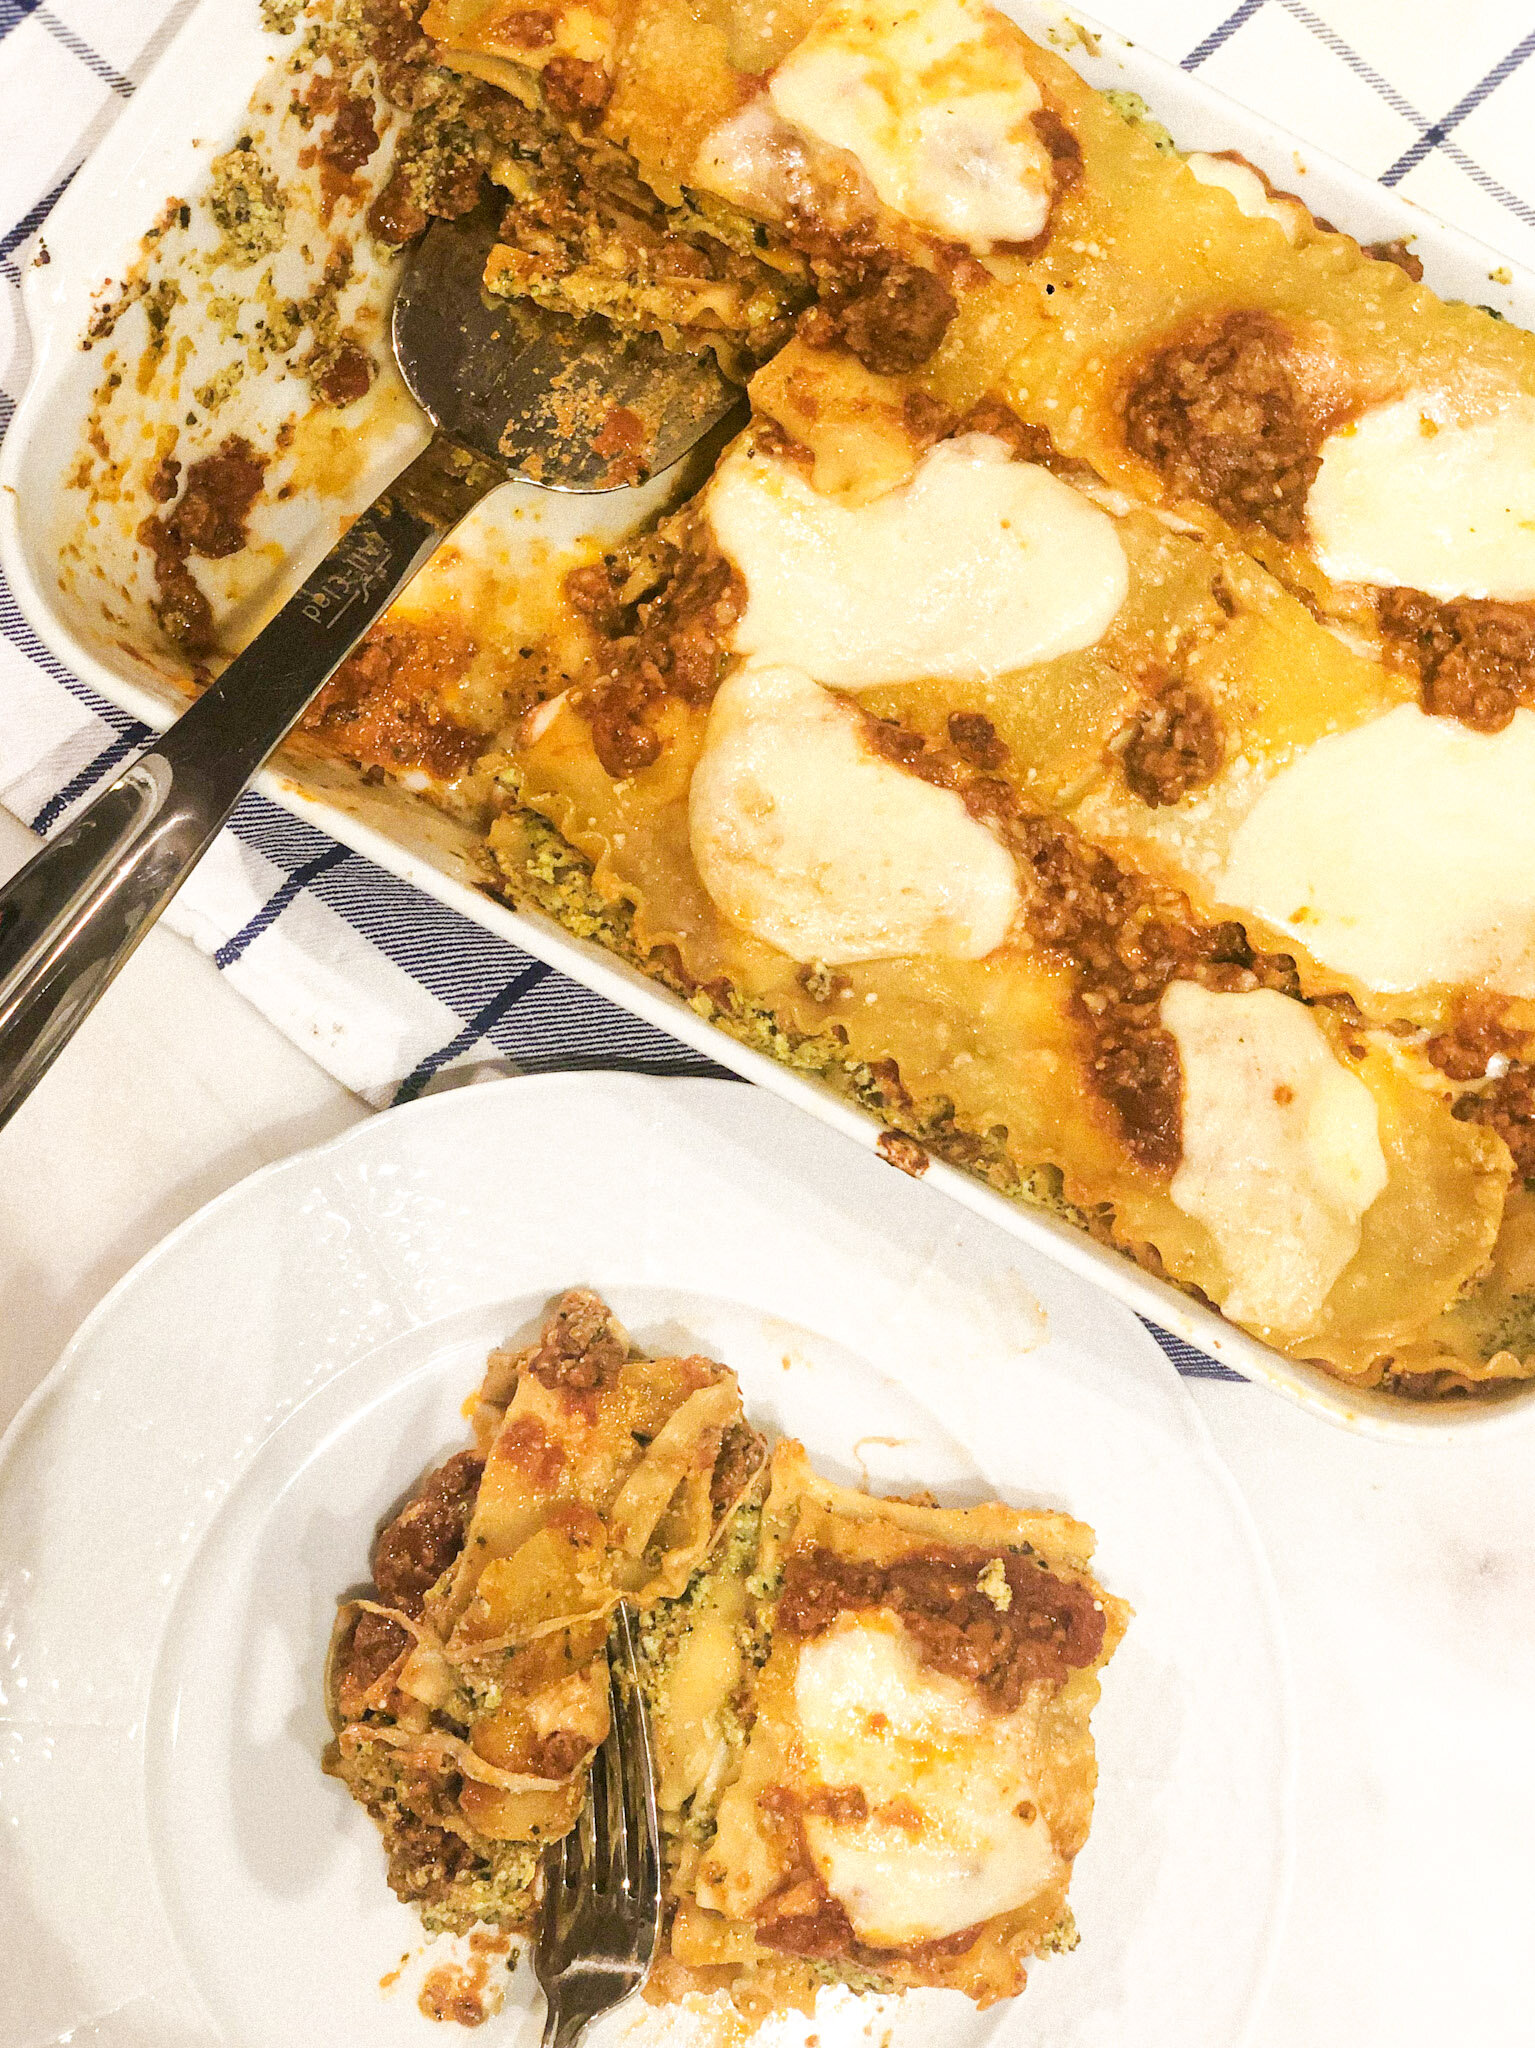
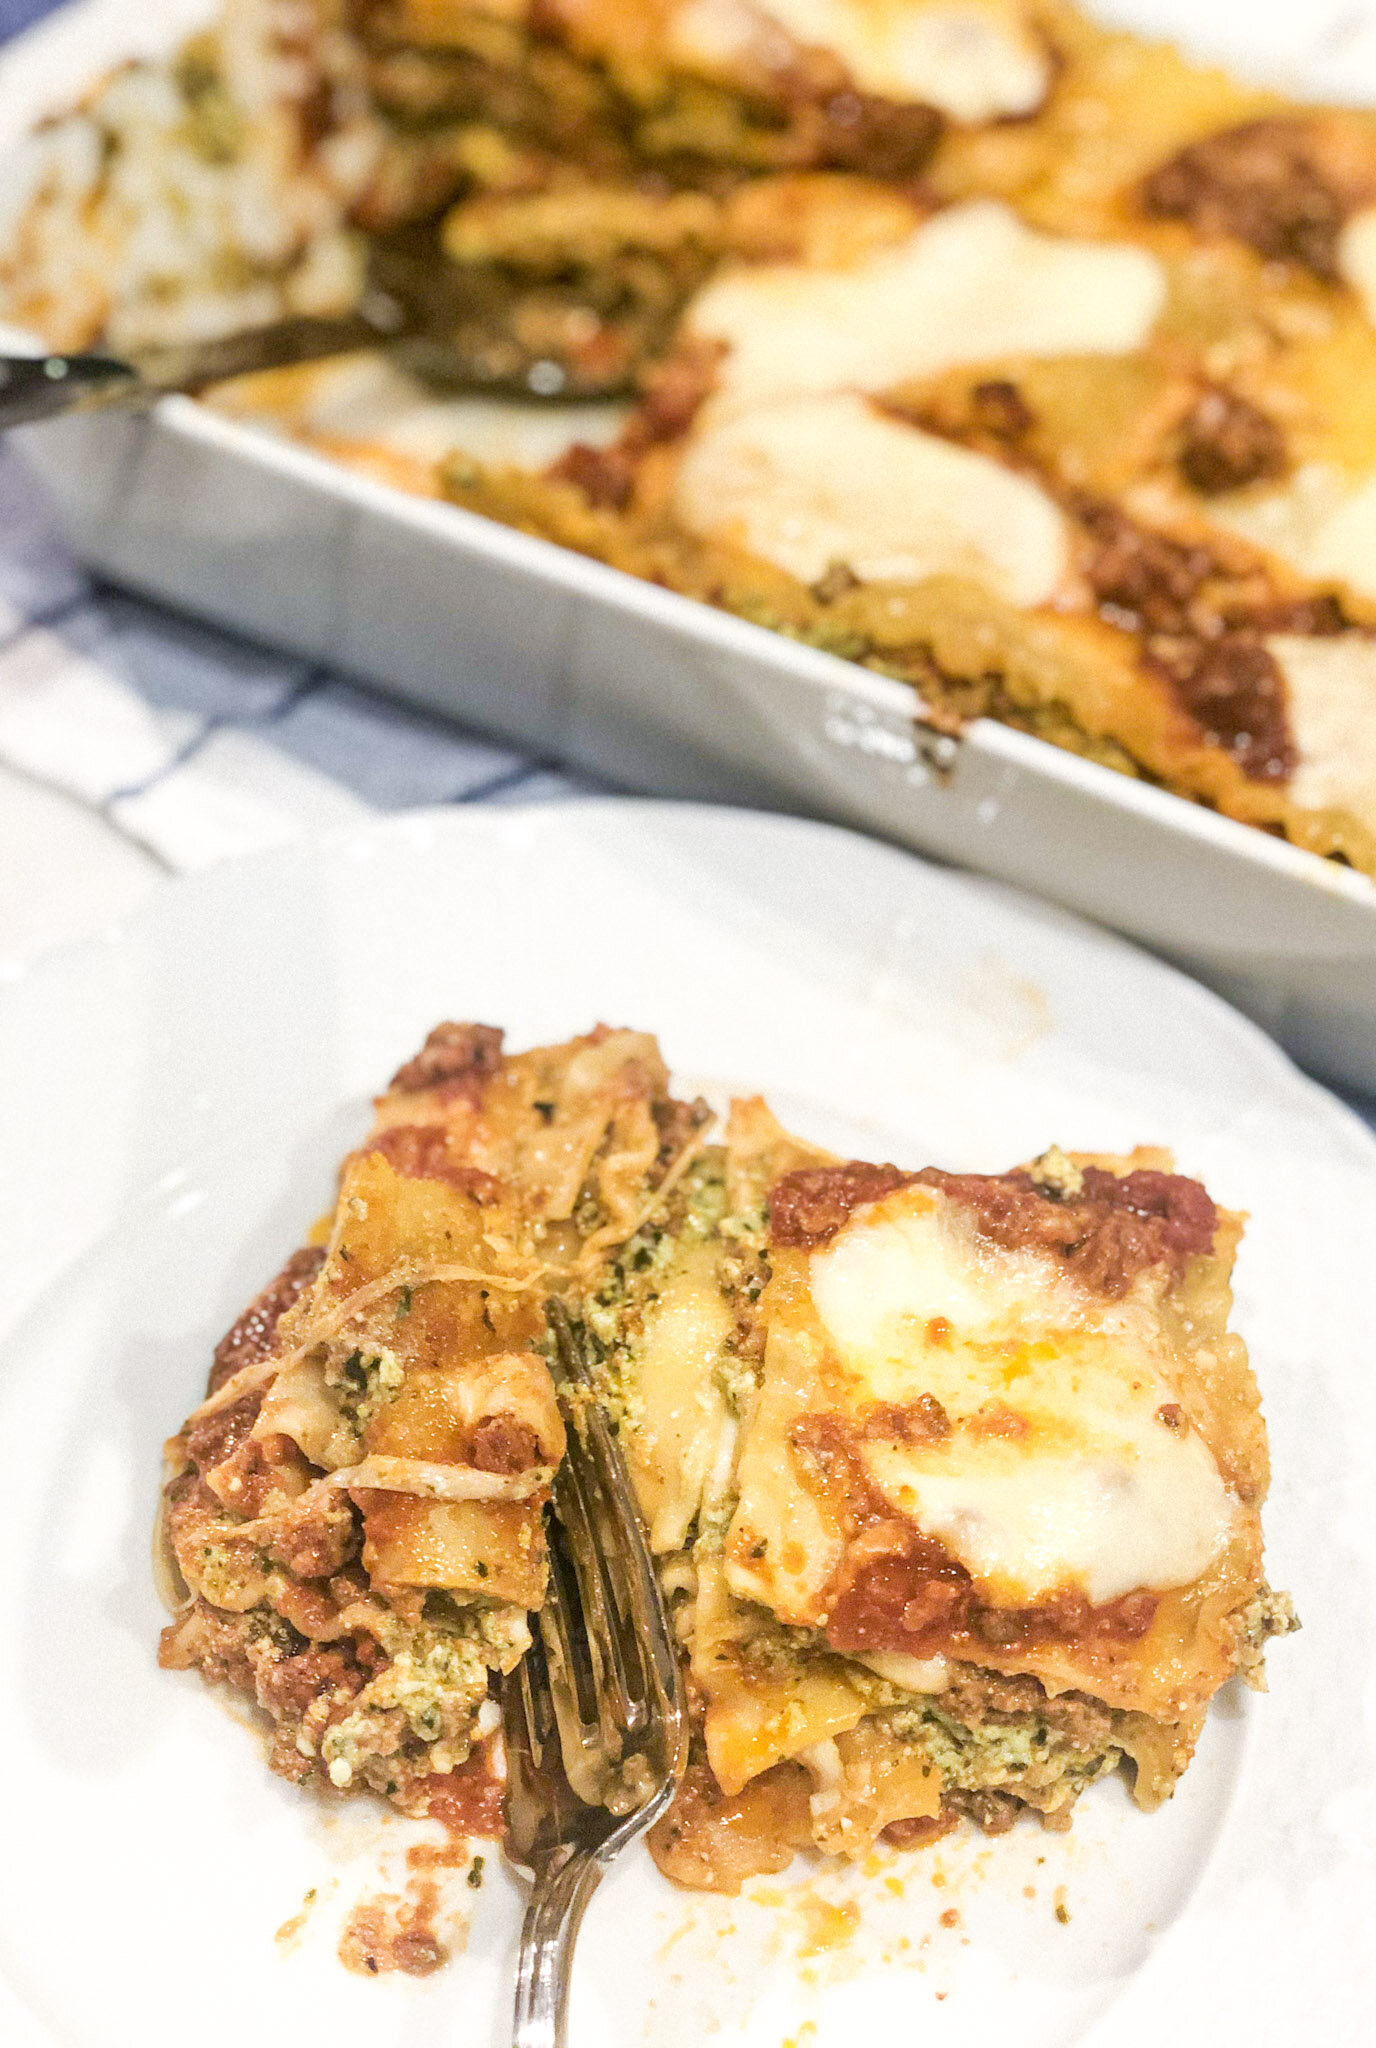
She’s beauty and she’s grace, she’s lasagna with pesto and spice!

Recipe:

  • 1 pound of lasagna noodles

  • 15 oz ricotta cheese

  • 16 oz of mozzarella, can use fresh or shredded (I cut my fresh mozzarella into halves and then slice into 1/4 inch thick half moons)

  • 1/4 cup of parmesan or pecorino for sprinkling on the top layer of noodles

  • Pesto

    • 2 cups fresh basil leaves

    • 1/2 cup parmesan or pecorino grated cheese

    • 2 tablespoons lemon juice

    • 2 cloves of garlic

    • 1/4 teaspoon kosher salt

    • 1/8 cup (or 2 tablespoons) olive oil

  • Meat Sauce

    • 1/2 pound ground Hot Italian sausage

    • 1/2 pound ground beef

    • 24 oz jar of your preferred marinara sauce (or if you feeling especially ambitious, try my husband’s amazing sauce recipe is here!)

Method:

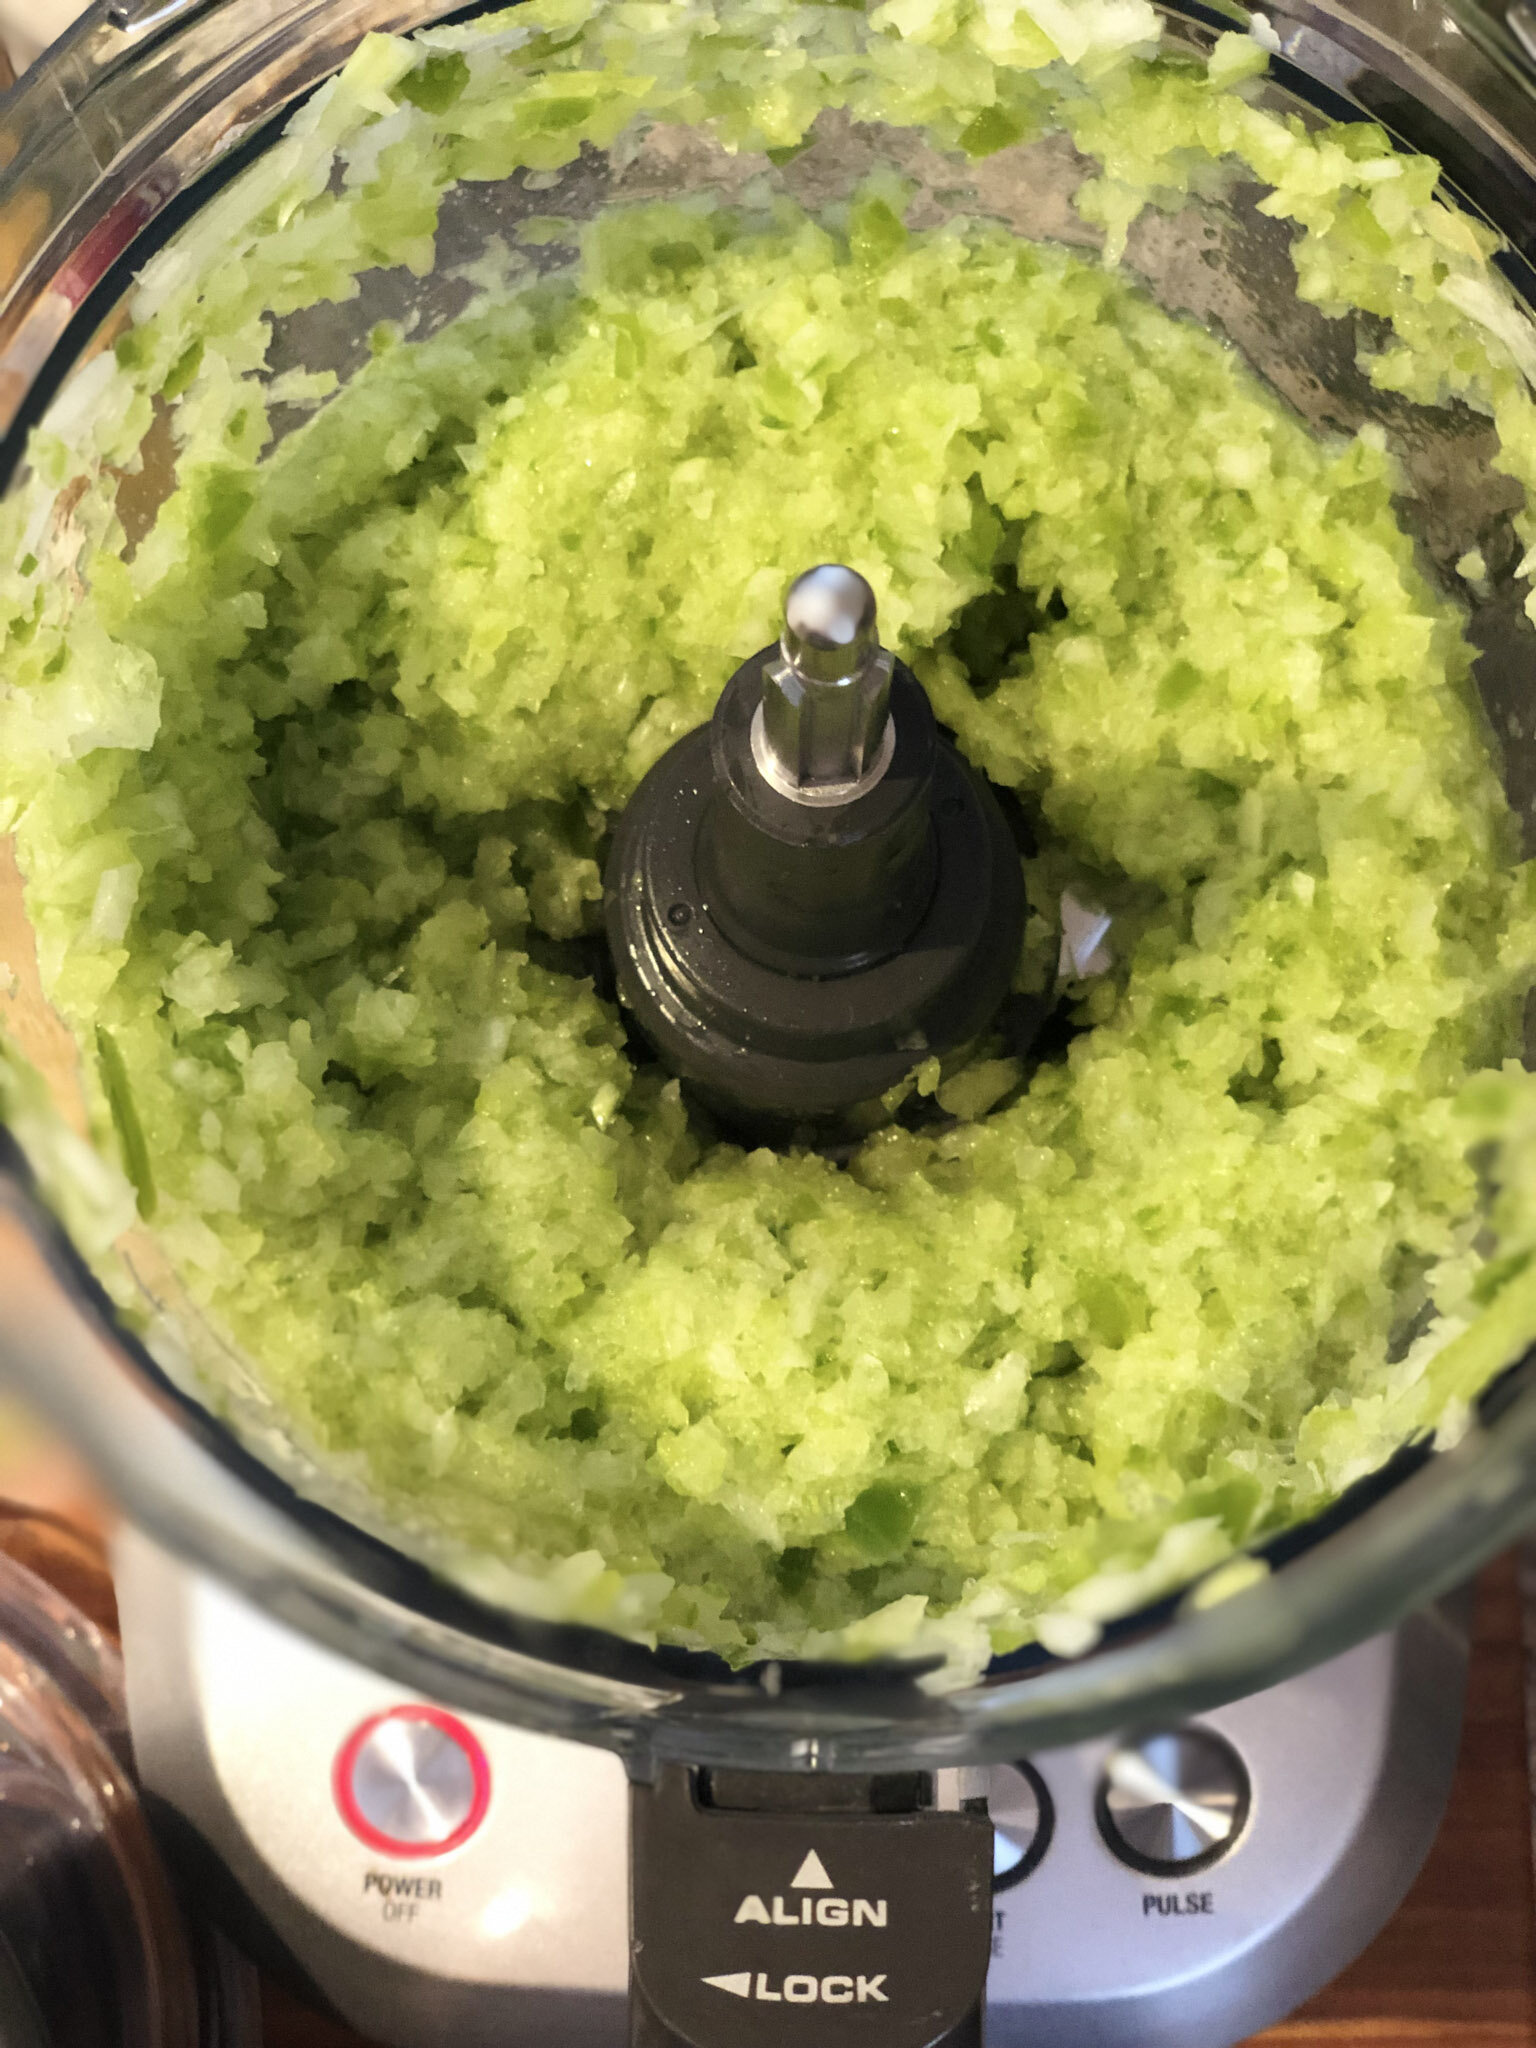
  1. Let’s kick this lasagna party off with some pesto-making. In a food processor or a blender, add basil leaves, grated cheese, lemon juice, garlic, and salt. Blend until broken down into fine pieces. With a blender or food processor on medium-high speed, slowly pour in olive oil until pesto is smooth and thick enough to coat the back of your spoon.

  2. In a medium bowl, add ricotta and pesto together, mix until well combined, and set to the side.

  3. Now onto the rest! Add enough water to a large pot for noodles, set on high, cover, and bring to a boil. While you’re waiting for that to boil, let’s work on our meat sauce and preheat our oven.

  4. Preheat your oven to 375. Onto the sauce!

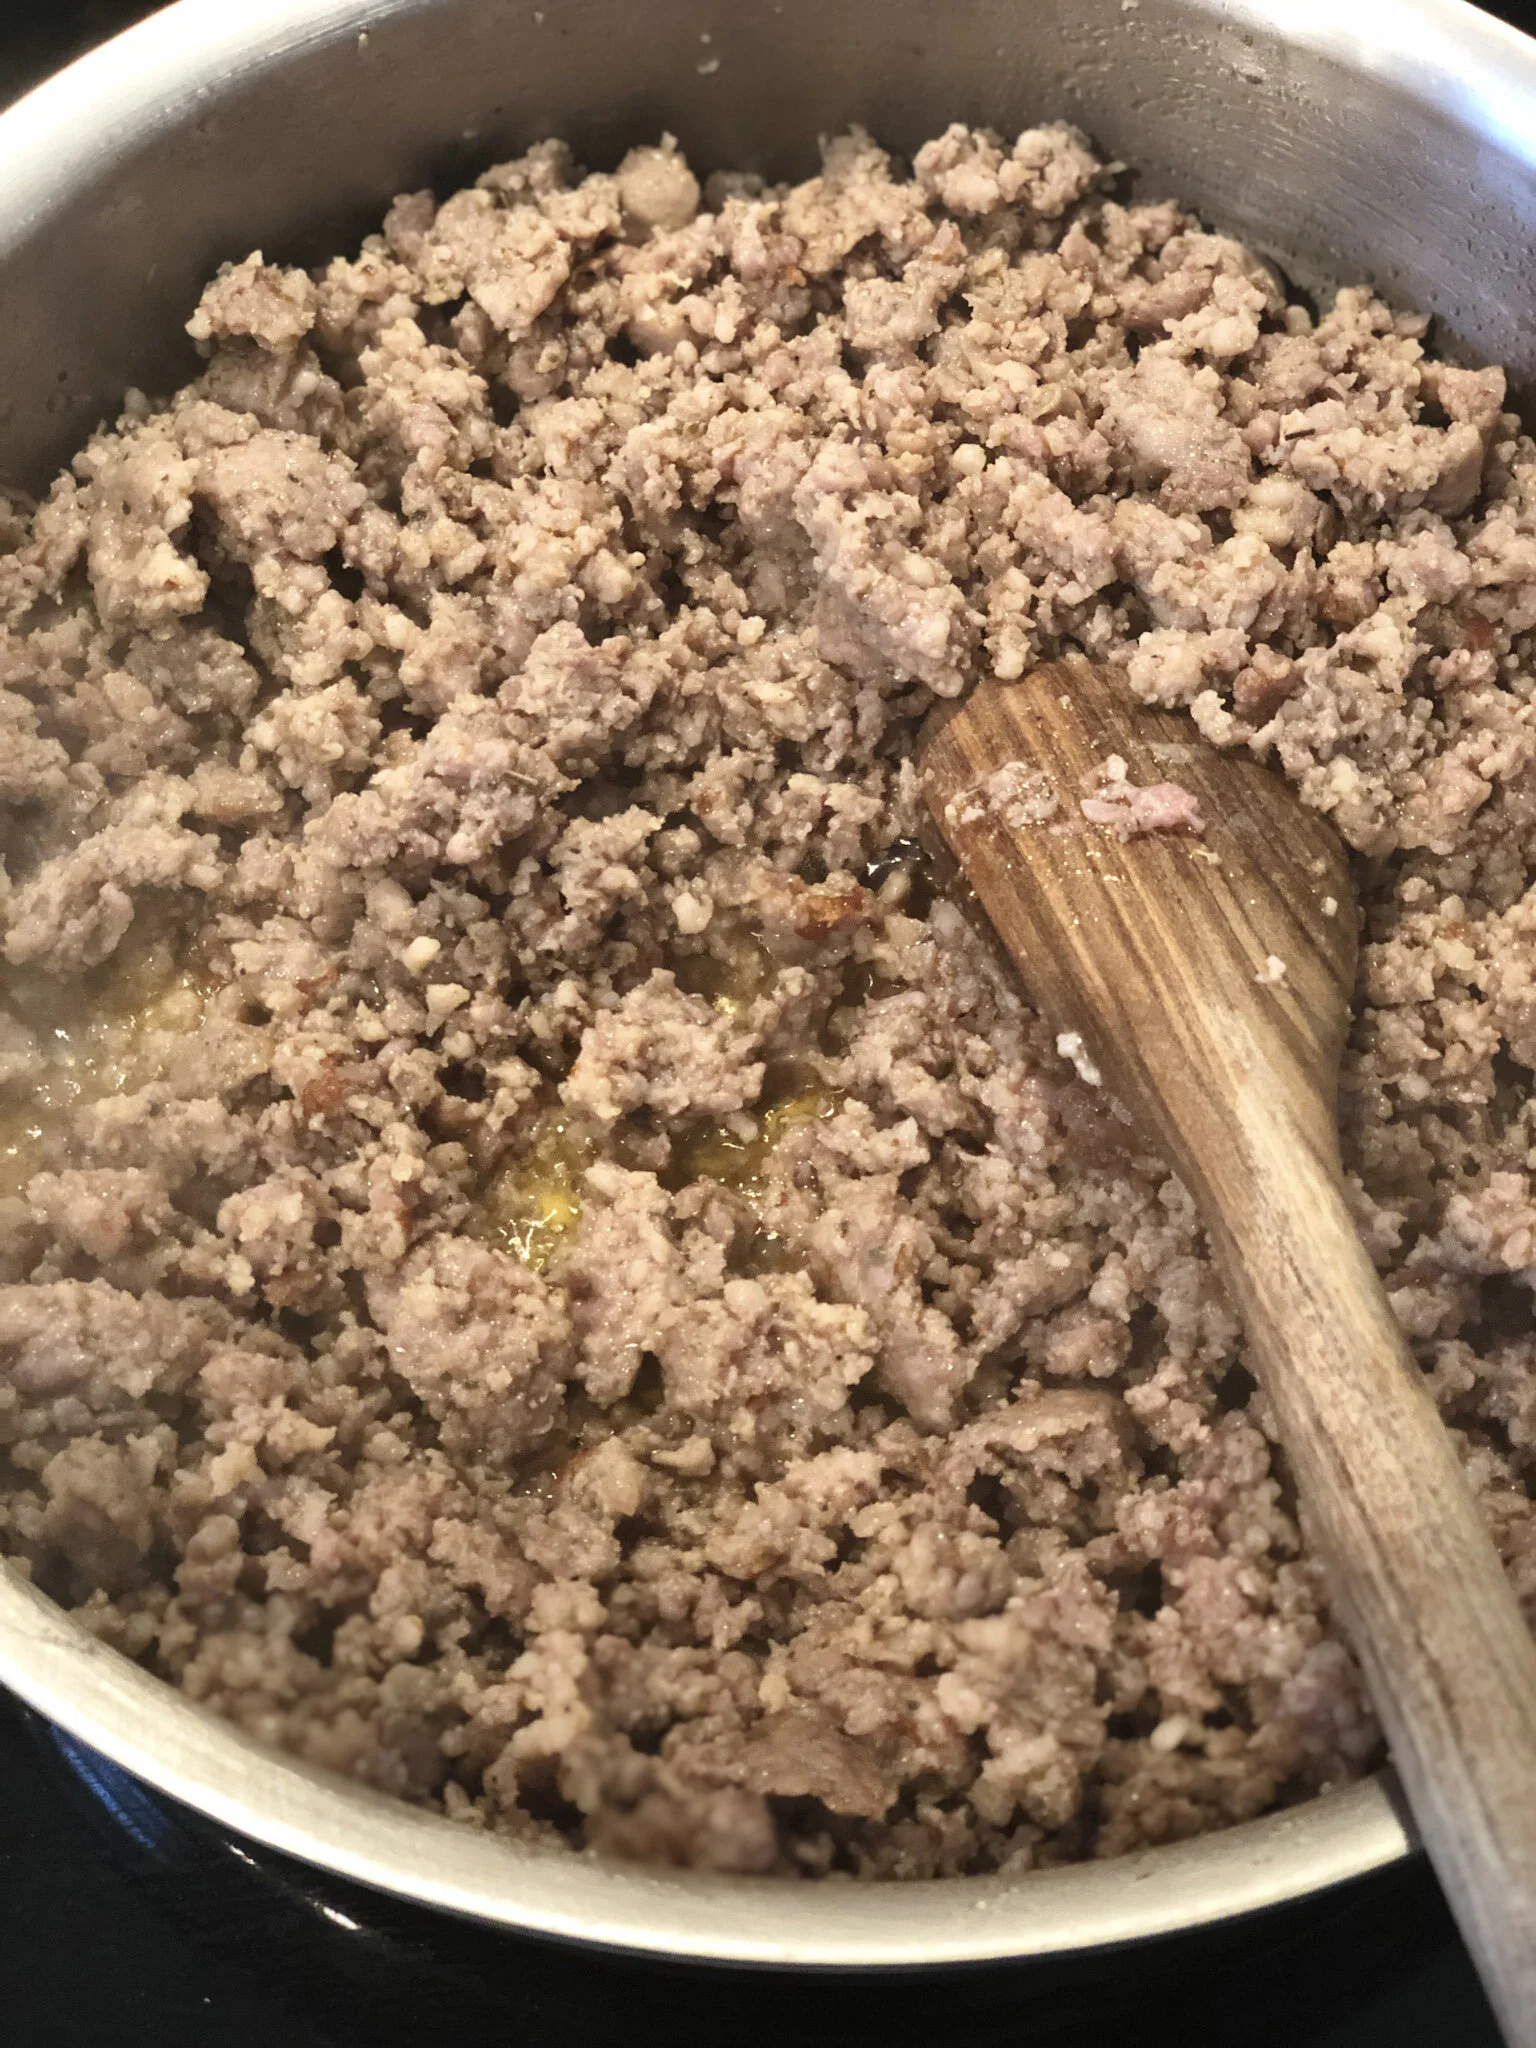
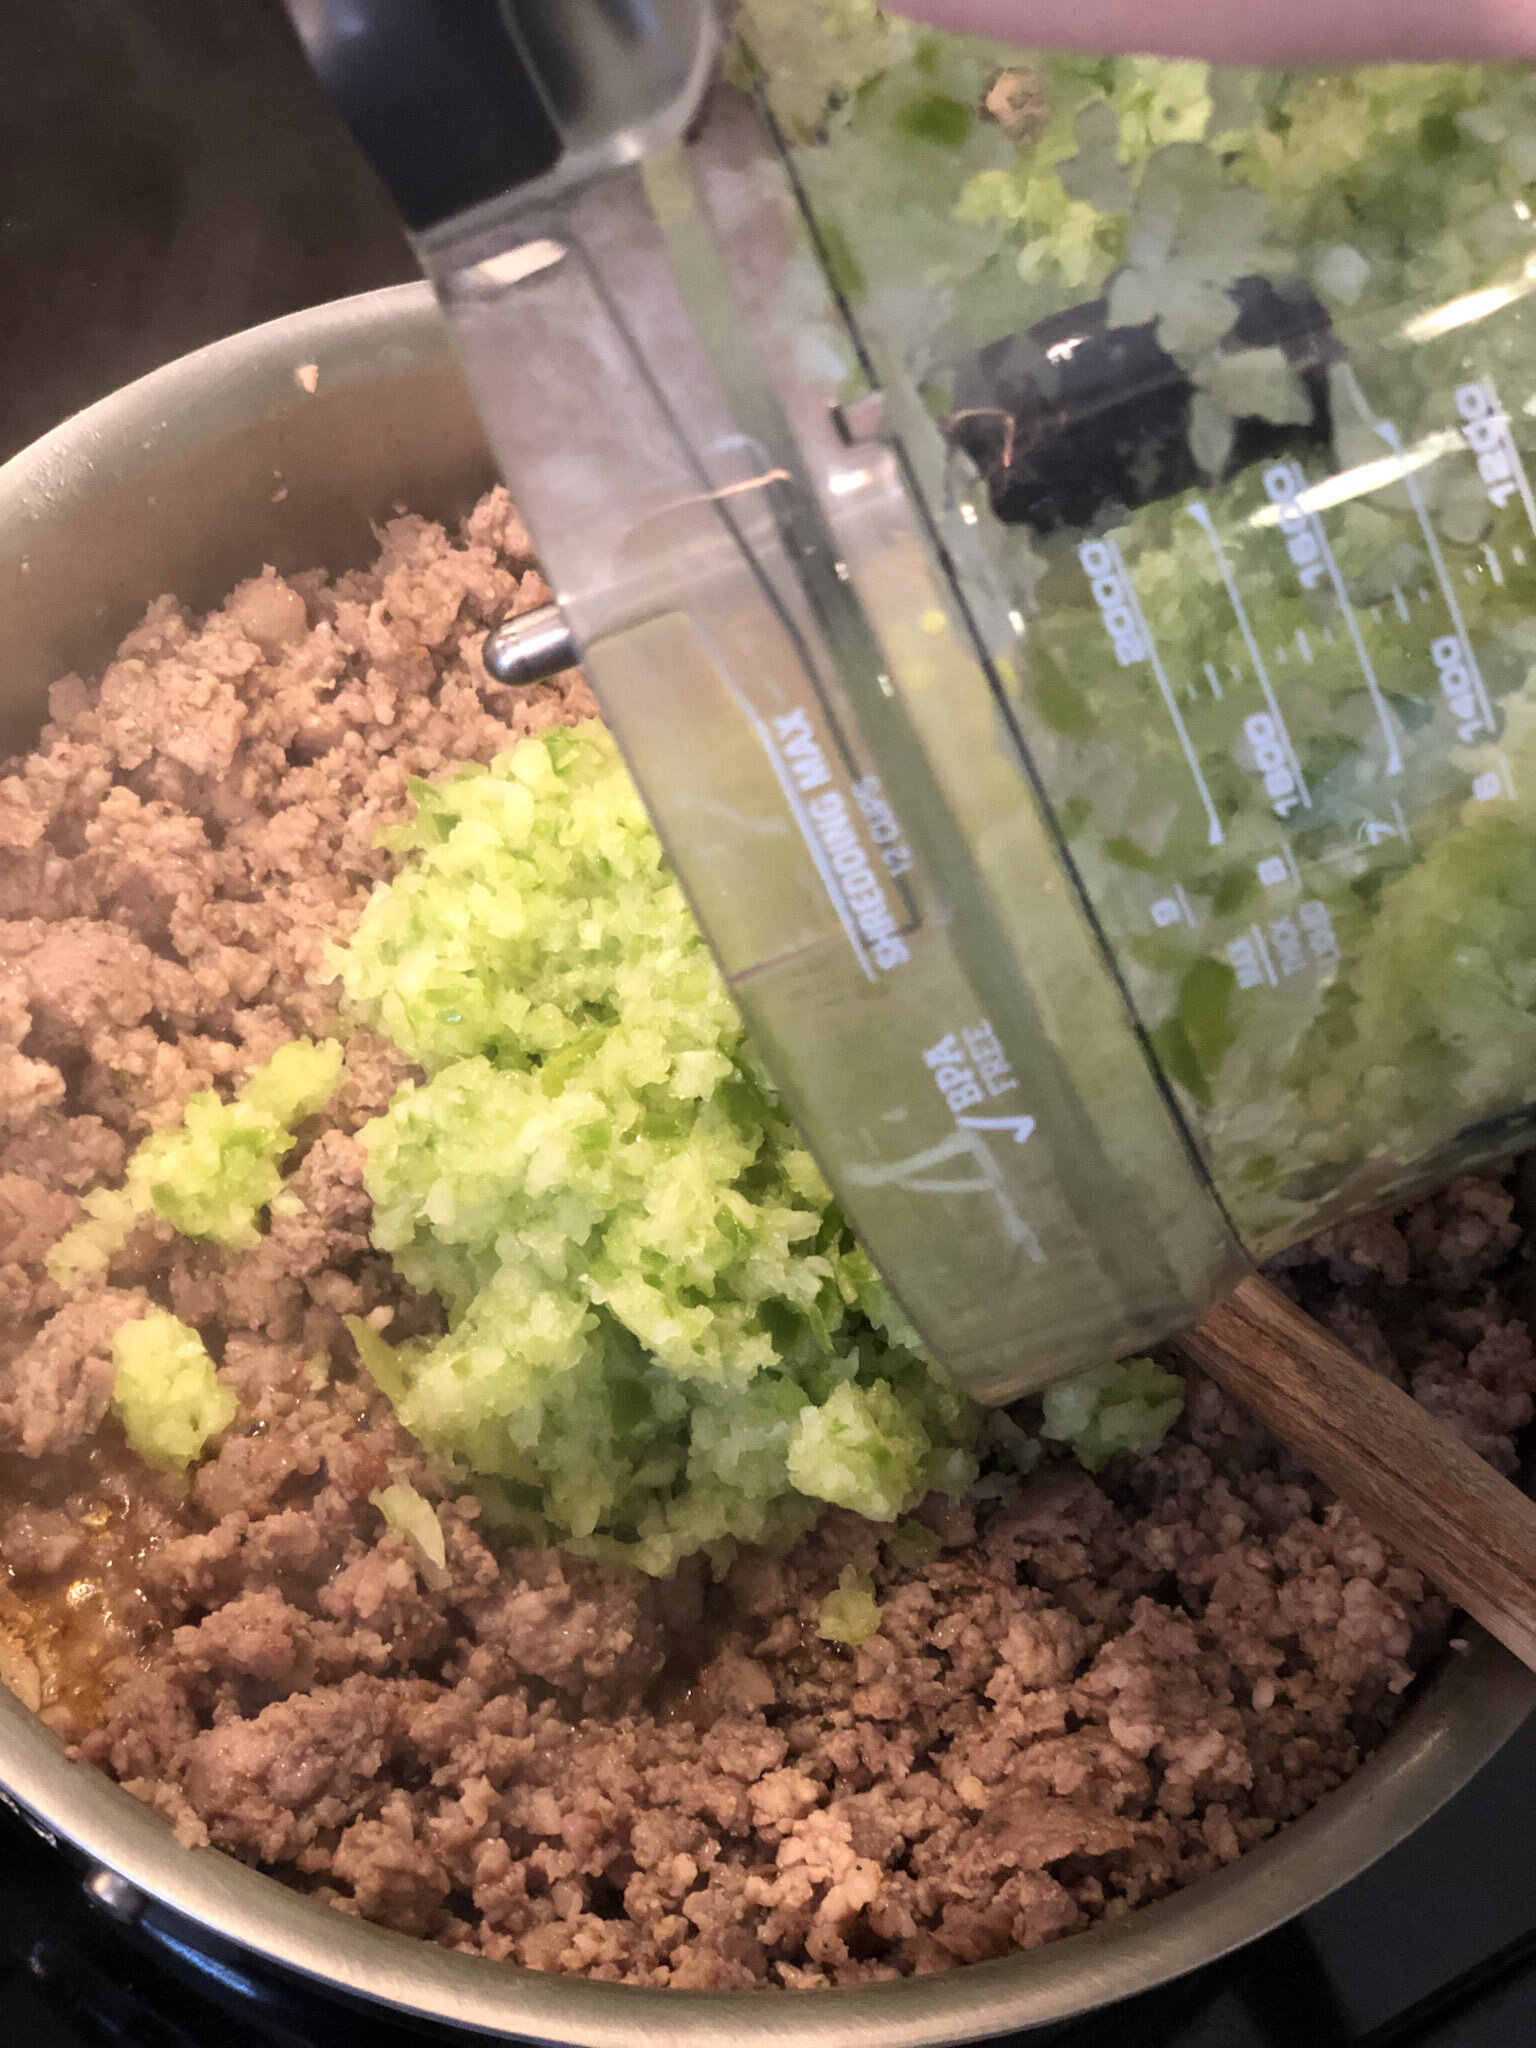
  5. In a large skillet, add a drizzle of olive oil to barely cover the bottom of the pan (to help with heat transfer from the pan to the meat) on medium-high heat. Once the oil is slightly rippling, add your meats. Do not begin to break up the meat until it has begun to brown—this is to help us get a good sear on our meat, which will help extract more flavor. (Hi, Maillard reaction!). Once the meat is browned, add your jar of marinara sauce. Add about a 1/4 cup of water to the jar to get the rest of the sauce and add to the skillet. Mix together, reduce heat to a simmer and allow the sauce to heat through and reduce slightly.

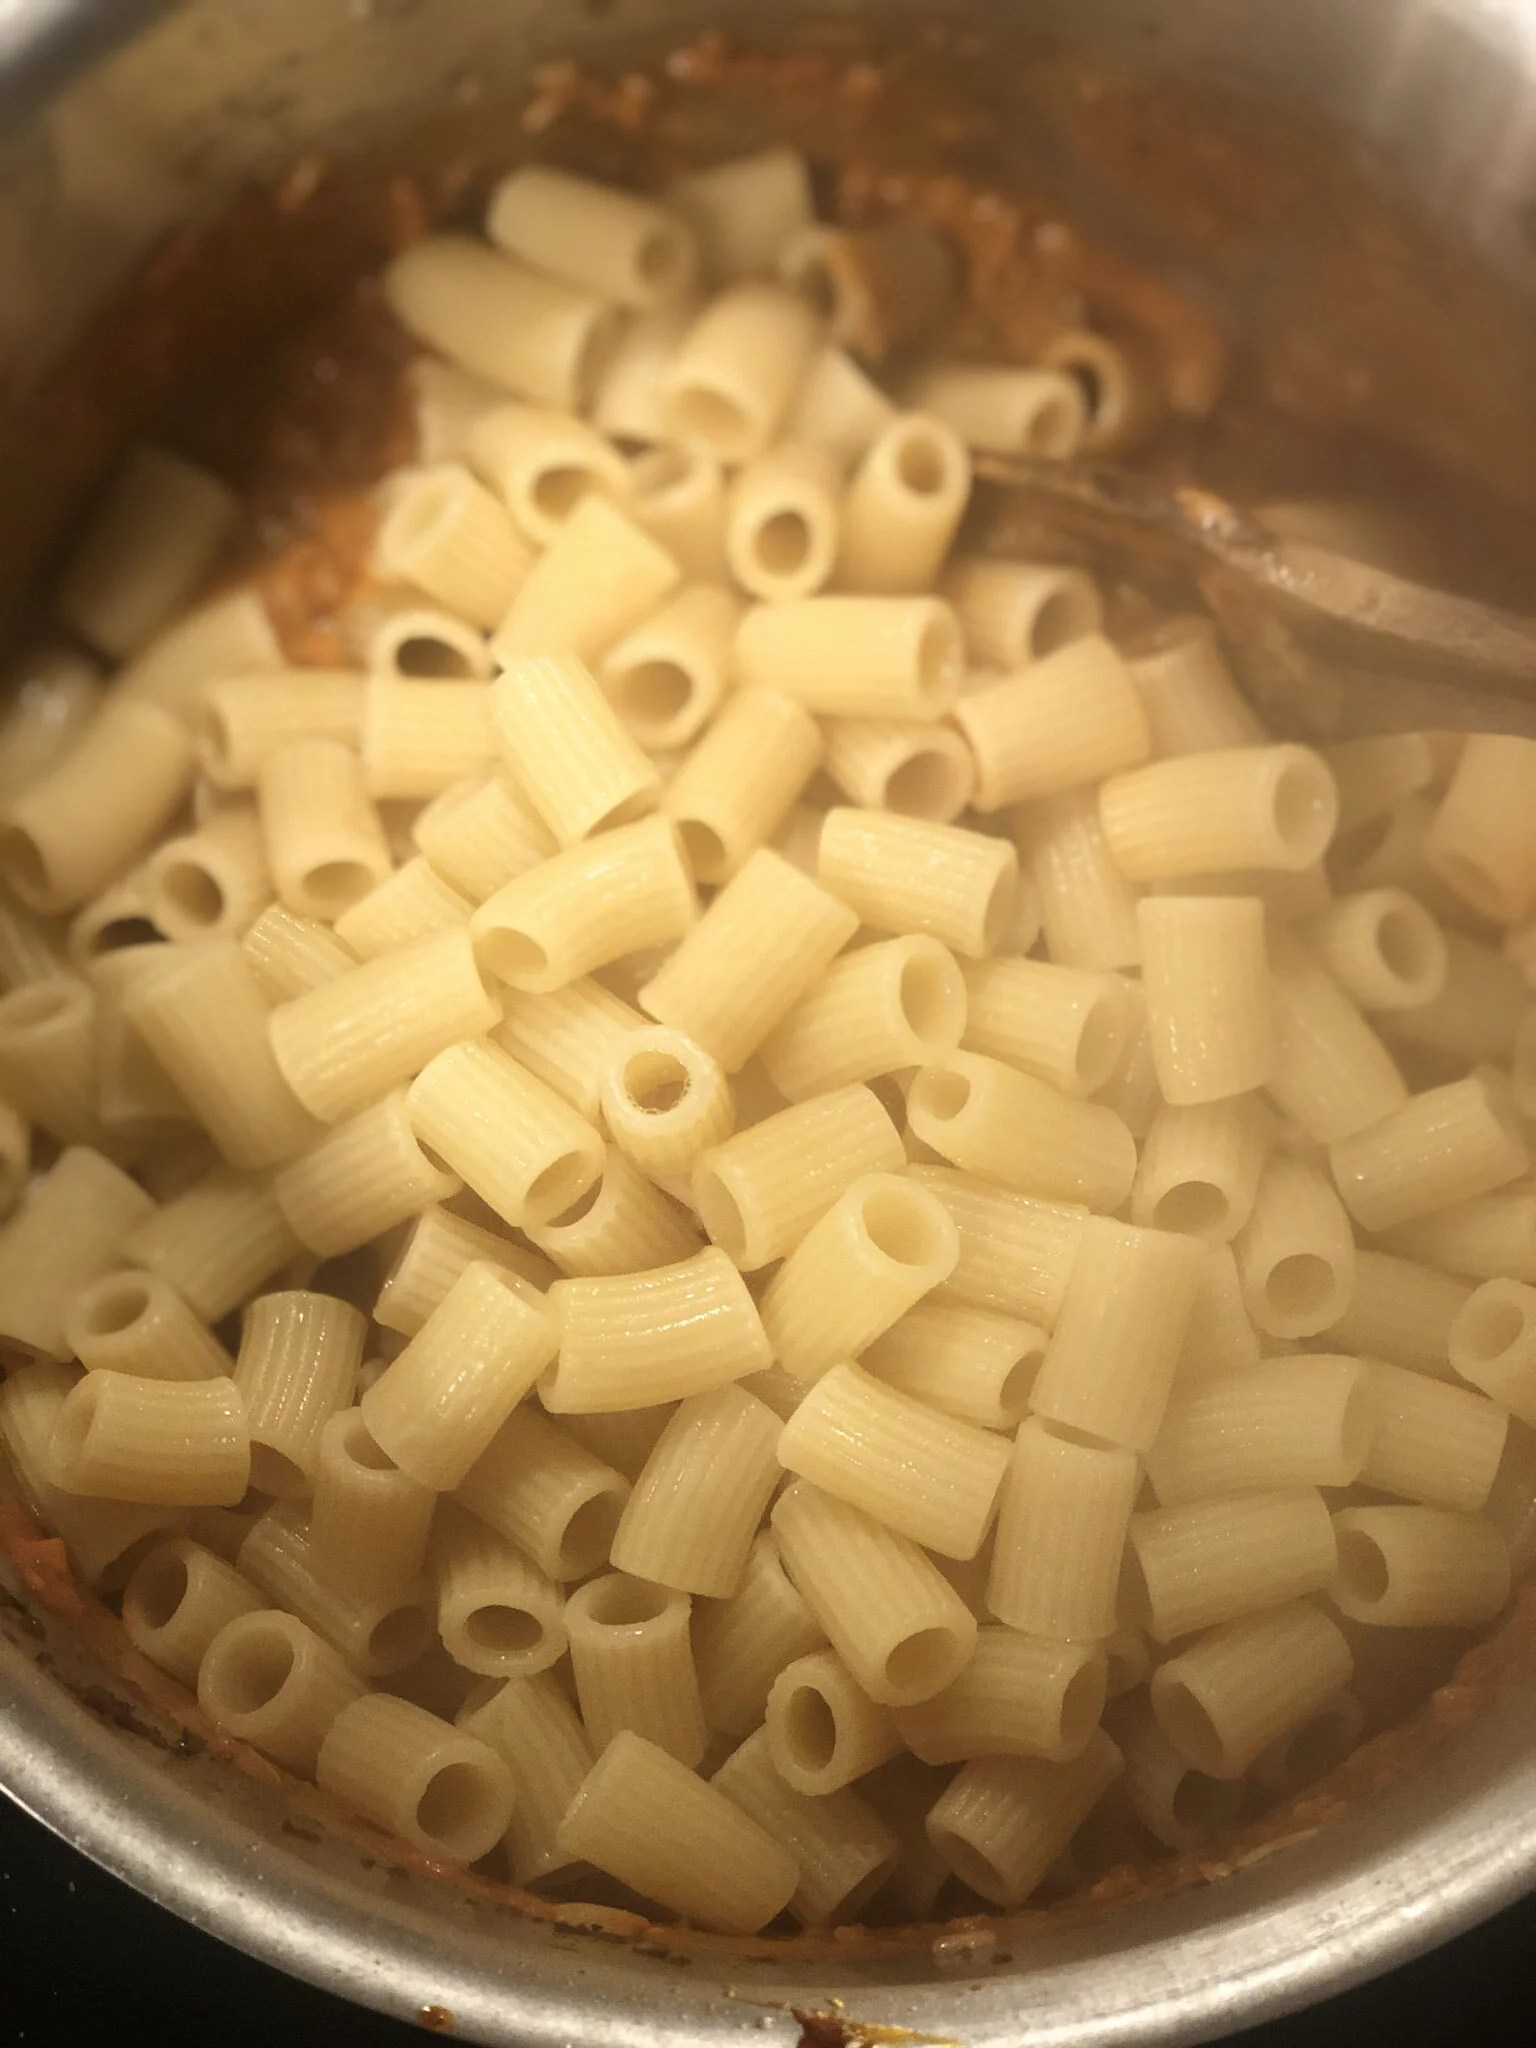
  6. Now for the noodles! Add your pasta to your boiling and salted pot. You want these less than al dente because they’re going to finish cooking in the oven. So I go for a noodle that becomes flexible but not cooked through or tender. So look for them to bend over without breaking and then pull them. Probably within 6-8 minutes. Toss them with some olive oil to keep them from sticking and allow them to cool slightly so your little mittens can handle them.

  7. Now assemble! In a 9x13 pan, add a few spoonfuls marinara to lightly coat the bottom of your baking dish. You're going to split your prepared fillings into 4 because that’s how many layers this lasagna has. Add enough noodles to cover the bottom of the pan, then add 1/4 ricotta-pesto mix, spread evenly; now add about 1/4 of marinara sauce. Then add 1/5 of your mozzarella (gotta save some of the top!). Okay now go 3 more rounds: a layer of pasta, ricotta-pesto mix, meat sauce, mozzarella, another round, and then one more! Okay, you’re done—great job.

  8. Top lasagna with remaining pasta to cover the filling and add your last round of mozzarella and sprinkle of grated parm or pecorino!

  9. Now, this last part is so important because if it doesn’t happen, you can say goodbye to that beautiful top cheese masterpiece you just created. You are going to cover your lasagna in foil for baking, but you’re going to spray one side of the foil with nonstick spray so you don’t lose your cheese topping!

  10. Okay now with the sprayed side down towards the cheese, cover the baking dish and place in the oven for about 45 minutes. Allow to bake for 30-35 minutes until starting to bubble. Then take off the foil for the last 10-15 minutes for the top to brown. If you want roasty, toasty you can throw the whole affair under the broiler for a minute to two to really crisp up.

  11. Allow to cool for about 10 minutes or you can kiss the roof of your mouth goodbye.

  12. Cut with a sharp knife and serve. Makes about 8 servings.

lasagna2.jpeg
In Dinner Tags dinner, lasagna, cheese, italian
1 Comment

Cozy Beef-Vegetable Soup

January 20, 2021 Savannah Near
Beef_Vegetable soup.jpeg

The past few weeks I have been taking a little break from posting on here. Frankly, I was feeling a little uninspired—not sure what I wanted to cook and share with you. I am a recovering perfectionist and sometimes when I feel like an idea or a recipe is not good enough (or creative enough!) I talk myself out of sharing it. This is ironic considering that I created this little corner of the internet as my creative outlet—and as a means of self-care, which means there is no place for self-judgment or the too loud critic. It also means that I need to allow it to be a true creative outlet and that means taking my perfectionistic foot off the performance gas. There is room at the table for success and failure—both are important in life and in cooking. So today, I share a recipe that is close to my heart and is tried and true, with no right or wrong way to make it. You can add or omit what you like and make it your own!

This is my grandmother’s beef-vegetable soup. She is beauty, she is grace. She is a one-pot wonder, with hearty meat, and plenty of colorful vegetables. Truly, I think this soup counted for 85% of my vegetable intake growing up. It is cozy comfort, especially on these gray January days.

Ingredients:

  • 1 pound beef stew meat, cut into 1/2 inch chunks

  • 1 medium onion, diced

  • 4 stalks of celery and leaves, diced

  • 2 1/2 cups chopped cabbage

  • 1 cup chopped carrots (dealer’s choice on size: my grandmother liked to add whole baby carrots!)

  • 1 package frozen corn (I like corn so I do a 10 oz bag)

  • 1 package frozen green beans, 10 oz

  • 1, 28 oz can whole tomatoes

  • 2 potatoes, chopped

  • 32 oz beef broth

  • 4 cups of water (or just save the beef broth container and fill it up with water!)

  • salt and pepper to taste

Method:

  1. In a large pot over medium-high heat, add your preferred cooking oil to coat the bottom of the pan. Add meat and brown. I like to add a pinch of salt to aid in browning and build layers of flavor.

  2. Once browned, add in onion, carrots, and celery. Cook for 5-7 minutes. Add a sprinkle of salt to help the water pull out of the veggies.

  3. In a medium bowl, pour in whole tomatoes and crush by hand to your preferred size, or can crush with your cooking utensil once in pot.

  4. Add in tomatoes to the pot and cook until tomatoes are simmering. I like for the acid of the tomatoes to tenderize the meat a bit further so I let it go close to 15 minutes.

  5. Add in green beans, potatoes, cabbage, and corn and combine.

  6. Pour in beef broth and water, scrape any bits off the bottom of the pot. If you need more water, add in until everything is covered.

  7. Partially cover the pot with the lid and bring to a boil. Stirring occasionally.

  8. Once boiling, reduce heat to a simmer, with the lid partially covering for 45 minutes to an hour. The longer this soup cooks, the better!

  9. Taste for salt and pepper, add, cook for a few minutes more for flavors to combine and serve!

In Dinner Tags soup, beef vegetable, dinner
Comment

Loaded Potato Soup

November 20, 2020 Savannah Near
PotatoSoup.jpg

Comfort, meet bowl. Bowl, meet comfort. This potato soup recipe has been a loyal member of my family’s recipe box for years. From cold nights to being under the weather or recovering from having wisdom teeth removed, my dad always remarked that this soup has, “magical healing powers.” Medicinal qualities aside, it is just good. It is no-frills and ready in about 45 minutes if needing in a pinch. It can be used as a vehicle to shovel mouthfuls of melted cheese and bacon (or cornbread!) to you or served a little bit lighter with chives and add some chopped veggies to the pot. From my grandparents’ kitchen to my parents’ to ours, this soup has brought cozy comfort into all of our homes. Bonus points because she’s a real crowd pleaser too—gotta love those type A, overachiever recipes!

Quick tip: When using chives, it is easiest to group and bind them together (like a bouquet) with kitchen twine, then you can chop with a knife or cut with kitchen shears. (Pictured above)

Ingredients:

  • 5 peeled potatoes, cut into equal chunks

  • 1 tablespoon kosher salt

  • 1/2 teaspoon cracked pepper

  • 1/2 teaspoon garlic powder

  • 1 cup milk

  • 2/3 cup flour

  • 2 tablespoons butter (optional)

  • Toppings: chives, cheddar, bacon, and sour cream (or Greek yogurt!)

Method:

  1. Place potatoes in a large pot and cover with water. Cover with a lid, place over high heat until boiling.

  2. Once potatoes are tender, in another bowl, mix together milk and flour. Bring together until well incorporated and smooth (read: not lumpy).

  3. Pour milk-flour mixture into potatoes and mix well. Stir until potatoes start to boil again.

  4. If too thin still, add more flour and milk together, mix, and stir into the pot, until the desired thickness is reached.

  5. Once the soup has thickened, reduce to medium heat, and add in salt, pepper, garlic powder, and butter to season. Taste check and adjust as needed! If wanting soup extra smooth, blend with immersion blender!

  6. Serve immediately and top with chives, cheddar, bacon, and sour cream!

In Dinner Tags dinner, potato soup, bacon, quick dinner, cheese

Special Guest Recipe: Andrew's Marinara

October 6, 2020 Savannah Near
Andrew_Marinara.jpg

This recipe was inspired by chef Roy Choi of Netflix’s The Chef Show with Jon Favreau. If you don't have this show on your watch list, give it a try, especially if you're trying to sharpen your skills in the kitchen! Some background: Roy and Jon became good friends when Jon was starring in the movie Chef and Roy coached Jon on how to appear chef-like in the film. Chef is one of my husband’s favorite movies, which is great because his other is The Hunt for Red October and there are only so many times I can listen to Sean Connery’s Russian accent. Sorry, Sean. 

I digress. 

The new season of The Chef Show came out at the end of September and you better believe we were waiting with bated breath and sharpened knives, waiting to see what Jon and Roy were going to serve up this season. Roy's take on marinara was shared along with his meatballs and Andrew knew the recipe was a must-try. But the recipe for the meatballs was not shared, so Andrew had to go back and watch the episode in slo-mo to eyeball the ingredients (talk about dedication) and off we went to Jimmy’s Food Store for the ingredients, projected measurements in hand. If you live in Dallas and do not go to or know about Jimmy’s for your Italian necessities, do yourself a favor and go get a coffee on a Saturday morning and drive to Jimmy’s and walk around. You will feel like you’re in Little Italy—it is fabulous.

With our pilgrimage to Jimmy’s complete—Andrew set about replicating Roy’s recipe. The base of the recipe started close to Roy's, then Andrew just couldn't fight is Italian heritage any longer and started deviating from the recipe—changing the type of mushrooms, then pureeing them, adding tomato paste, blending the onion (not in the original recipe), adding oregano and a bunch of basil. The result? A sauce that brings a tear to the eye it is so good. I am not being facetious. After my first bite, I immediately brought Andrew a piece of paper and a pen to write down his recipe. Roy's meatballs are good, but Andrew's sauce feels like a hug in a bowl. From the mushroom puree that brings the Earthy notes to the savory garlic confit (thank you for this, Chef Roy!) and the addition of tomato paste for depth, everything about this sauce is perfection. If the recipe feels overwhelming at first, (there is a little prep work involved) it is worth it! Once the garlic confit, the mushrooms and mushroom stock are done, the rest of the time you are just pouring ingredients into the pot and bringing them together. 

Note: This makes a lot of sauce! You can cut the recipe in half and still get 8 cups! You can freeze the leftover mushroom stock and bag and refrigerate the garlic confit for later use!

Ingredients:

  • 4, 28 oz cans of San Marzano Tomatoes (labeled “DOP” if you can find it!) 

  • 1 lb of Porcini mushrooms 

  • 1 cup mushroom stock—Don’t worry if you’re scratching your head. We will walk through it!

  • 1 1/4 cups garlic confit—yep—walking through this one too!

  • 6 oz tomato paste

  • 1 tablespoon dried oregano

  • Half an onion (place half an onion with a 1/4 cup of water into a blender and blend until smooth)

  • 1 bunch of basil (leaves and stem) tied together with twine to form a bundle 

  • 1 cup extra virgin olive oil

  • salt/pepper to taste

  • 1 pound of pasta

  • grated parmesan (optional) 

Method:

For the mushroom stock:

  1.  Wipe down mushroom with a damp towel to remove any dirt. 

  2. Add 1 lb of porcini mushrooms to 8 cups of water. Bring to a boil and then reduce heat to simmer. Let cook for 2 hours. Look for a deep, dark brown color to develop. 

  3. Strain mushrooms from stock, catching liquid into a separate bowl (we want to keep it!). Pour mushrooms into a blender and puree—set to the side. 

For garlic confit:

  1. Add 2 heads worth of peeled garlic cloves to a skillet with 1 cup of olive oil. 

  2. Cook on the lowest heat setting for 2 hours. Stirring occasionally until garlic is a dark, golden color. Set to the side, with the oil! If halving the recipe, just use one whole head worth of garlic cloves.

For marinara, makes about 14 cups: 

  1. In a large pot over medium-high heat, add cans of San Marzano tomatoes, with their juice. Bring to a boil. 

  2. Add 1 1/4 cups of garlic confit and oil from skillet into the tomatoes and stir. 

  3. Add one cup of mushroom stock and half of the pureed mushrooms. Blend with an immersion blender until smooth, add onion, and mix. Allow to simmer and reduce on low heat for two hours. 

  4. Taste for salt and pepper and add accordingly. Add basil bundle, tomato paste, and oregano, stir together. 

  5. Continue to simmer for about 30 more minutes, check for seasoning, and add to taste. 

  6. Take out the basil bundle and if not using immediately, freeze or refrigerate. 

If using immediately:

  1. Bring a large pot of salted water to a boil. 

  2. Add your desired pasta and cook until al dente. 

  3. Reserve 1/2 cup of pasta water and drain pasta. 

  4. Toss pasta with 2 cups of sauce and add a splash of pasta water and a handful of parmesan. Mix until pasta is thoroughly coated and glossy. Add freshly grated parmesan and toss once more, add more on top for good measure! Serve immediately—with more parm if you please and some fresh cut basil! Dig in!

Andrew_Marinara_Upclose.jpg
In Dinner Tags pasta, dinner, marinara, italian, Andrew, basil, meatballs
Comment

Say "Pesto-Changeo" & you too can make Pesto!

September 17, 2020 Savannah Near
Pesto1.jpg

“Abracadabra!” “Alakazam!” No, honey, you don’t need a magic trick to make pesto! Put down your magic wand and save your witch hat for next month. Go look outside!

Is your basil trying to go to seed? Grab those leaves and let’s make some pesto! Seriously though, grab them sooner rather than later because when herbs or vegetables go to seed, they turn bitter. Why you ask? Oh, it is this cool thing that the plant is trying to pass on its genetics, by turning bitter. This adaption keeps animals in the wild from eating them. Thus, their genetics are passed on. Enough about biology—back to Genovese Basil, which is the type that is best suited for pesto!

Okay, wait, one more biology lesson, or it could be considered horticultural. Either way, do you know how many types of basil there are? 21!! I had no idea either! Each has its own distinct flavor profile, so many of the variations cannot be used interchangeably. For pesto making, it’s Genovese Basil, which looks very similar to Sweet Basil-- probably the variation you are most familiar with. My basil grows like a weed in the summer so that means by late summer, it is starting to go to seed. Lucky for me I make a giant batch of pesto to enjoy well into fall. I divide the batch into a few vacuum-sealed bags and freeze them for quick and easy meals! I snuck a few extra greens into this recipe. Spinach for some extra vitamins and minerals and arugula to help give a lovely, peppery bite to the pesto. I love this pesto recipe so much and hope you will too!

Ingredients:

  • 3 cups basil leaves

  • 1 cup spinach

  • 1/2 cup arugula

  • 3 large garlic cloves

  • 2 cups shredded parmesan

  • 1/2 teaspoon kosher salt

  • 2 tablespoons lemon juice

  • 1/4 cup olive oil

  • 1 pound of cooked and drained pasta

    • Reserve 1/2 cup of pasta water before you drain the pasta

Method:

  1. In a food processor, add in all of the ingredients, except the olive oil, and pulse until paste-like.

  2. With the processor on, slowly stream in olive oil until pesto is smooth and homogenous. Taste for seasoning and adjust as needed.

  3. Scoop into a large bowl, cover, and set to the side if using immediately. Set in the refrigerator, if not using immediately. A note on flavor development—There are two factors when it comes to building flavor: time and temperature. Like a middle school grade dance, these flavors are standing on opposite sides of the room. As there is no alcohol in this recipe, time is going to be our ice breaker, and let’s give these flavors a chance to get to know each other. If covered and in the fridge, the pesto will keep for 5 days.

    Tip: To keep the top of the pesto from drying out, once in its container, add a drizzle of olive oil to the top, cover, and then, place in the refrigerator.

  4. If using immediately, move on to step 5!

  5. Bring a large of heavily salted water to a rolling boil.

  6. Add pasta and cook until al dente. Scoop out 1/2 cup of pasta water and set it to the side.

  7. Drain pasta and put back into the pot. Add pesto and stir it together. If pesto is not spreading easily, add a few drops of pasta water until pasta is covered in pesto!

  8. Plate and add a little extra parm on the top!

You’ll notice that there are no pine nuts in this recipe. Nuts are hit or miss with me. It seems that everything but almonds causes an adverse reaction for me, so I steer clear of 99% of nuts. If you are missing them in this recipe, simply toast about 1/4 of a cup of pine nuts on the stove, until you can smell them, add them to the food processor, and proceed with step 1.

Pesto2.jpg
In Dinner, Healthy Tags pesto, basil, summer, herbs, easy, dinner, parm, italian
Comment

Summer Salmon with Mango Salsa and Cauliflower Rice

August 20, 2020 Savannah Near
MangoSalmon.jpg

I could write a few things about this dish, but I think its most winning endorsement would be this: Last Friday I offered to order pizza for dinner from our favorite spot, my husband considered the option and then asked me if we could have this instead. Yes, you heard that right. This dish trumped the glorious soppressata and sausage pizza from Olivella’s. Bonus points for this dish because you can snack on the salsa while you finish the rest of it!

Serves 2-4 depending on the size of your salmon fillet. 

Ingredients:

  • For the salmon

    • 2, 8 oz or 4, 4 oz salmon fillets

    • 1/2 teaspoon kosher salt

    • 1/2 teaspoon paprika

    • 1/4 teaspoon cayenne (you can use more if you have the stomach for it—I do not!)

    • 2 teaspoons of lime zest

    • 1 tablespoon of olive or avocado oil

    • 1/2 of a lime for finishing out of the oven

  • For the salsa:

    • 1 peeled and diced mango, yielding 1 cup (Tip: Just like I advocate for when working with peaches, you have to squeeze the mango meat off the giant seed in the middle of the fruit! Once you have cut off all you can, place the seed in your hand and give it a good squeeze over a bowl. Using the fruit and the juice that comes out for the salsa!) 

    • 1 large avocado diced

    • 1 small red onion diced

    • 1 peeled and diced small grapefruit (I like to use Ruby Red!) yielding about 1 cup

    • 1/2 cup chopped cilantro

    • 1/8 cup (2 tablespoons) lime juice

    • 1/2 teaspoon kosher salt

    • Optional: 1 seeded and chopped jalapeno

  • For the cauliflower rice:

    • 10 oz riced cauliflower (if yours is in in the 16oz size, no problem just double the following ingredients!)

    • 1 tablespoon avocado oil

    • 1/8 cup lime juice

    • 1/3 cup chopped cilantro 

Method:

  1. Let’s start with our salsa so it can marinate in the fridge while we prepare the rest or you can have a ready made side snack!

  2. Combine all of the salsa ingredients into a bowl and mix them together. Taste for additional salt or lime juice. Cover and place in the fridge. Or grab the tortilla chips, you know what to do!

  3. Preheat oven to 400 degrees. 

  4. Mix salmon seasoning together and pat salmon filets dry.

  5. Place fish on a foil-lined baking sheet, drizzle oil on top of the fish, and divide seasoning evenly between the fillets and sprinkle on top.

  6. Bake for 12-15 minutes. For well-done salmon, cook until the center reaches 145 degrees and for medium salmon cook until it registers 125 degrees. Smaller fillets will cook faster so, check them more often!

  7. While the salmon cooks, time to start on your cauliflower rice. In a skillet on medium heat, add your oil and then your cauliflower rice and toss. Cover with a lid so the cauliflower can steam, checking it every couple minutes and stirring. Once cauliflower rice is tender (the time will vary based on if yours is frozen or fresh), add lime juice and cilantro. Take off heat immediately and cover with a lid so it will not dry out. If your cauliflower is frozen and calls to be steamed in the microwave—you can do that! Once out of the microwave and ready to open, pour the cauliflower into a bowl with the lime and cilantro and cover so you can trap the steam and help the flavors intensify. Remember: time + temperature = flavor.

  8. Once salmon is cooked through, drizzle the filets with the juice of half a lime and get ready to serve. 

  9. Lay down the cauliflower rice at the bottom of the plate/bowl, add salmon filet on top, and then add salsa. Garnish with cilantro and a lime wedge or two! 

  10. Enjoy!

In Dinner Tags healthy, salmon, mango salsa, dinner, healthy dinner, fish
Comment

Crispy Salmon

May 20, 2020 Savannah Near
CrispySalmon2.jpeg

Need a 30 minute dinner that tastes like it took 3x longer? Look no further! This salmon dinner and roast chicken have been my saving graces during these weeks at home. I deeply appreciate recipes that are greater than the sum of their parts and require little to no fuss. This recipe checks both of those boxes for me. And if that doesn’t inspire you to give it a try, maybe this will: I love salmon—I could eat it everyday—my husband, on the other hand, was not its biggest fan saying that it was too fishy. Now, he asks for this recipe once a week. See also: Hook, line, and sink(him!).

Serves 2-4 depending on the size of your salmon fillet.

Ingredients:

  • 2, 8oz salmon fillets or 4, 4oz fillets

  • For the paste:

    • 1 heaping tablespoon of mayonnaise

    • 1 tablespoon Sriracha

    • 1 tablespoon Dijon mustard

    • 1 tablespoon lemon juice

    • 1/2 teaspoon onion powder

    • 1/2 teaspoon garlic powder

    • 1/4 teaspoon kosher salt

  • For the breadcrumbs:

    • 1/2 cup of Panko breadcrumbs

    • 1/2 teaspoon onion powder

    • 1/2 teaspoon garlic powder

    • 1/4 teaspoon kosher salt

    • 1/2 teaspoon of pepper

    • 1 teaspoon lemon zest

    • dash of paprika

Method:

  1. Preheat oven to 400 degrees.

  2. Mix together ingredients for paste and refrigerate for 10-15 minutes to thicken.

  3. In a small bowl, add in ingredients for breadcrumb mixture and combine until evenly distributed.

  4. Over medium heat, add a drizzle of olive oil (or a spray of avocado oil) to coat the bottom of a pan. Pour in your breadcrumbs, toss with oil, and toast until lightly golden. Remove from heat and put back into the bowl, or they will keep browning.

  5. Place your salmon on a foil-lined sheet (This will help clean up if there is spillage from the paste and the skin will stick to it so you can easily use a spatula to separate the meat from the skin once it is done cooking!). If you’re into fish skin, make sure you grease the skin and the foil before putting them down.

  6. Pat the salmon dry with a paper towel—this will help the paste stick. Add a pinch of salt to each piece of fish.

  7. Divide paste between your salmon pieces and coat each piece.

  8. Add your toasted breadcrumbs on top to each piece. **Tip: I use an avocado oil spray when I cook so I add a spritz to the top of my breadcrumbs to help them crisp up a bit more in the oven before I put my salmon in the oven.

  9. Bake for 12-15 minutes. For well done salmon, cook until the center reaches 145 degrees and for medium salmon cook until it registers 125 degrees. Smaller fillets will cook faster so check them more often!

  10. Take out of the oven and serve immediately! You can add an extra squeeze of lemon on top!

Salmon1.jpeg Salmon2.jpeg Salmon3.jpeg Salmon4.jpeg
In Dinner Tags salmon, dinner, lemon, 30 minute dinner, healthy
Comment

Rigatoni alla Vodka

January 13, 2020 Savannah Near
TV11.jpg

According to surveys, January 17th is the day that most throw in the towel on their New Year’s resolutions. This is not that surprising as it takes 28 days to form a habit. So you may or may not be eating carbs now, but within a few days you might feel the need for pasta in your life. When that time comes, I want you to be prepared. Enter: rigatoni alla vodka. Yes, it is decadent and creamy and fatty. Is it a once a week meal? Probably not. Once a month? You bet your bottom dollar. Why? Because I truly believe life is too short to avoid carbs and cream.

Perhaps my epitaph will read:

Here lies Savannah,

She loved Blue and White china,

and never said no to carbs and cream…

You could be remembered for worse things, am I right?

Ingredients:

  • 1/2 lb. of hot Italian sausage

  • 1/2 lb. of ground beef

  • 1 small onion

  • 3 garlic cloves

  • 8 oz. Parmesan cheese

  • 2 Tbsp. extra-virgin olive oil

  • 1 4.5-oz. tube double-concentrated tomato paste

  • 1/4 tsp. crushed red pepper flakes

  • 3 oz. vodka

  • ¾ cup heavy cream

  • 1 lb. rigatoni (I used the shorter version, mezzo rigatoni, as the smaller size incorporates a bit easier!)

  • basil leaves for garnishing

  • salt and pepper to taste

Method:

  1. Fill a stock pot or other large pot three-quarters full with water, over high heat. Bring to a boil, add a heavy pinch of salt once boiling. Tip: When needing to bring water to a boil more quickly, fill the pot with hot water out of the facet. It’ll help bring to a boil faster, as the starting temperature closer to the boiling point!

  2. Peel and finely chop 1 onion.

  3. Peel 3 cloves of garlic and grate with a microplane.

  4. Grate 8 oz. Parmesan on the smallest holes of the box grater. Tip: Anytime you’re making a sauce with cheese, it is important to grate your own. Pre-shredded or grated cheese is coated with cellulose so that it will not stick together in a container, as it blocks the absorption of moisture. Therefore when added to a sauce, it will not come together as easily as cheese grated by y-o-u!

  5. In a large pot, add the beef and sausage on medium heat and cook until browned. Add a pinch of salt while cooking. Once cooked through, place cooked meat on a paper towel lined plate to drain. Tip: When building a sauce or soup, or really anything, it is important that you are tasting and seasoning at every step! You are literally building layers of flavor!

  6. In the large pot you browned the meat in, heat 2 tbsp. oil. Add onion and garlic and cook, stirring constantly, just until onion is starting to brown around the edges, about 5–7 minutes.

  7. Add 1 lb. rigatoni to pot of boiling salted water and cook according to package instructions until al dente. Tip: I chose a ridged pasta with texture to help the sauce cling to it, as opposed to a smooth pasta.

  8. Back to the onion and garlic, add entire 4.5-oz. tube tomato paste and ½ tsp. red pepper flakes and stir until paste evenly coats onion/garlic mixture. Continue to cook, stirring often, until paste is deep red (think brick red!) and starting to brown on bottom of pot, 5–7 minutes.

  9. Add 3 oz. vodka to deglaze pan and stir to incorporate, scraping bottom of pot. Reduce heat to low.

  10. Using a glass measuring cup, scoop about ¼ cup boiling water from pasta pot, then add ¾ cup heavy cream to measuring cup Tip: You’re tempering the cream so it won’t curdle.

  11. Slowly add warmed cream to tomato mixture, stirring constantly, until a smooth sauce forms.

  12. Add 1/2 of the parmesan and stir to combine, and then add meat to the sauce.

  13. Using a spider, transfer rigatoni to sauce. Some water will hang on to the pasta when transferring over! That is okay—the starch in the water helps build the sauce!

  14. Add in the last half of Parmesan, stirring constantly to melt cheese. Season with salt and pepper to taste and feel free to keep a pinch of Parmesan to the side for garnishing, if so desired!

  15. Serve immediately and top with remaining cheese, dividing evenly, and tear basil and garnish.

  16. Enjoy!

A step-by-step photo guide is below!

TV_1.jpeg TV2.jpeg TV3.jpeg TV4.jpeg TV5.jpeg TV6.jpeg TV7.jpeg TV8.jpeg TV9.jpeg TV10.jpeg TV11.jpg TV12.jpeg
In Dinner Tags pasta, rigatoni alla vodka, dinner, sauce
Comment

Sausage Casserole

December 9, 2019 Savannah Near
SC1.jpeg

Lordy, Lordy what a whirlwind these past two weeks has been. November 28th, we celebrated Thanksgiving with my and my husband’s families; November 30th, my niece decided to make a surprise appearance (mom and baby are happy and healthy!); and December 4th, I got hit with sickness that seems to visit me the first week of December every year. This year, bronchitis has decided to visit—lucky me! December 7th, marked my first Christmas Coffee for my garden club and I had to make a Balinese-inspired Christmas decoration, and December 8th, my sorority’s alumnae group had their big holiday tea (I sadly missed as I was coughing up a lung). Revisiting all of these things just makes me want to lie down and take a big nap. Needless to say, the past two weeks haven’t lent themselves to cooking, baking, or recipe development. But a girl’s gotta eat (and feed her husband too!) so I have been sticking to the basics in order to get the job done. Preferably things that I can make ahead when I have time, freeze, and then bake when I need it (thank you, my dear, sausage casserole). This recipe has seen the inside of mine, my grandmother’s, mother’s, and sister’s kitchens—I think that makes it a tried and true classic, in addition to being a real crowd-pleaser. Bonus points because it only requires about 15 minutes of real, hands on work!

Ingredients:

  • 1 lb. ground pork sausage (can use “hot” if you want an extra kick

  • 3 stalks of celery, cut into quarters

  • 1 white onion, quartered

  • 2 green bell peppers, quartered

  • 1 can of cream mushroom soup (10.75 oz size)

  • 1 can chicken noodle soup (10.75 oz size)

  • 1 cup of white rice (not instant)

  • 1 cup of water

Method:

  1. Preheat oven to 350 degrees.

  2. In a food processor, combine quartered green bell pepper, onion, and celery. Pulse until broken down into paste-like consistency. Picture below for reference.

  3. In a skillet on medium-high heat, brown sausage until it is no longer pink.

  4. Add in pulsed vegetable mixture, and cook until water has evaporated, and it is heated through. About 5 minutes. Take off heat.

  5. In a large baking dish (this recipe used a 9x13), add in sausage and vegetable mixture. Then add soups, rice, and water.

  6. Mix together until evenly distributed.

  7. Cover with foil and bake for 50-60 minutes, or until bubbling.

  8. Take foil off and let brown for 15 minutes, or until casserole develops a crust.

    Family serving secret: every single man in my family eats this topped with a healthy serving with Newman’s Thousand Island Dressing

Click through the pictures below to see the recipe in action!

SC1.jpeg SC2.jpeg SC3.jpeg SC4.jpeg SC5.jpeg SC6.jpeg SC7.jpeg SC8.jpeg SC9.jpeg
In Dinner Tags sausage, casserole, dinner
Comment

Sweet Potato Soup

October 20, 2019 Savannah Near
SP-Soup.jpeg

It seems that the color orange is my favorite food group during the month of October. From pumpkin spiced everything to sweet potatoes, it feels like my plate wants all in on the fall flavors and colors. One of my favorite things that falls into the orange food group is this brightly-colored soup. When I was in college at Baylor, one of my favorite places to take a break from campus was a small community just north of Waco, called Homestead Heritage.

It belongs an agrarian-based, Christian community that makes all of their own clothes, furniture, grow their own food, even has their own blacksmiths and kiln. In fact, if you have ever been to Rise No. One in Dallas, if you turn their pottery over, you will see that their pieces are stamped Homestead Heritage. One of the coolest parts of the community (besides the most gorgeous, handmade coffee tables with turquoise inlays!) was the restaurant onsite, and often had a 30+ minute wait on the weekends. Don’t worry you can peruse the stores across the way and walk the property while you wait for your table. Everything in the restaurant is homemade in the kitchen, and more often than not, grown on and supplied from the farm on site. While everything on the menu delicious, homemade, and fresh, their sweet potato soup is out of this world! Literally liquid gold. When my husband, then boyfriend, would fly down to visit me he would often request a visit to the Homestead so that he could order this soup. Once we got married, I knew it was a recipe I needed in my arsenal, so this is my interpretation of the Homestead’s glorious, liquid gold, Sweet Potato Soup.

Ingredients:

  • 1 large onion, chopped

  • 3 large cloves of garlic, smashed

  • 5 large sweet potatoes, peeled and chopped

  • 2 tbsp of butter

  • 1 tbsp of oil

  • 2 quarts of chicken broth

  • 1 tbsp kosher salt

  • 3/4 cup of heavy cream (optional)

  • 2 tsp fresh cracked pepper

  • 2 tbsp ground cumin

  • 2 tsp chili powder

  • 6 slices of bacon (this recipe used Pederson’s), chopped

  • 1 handful of cilantro, chopped

  • A dollop of sour cream or Greek yogurt

  • 2 tsp turmeric (optional)

Method:

Serves 6 for dinner, 8-10 as an appetizer

  1. Set the oven to 415 degrees and place 6 slices of bacon on a baking sheet. Cook bacon for 15-20 minutes, or until cooked through.

  2. In a large pot, melt the butter or spray pot with enough oil to coat the bottom of the pot (about 1 tbs of oil) I used avocado oil.

  3. Once oil/butter is heated, add smashed garlic and cook until fragrant. Add onions and cook until translucent, adding a pinch of salt to draw out their water. Cook about 5-7 minutes.

  4. Add sweet potatoes and broth. Stir, cover, and bring to a boil.

  5. Once boiling, reduce to a simmer. Simmer until potatoes are fork tender.

  6. When potatoes are done, blend with an immersion blender until smooth consistency is reached. (Hence why you can be lazy and not mince the garlic!)

  7. Add in salt, pepper, cumin, chili powder, and, if so desired, cream and turmeric. Simmer for 15-20 minutes more. Taste, add more seasoning, salt, and pepper, if needed.

  8. Chop bacon and cilantro for garnishing.

  9. Serve immediately, topping with bacon, cilantro and sour cream/yogurt.

  10. Enjoy!

SP_Soup1.jpeg
In Dinner Tags sweet potatoes, fall, dinner, soup
4 Comments

Let’s be social. FOLLOW along at @savannahmakes

...lasagna with pesto and hot Italian sausage! 🇮🇹 Like Garfield, I too love lasagna. But unlike Garfield, I decided to throw mine a graduation party a let it get a little more sophisticated and grown-up! Recipe is now up on SavannahMakes.com and li Just a few bites of Texas sheet cake to celebrate my beloved state’s independence day! Happy Texas Independence Day, y’all! Recipe for the sheet cake is already on SavannahMakes.com! ⭐️ #rememberthealamo #remembersanjacinto #remembertoeat Sending you all the 💗❤️💜 from my kitchen to yours! #happyvalentinesday #biscuitlove The weather forecast for Dallas this week is: 🌧🌧🌧🌧 so I’m cozying up with plenty of soup. Starting with this one—beef vegetable! Hearty with plenty of colorful veggies, I’m pretty sure this soup accounted for 85% of my vegetable I hope your new year is off to a sweet start! Recipes are like relationships, when you don’t see one for awhile, you start to miss it. While I made lots of candy this Christmas, I didn’t make my cinni-minis at all! Making a batch of these Sending you the merriest wishes from me and my pink, peppermint clouds of divinity for a safe and happy Christmas! Merry, merry!! 💕 This recipe is now up on SavannahMakes.com and linked in my bio! 😘 #divinitycandy #christmascandy #peppermint ‘Tis the season for Christmas candy!  Give your sweet and salt tooth a gift, peanut 🥜 brittle! Sharing my family’s favorite recipe today on SavannahMakes.com and in the link in my profile! 🎄 #christmascandy #peanutbrittle Happy Friday to my fellow cookie monsters! Sending you a (virtual!) treat to start your weekend. My recipe for the ultimate chocolate chip cookie is up and it’s like a hug in your hand! 💕 Go to SavannahMakes.com or the link in my bio to bite i Sunday and baking goes together like biscuits and gravy!! My new (& improved) biscuit recipe is up with bonus recipe of sausage gravy!Beware: people (hungry husbands) will not be able to keep their hands off of them! Head over to SavannahMakes.co With @chiomegaxmas coming to a close this weekend, planning a very cozy and restful weekend for myself, with a big bowl of potato soup with allllll the fixings! Co-chairing a (virtual) Christmas market has been no joke and luckily, this soup is a cin Cookies, brownies, and ice cream pie (oh my!) Sending some virtual sweetness from me to you! ❤️💙 #election2020 Happy Halloween! No tricks here, just a treat! Remember that boxed cake experiment I did in the kitchen last week? Well this is the result—Gluten Free Spiced Bundt Cake with Cranberries and Orange Glaze!

I took a box of @simplemills vanilla, a I realized today and I hadn’t made these pumpkin spiced oatmeal chocolate chip cookies once this fall and they just went straight to the top of my weekend’s to do list! Because who doesn’t want a cookie that feels like a warm hug? 
Ending the week on a sweet note and giving our girl pumpkin pie a much deserved makeover in anticipation for all of her upcoming dinners. 💄 😜 Meet my Pumpkin Pie Chiffon Bars with a Biscoff cookie crust! If you like a crunchy pie crust and a cloud- Finally sat down and typed out the recipe for this ✨magical✨ marinara sauce my husband 🧔🏻 created! After the first bite, I immediately got up, found a pen and a piece of paper, and said he had to write down the recipe! This sauce is like a hug in a 🙌🏻Protein Power Balls with Almond Butter and Dark Chocolate🙌🏻 If you need a healthy snack that tastes like cookie dough, look no further! Recipe is below 👇🏻and on SavannahMakes.com 💙

 Ingredients:

1 1/4 cups oats

1 cup almond butter

1/2 cu
Instagram

All photography is my own, unless noted.